> ## Documentation Index
> Fetch the complete documentation index at: https://docs.stably.ai/llms.txt
> Use this file to discover all available pages before exploring further.
# Auth with Google
> Authenticate with Google in your Playwright tests using the Stably SDK
## Background
You might want to authorize/login with Google in your tests, but doing so in your an automated web browser can have issues may be blocked by Google (as they might think this is bot traffic). This method exists to login in a way that won't trigger such a response by Google.
On rare occasions, Google may still prompt for a one-time passcode (OTP). You can handle this by generating a code from your `otpSecret`.
## `context.authWithGoogle(options)`
Signs in a Google test account and applies the authenticated session to the current browser context. After this resolves, subsequent pages in the context are fully authenticated — no need to drive the login UI manually.
```typescript theme={null}
import { test } from "@stablyai/playwright-test";
test("authenticated flow", async ({ context, page }) => {
await context.authWithGoogle({
email: "qa@example.com",
password: process.env.GOOGLE_TEST_PASSWORD!,
otpSecret: process.env.GOOGLE_TEST_OTP_SECRET!,
});
await page.goto("https://myaccount.google.com");
// context is now authenticated as qa@example.com
});
```
You can also use `authWithGoogle` stand-alone (pass your own `context`) if you import it directly:
```typescript theme={null}
import { authWithGoogle } from "@stablyai/playwright-test";
await authWithGoogle({ context, email, password, otpSecret });
```
### Options
Google account email address.
Google account password.
TOTP secret used to generate the Google 2FA code. This is the 32-character base32 secret Google shows when you click **Can't scan QR code** during authenticator setup. See [Setting up a Google test account](#setting-up-a-google-test-account) below for how to obtain this.
Force a cache refresh server-side. Use this if you need a fresh session.
Optional Stably API key override. Defaults to the configured API key.
Your credentials are sent to Stably's servers to perform the Google sign-in. The authenticated session is cached server-side for reuse across test runs.
***
## Setting up a Google test account
Before using `authWithGoogle`, you need a Google account with 2FA configured using an authenticator app. The key requirement is obtaining the **OTP secret** — the 32-character base32 string Google provides during authenticator setup.
More detailed instructions are below in [Detailed walkthrough](#detailed-walkthrough)
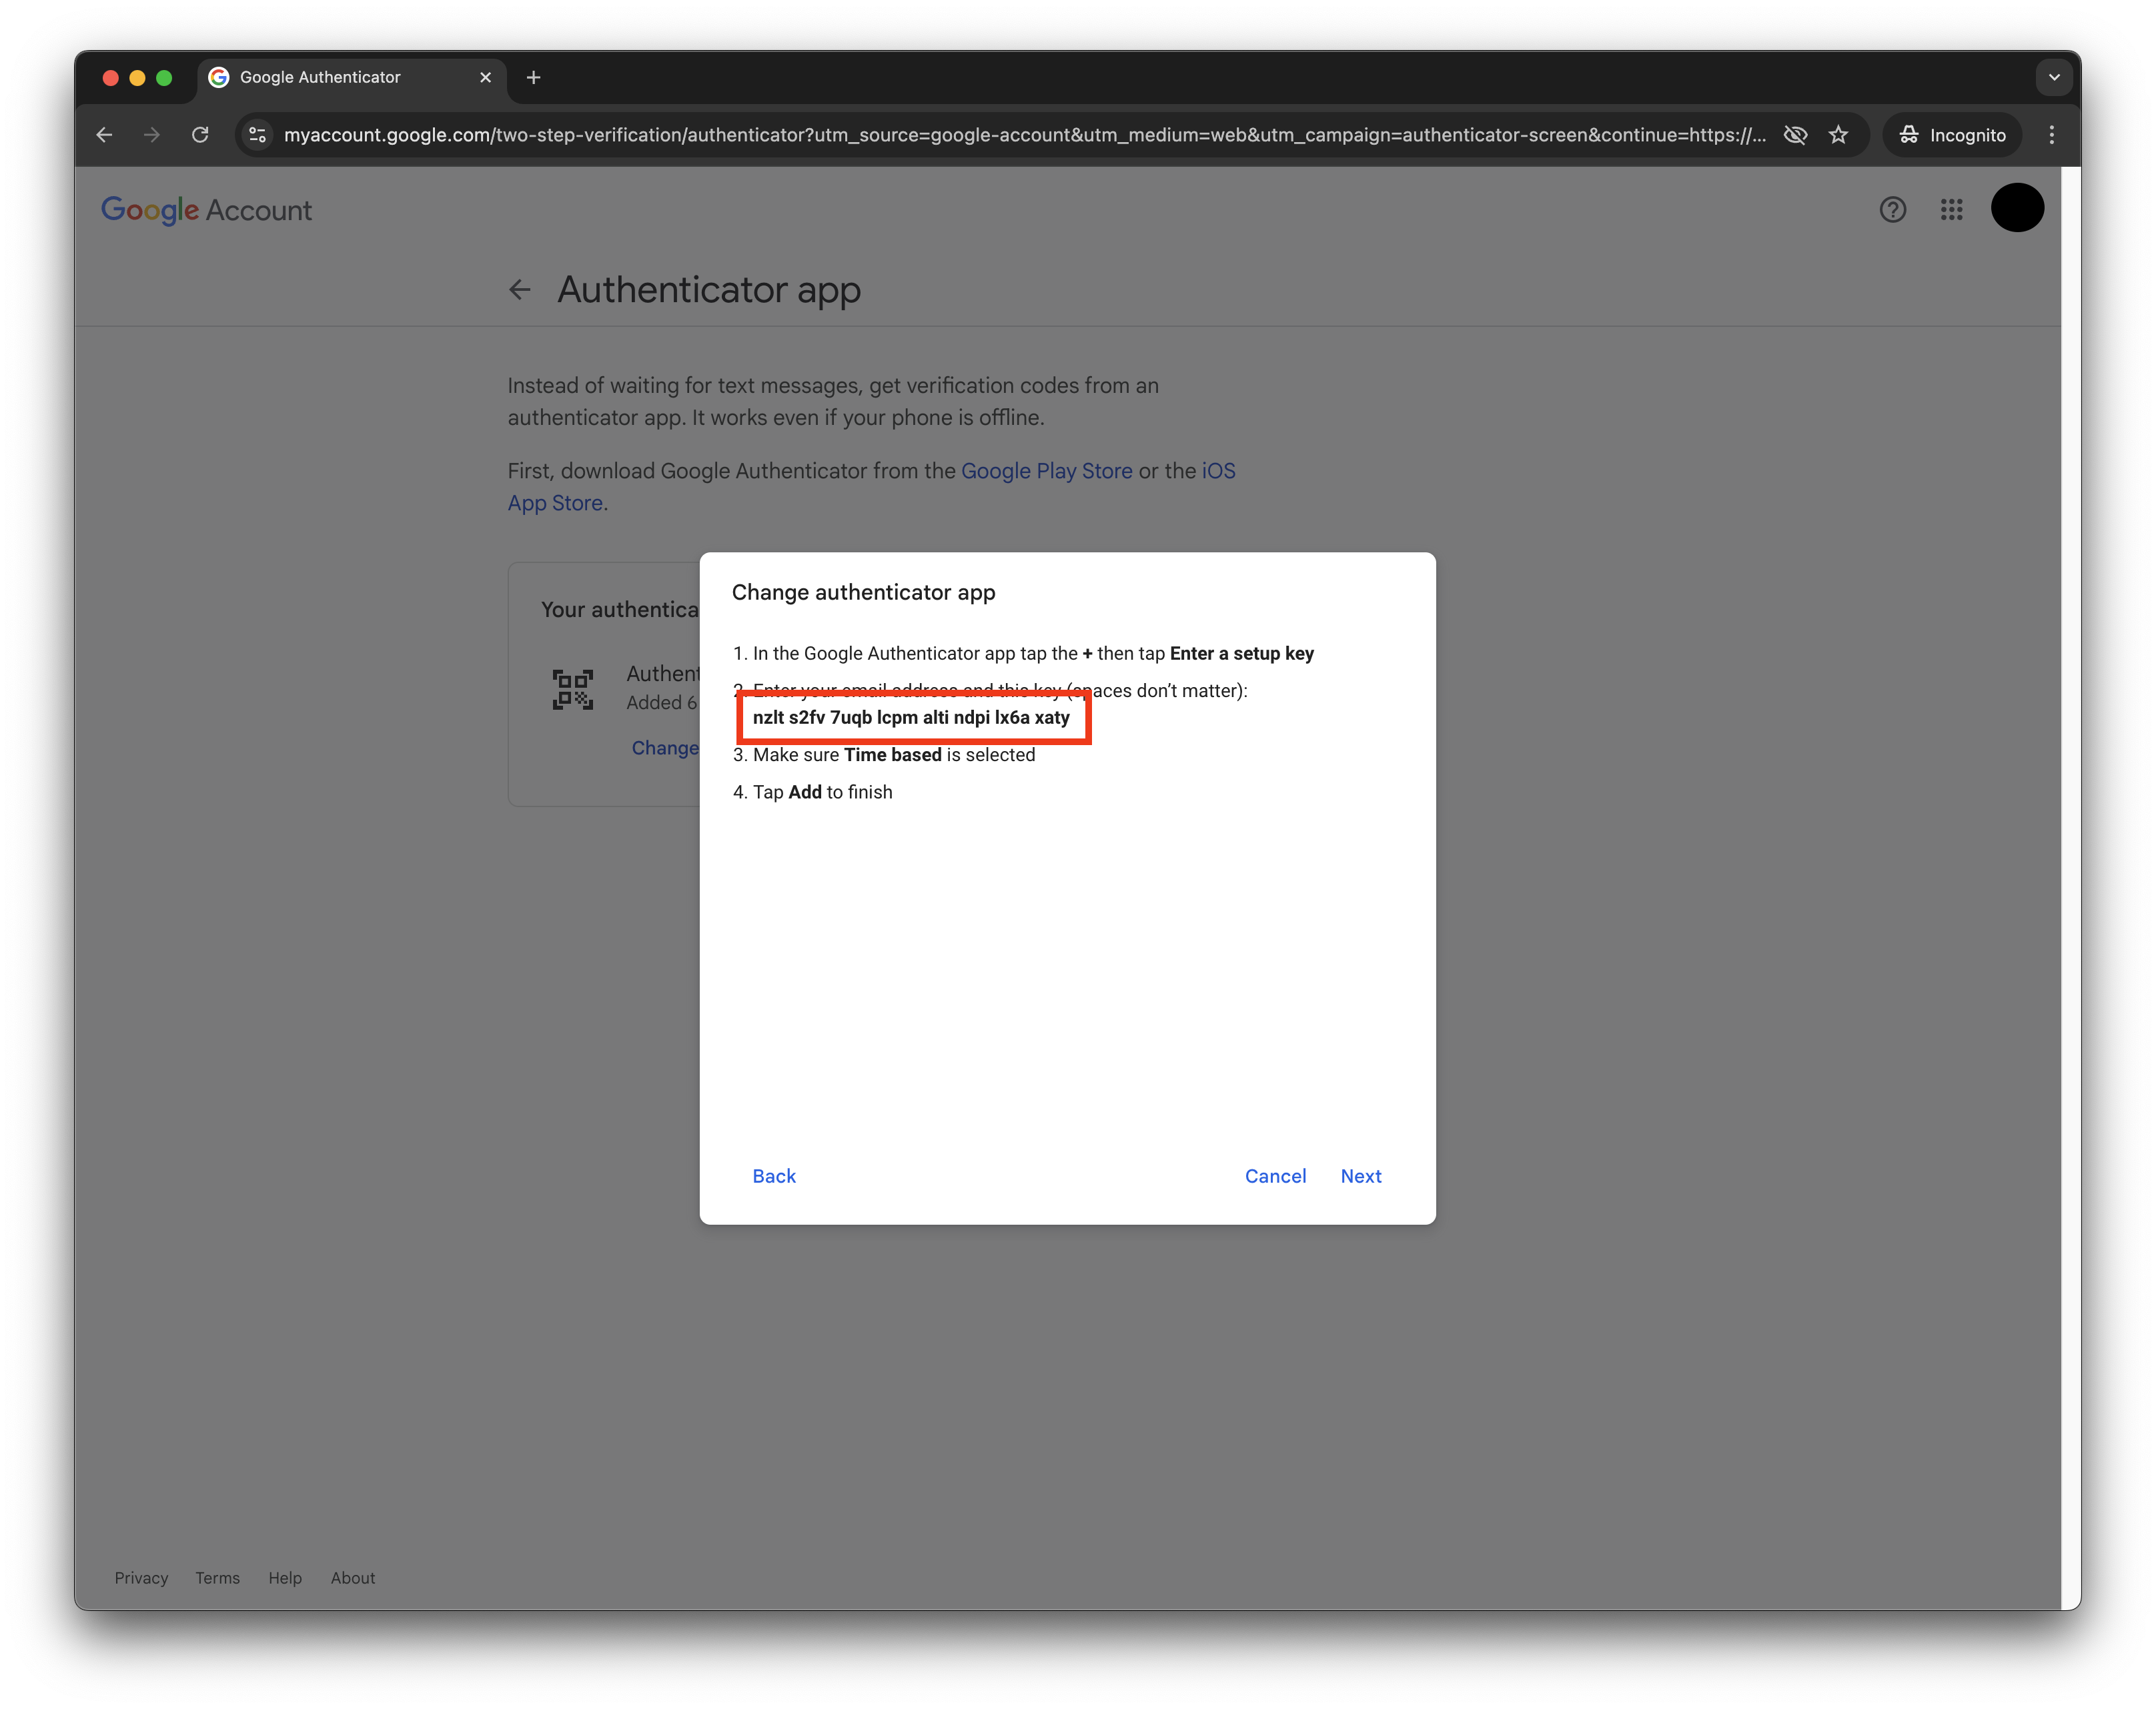
In Google account security settings, start authenticator setup and click **Can't scan QR code** to reveal the secret text.
Paste the secret into the [Stably OTP helper](https://app.stably.ai/utils/google-otp-secret) and copy the displayed 6-digit code.
Return to Google's verification screen, paste the 6-digit code, and complete setup.
Save the OTP secret as an environment variable (e.g. `GOOGLE_TEST_OTP_SECRET`) for use in your tests.
### Detailed walkthrough
Sign in to your test Google Workspace account at [accounts.google.com](http://accounts.google.com/).
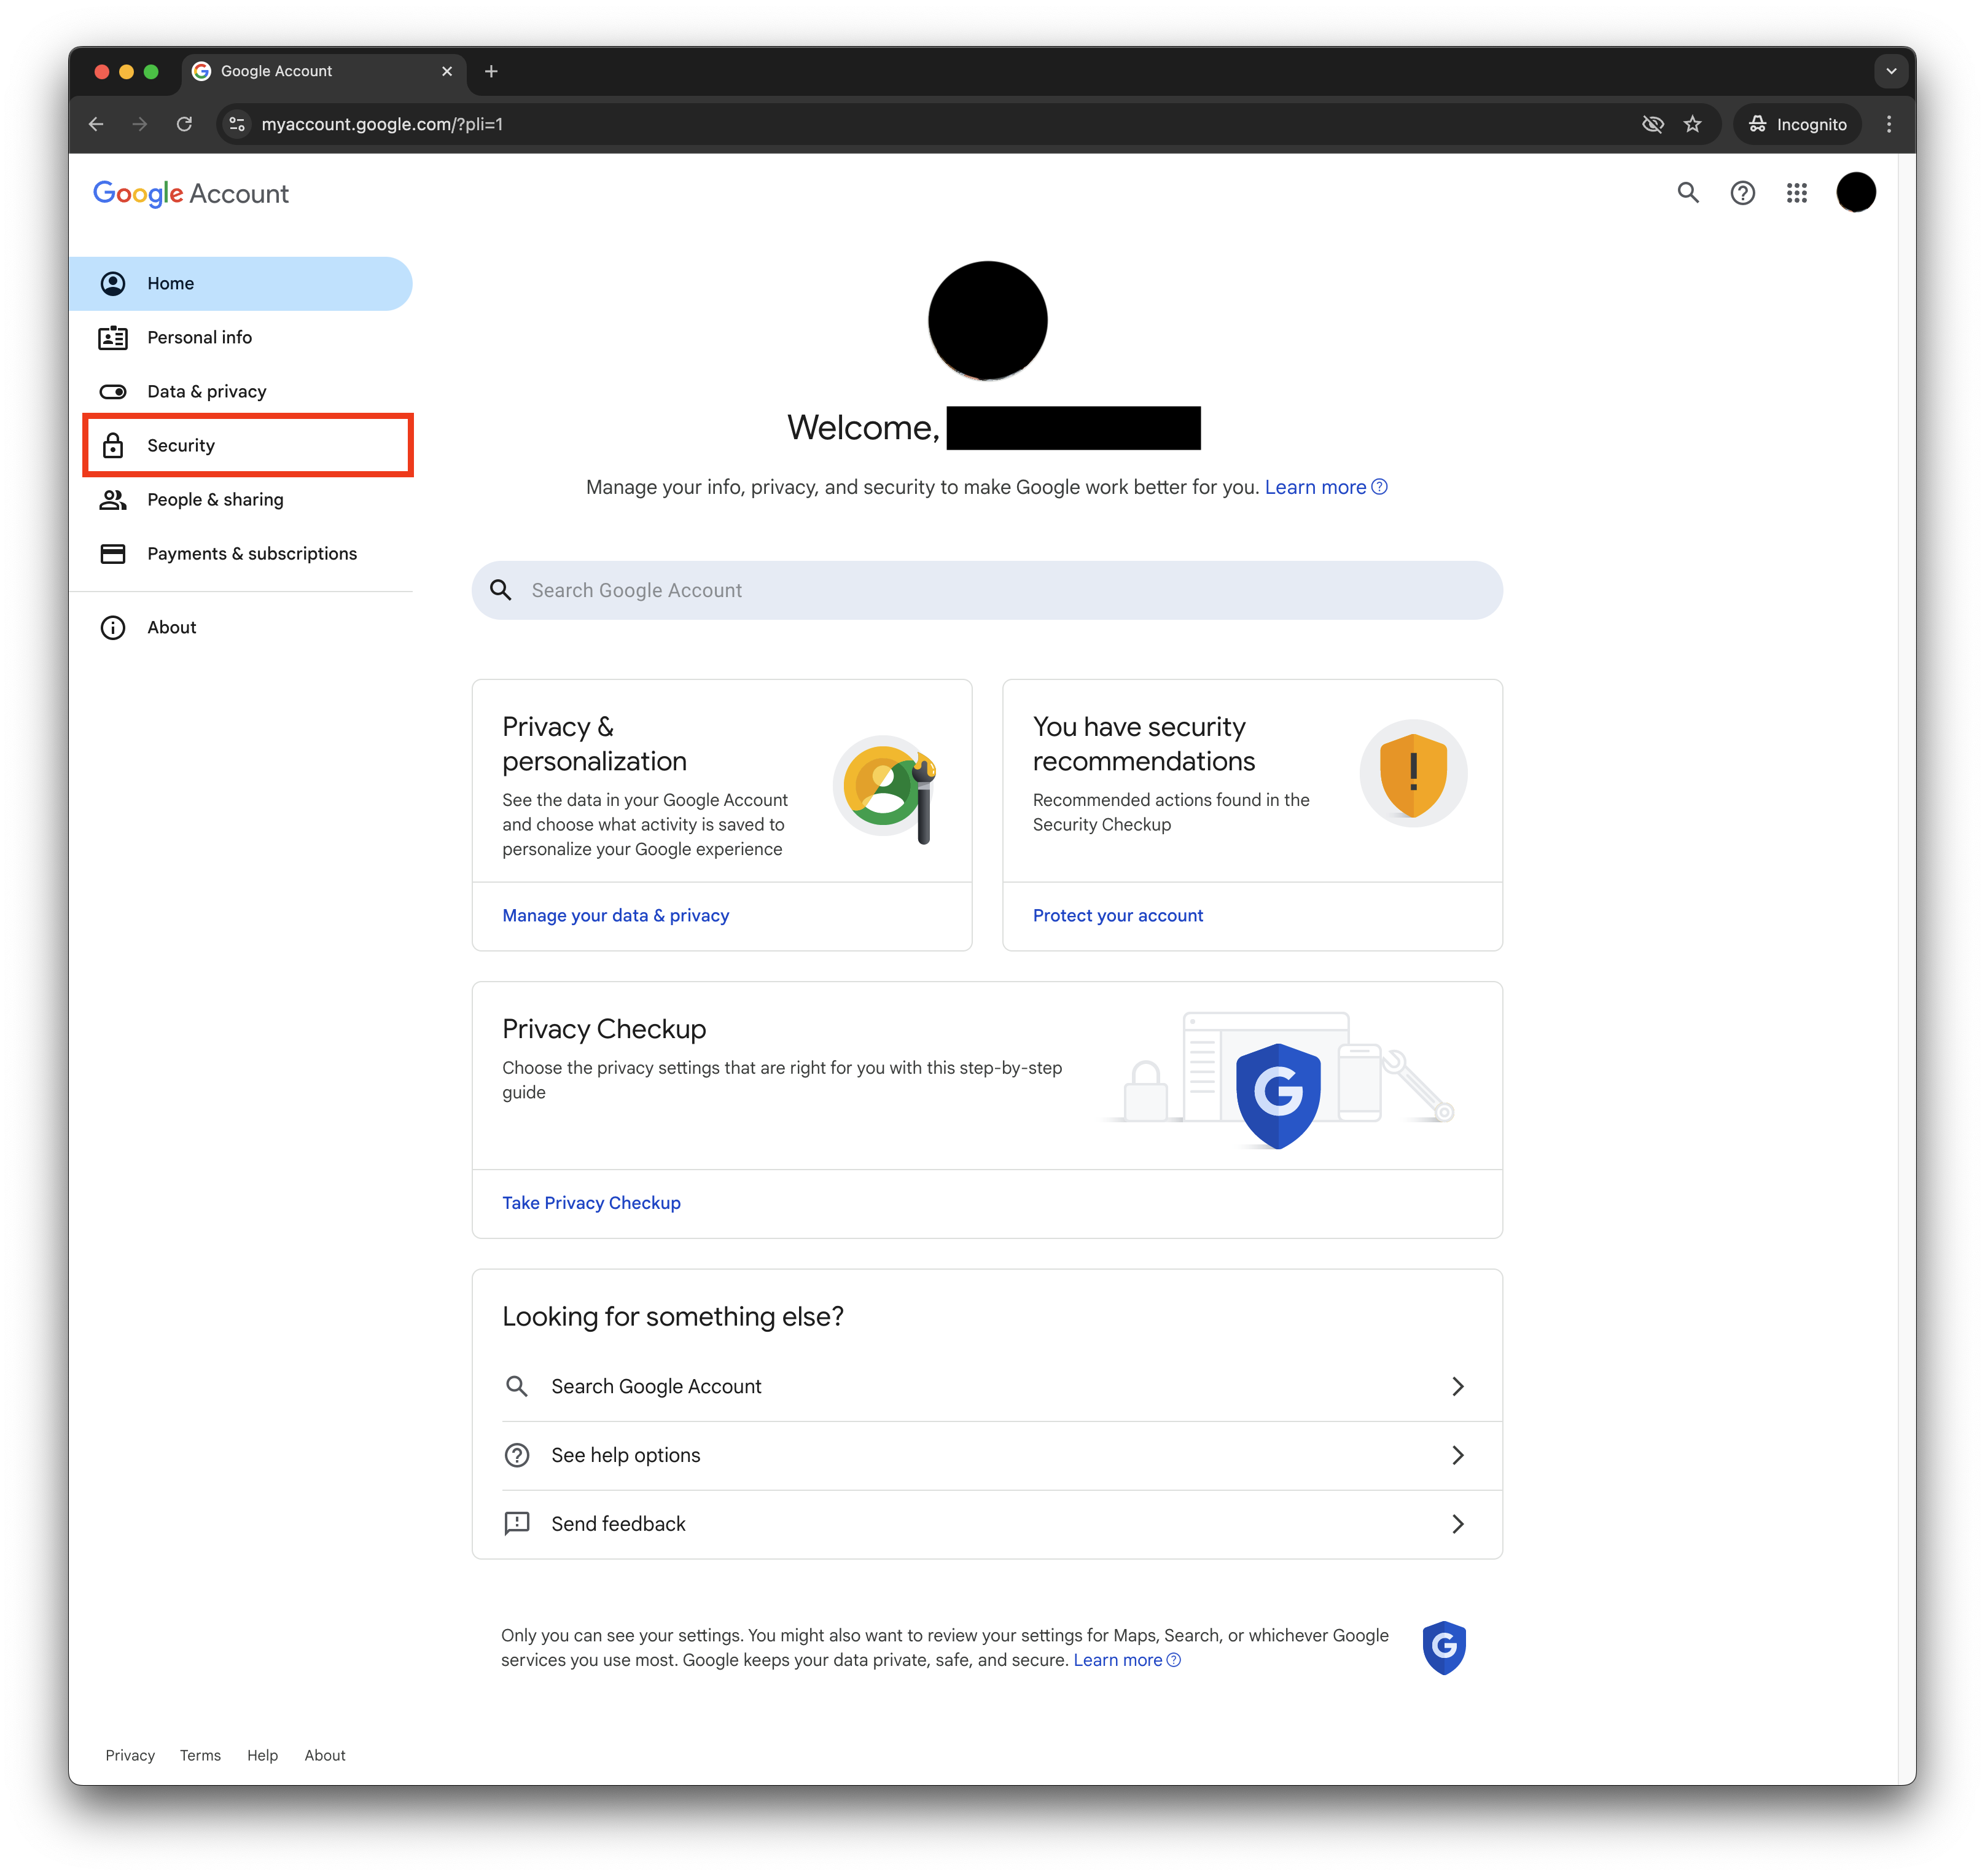
Select 'Security' from the left sidebar menu.
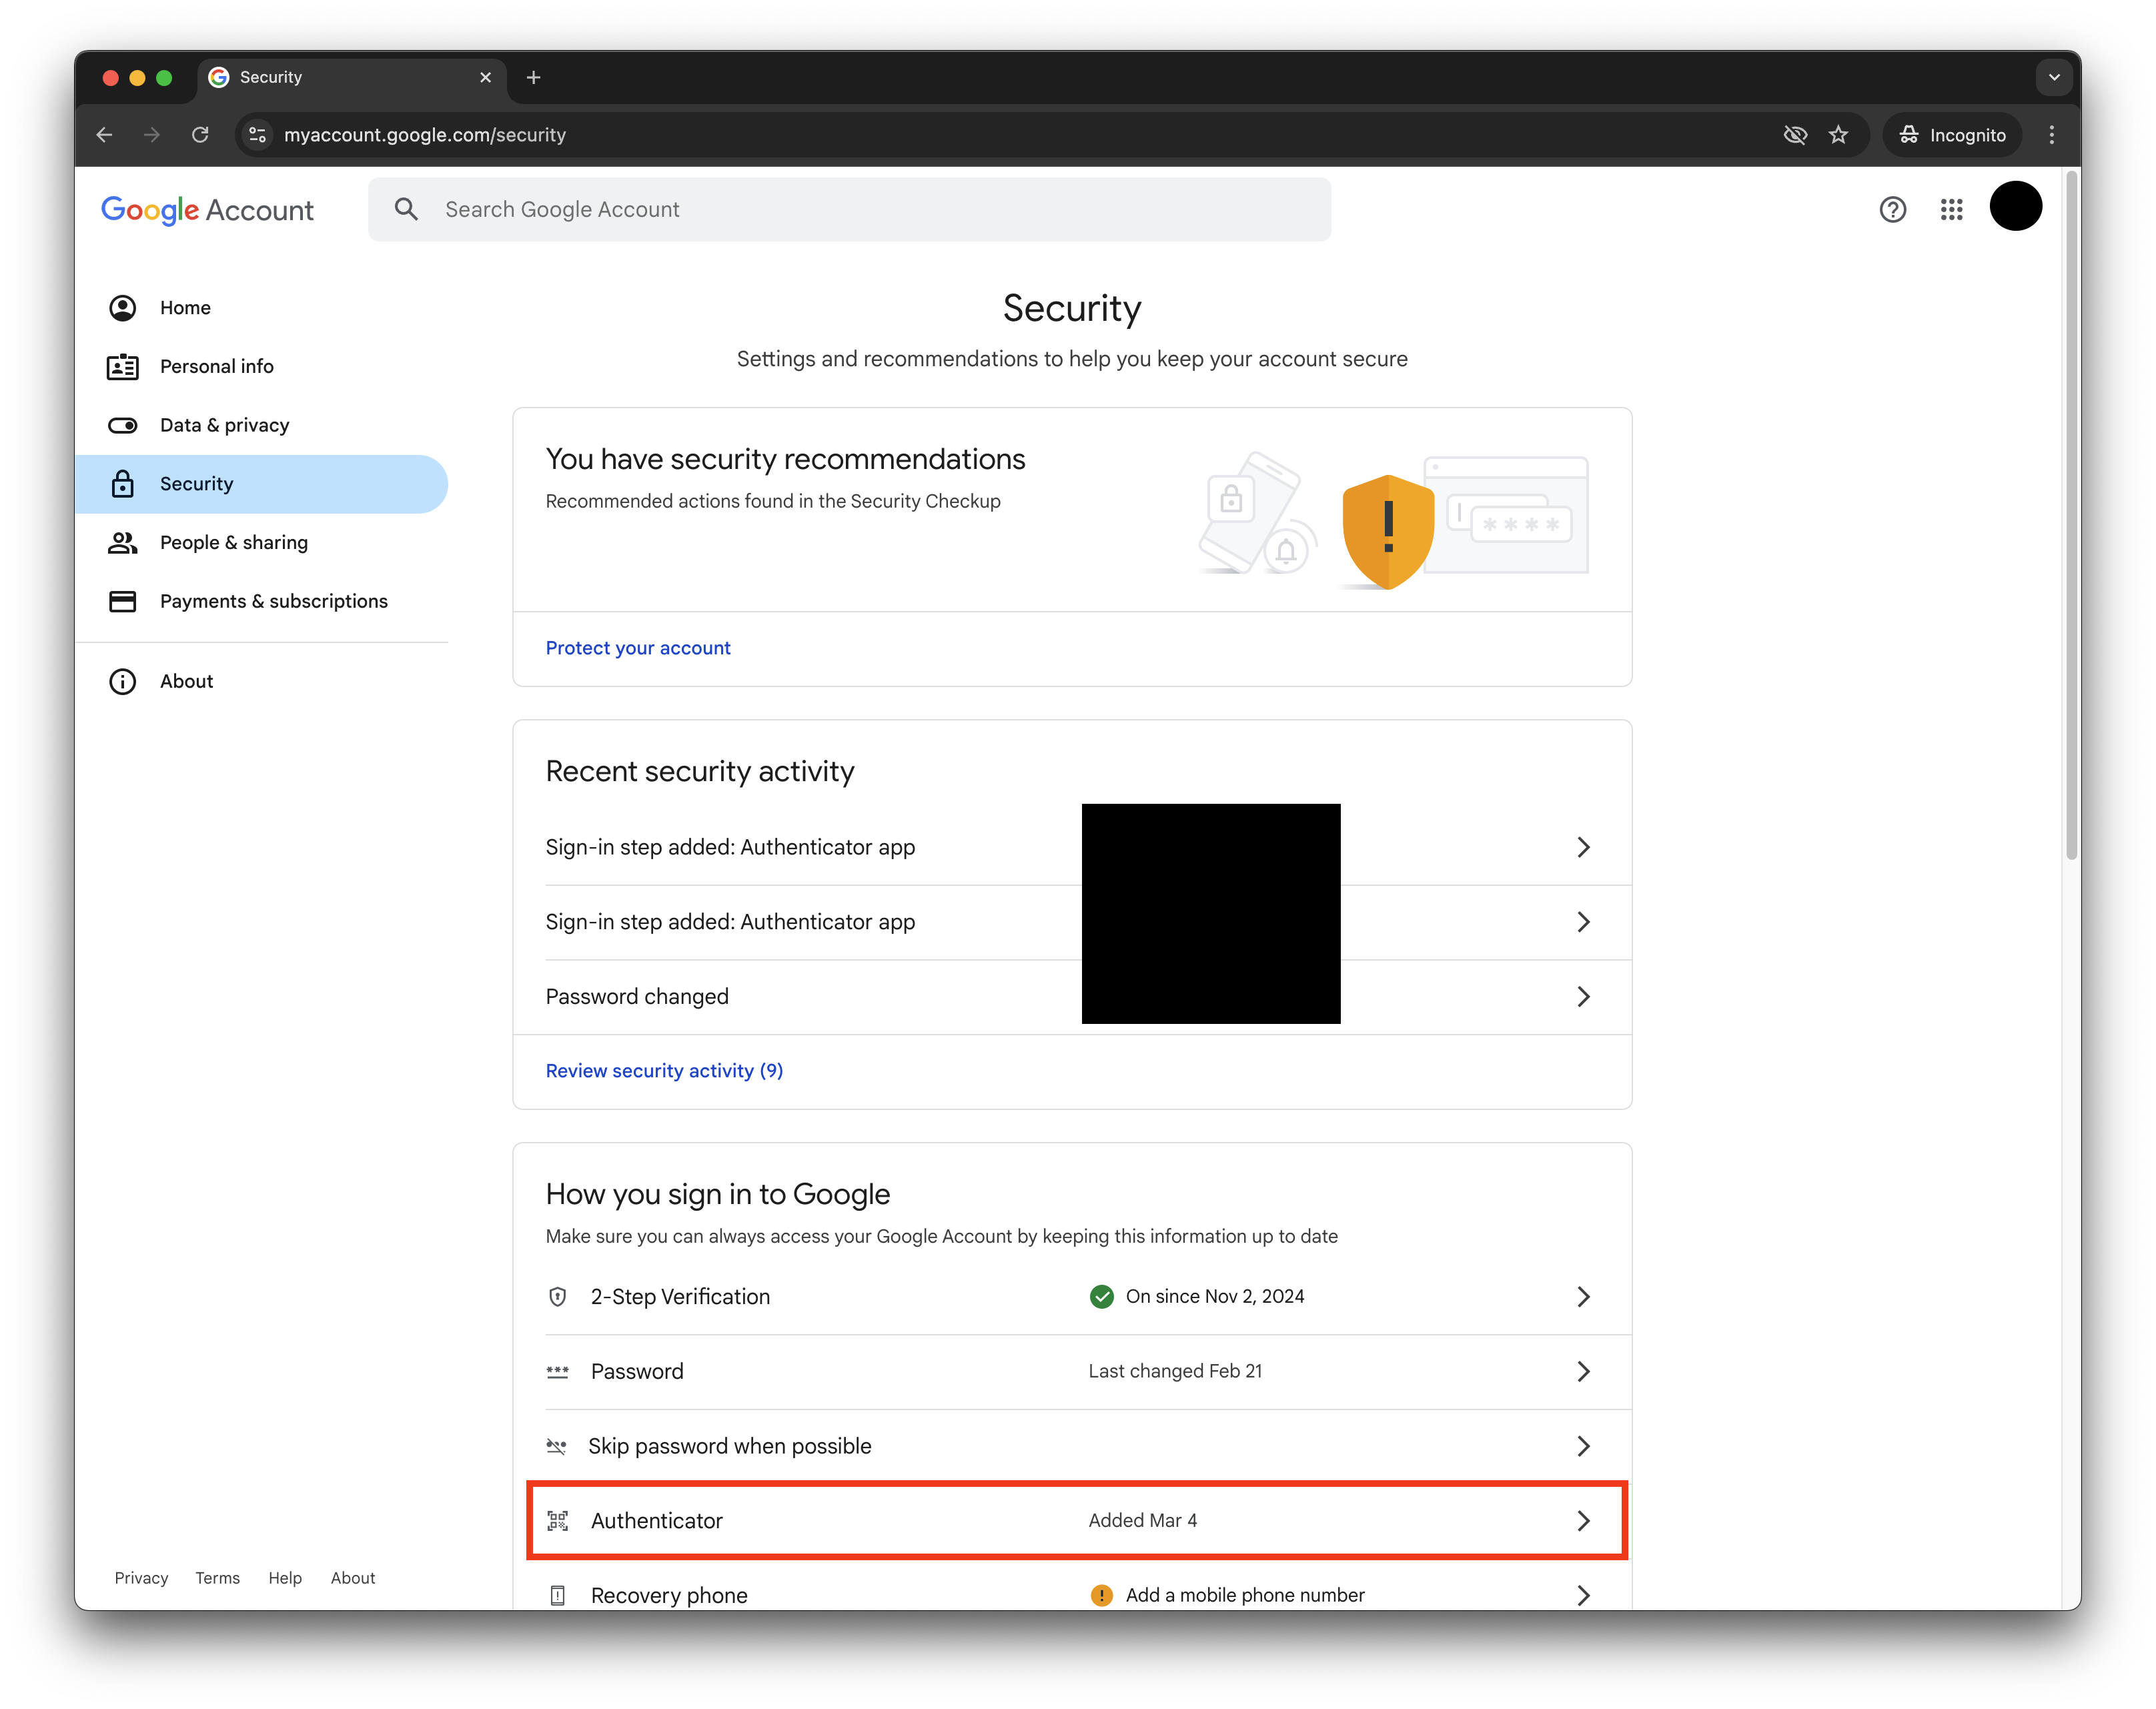 This will invalidate your previous Authenticator app setup.
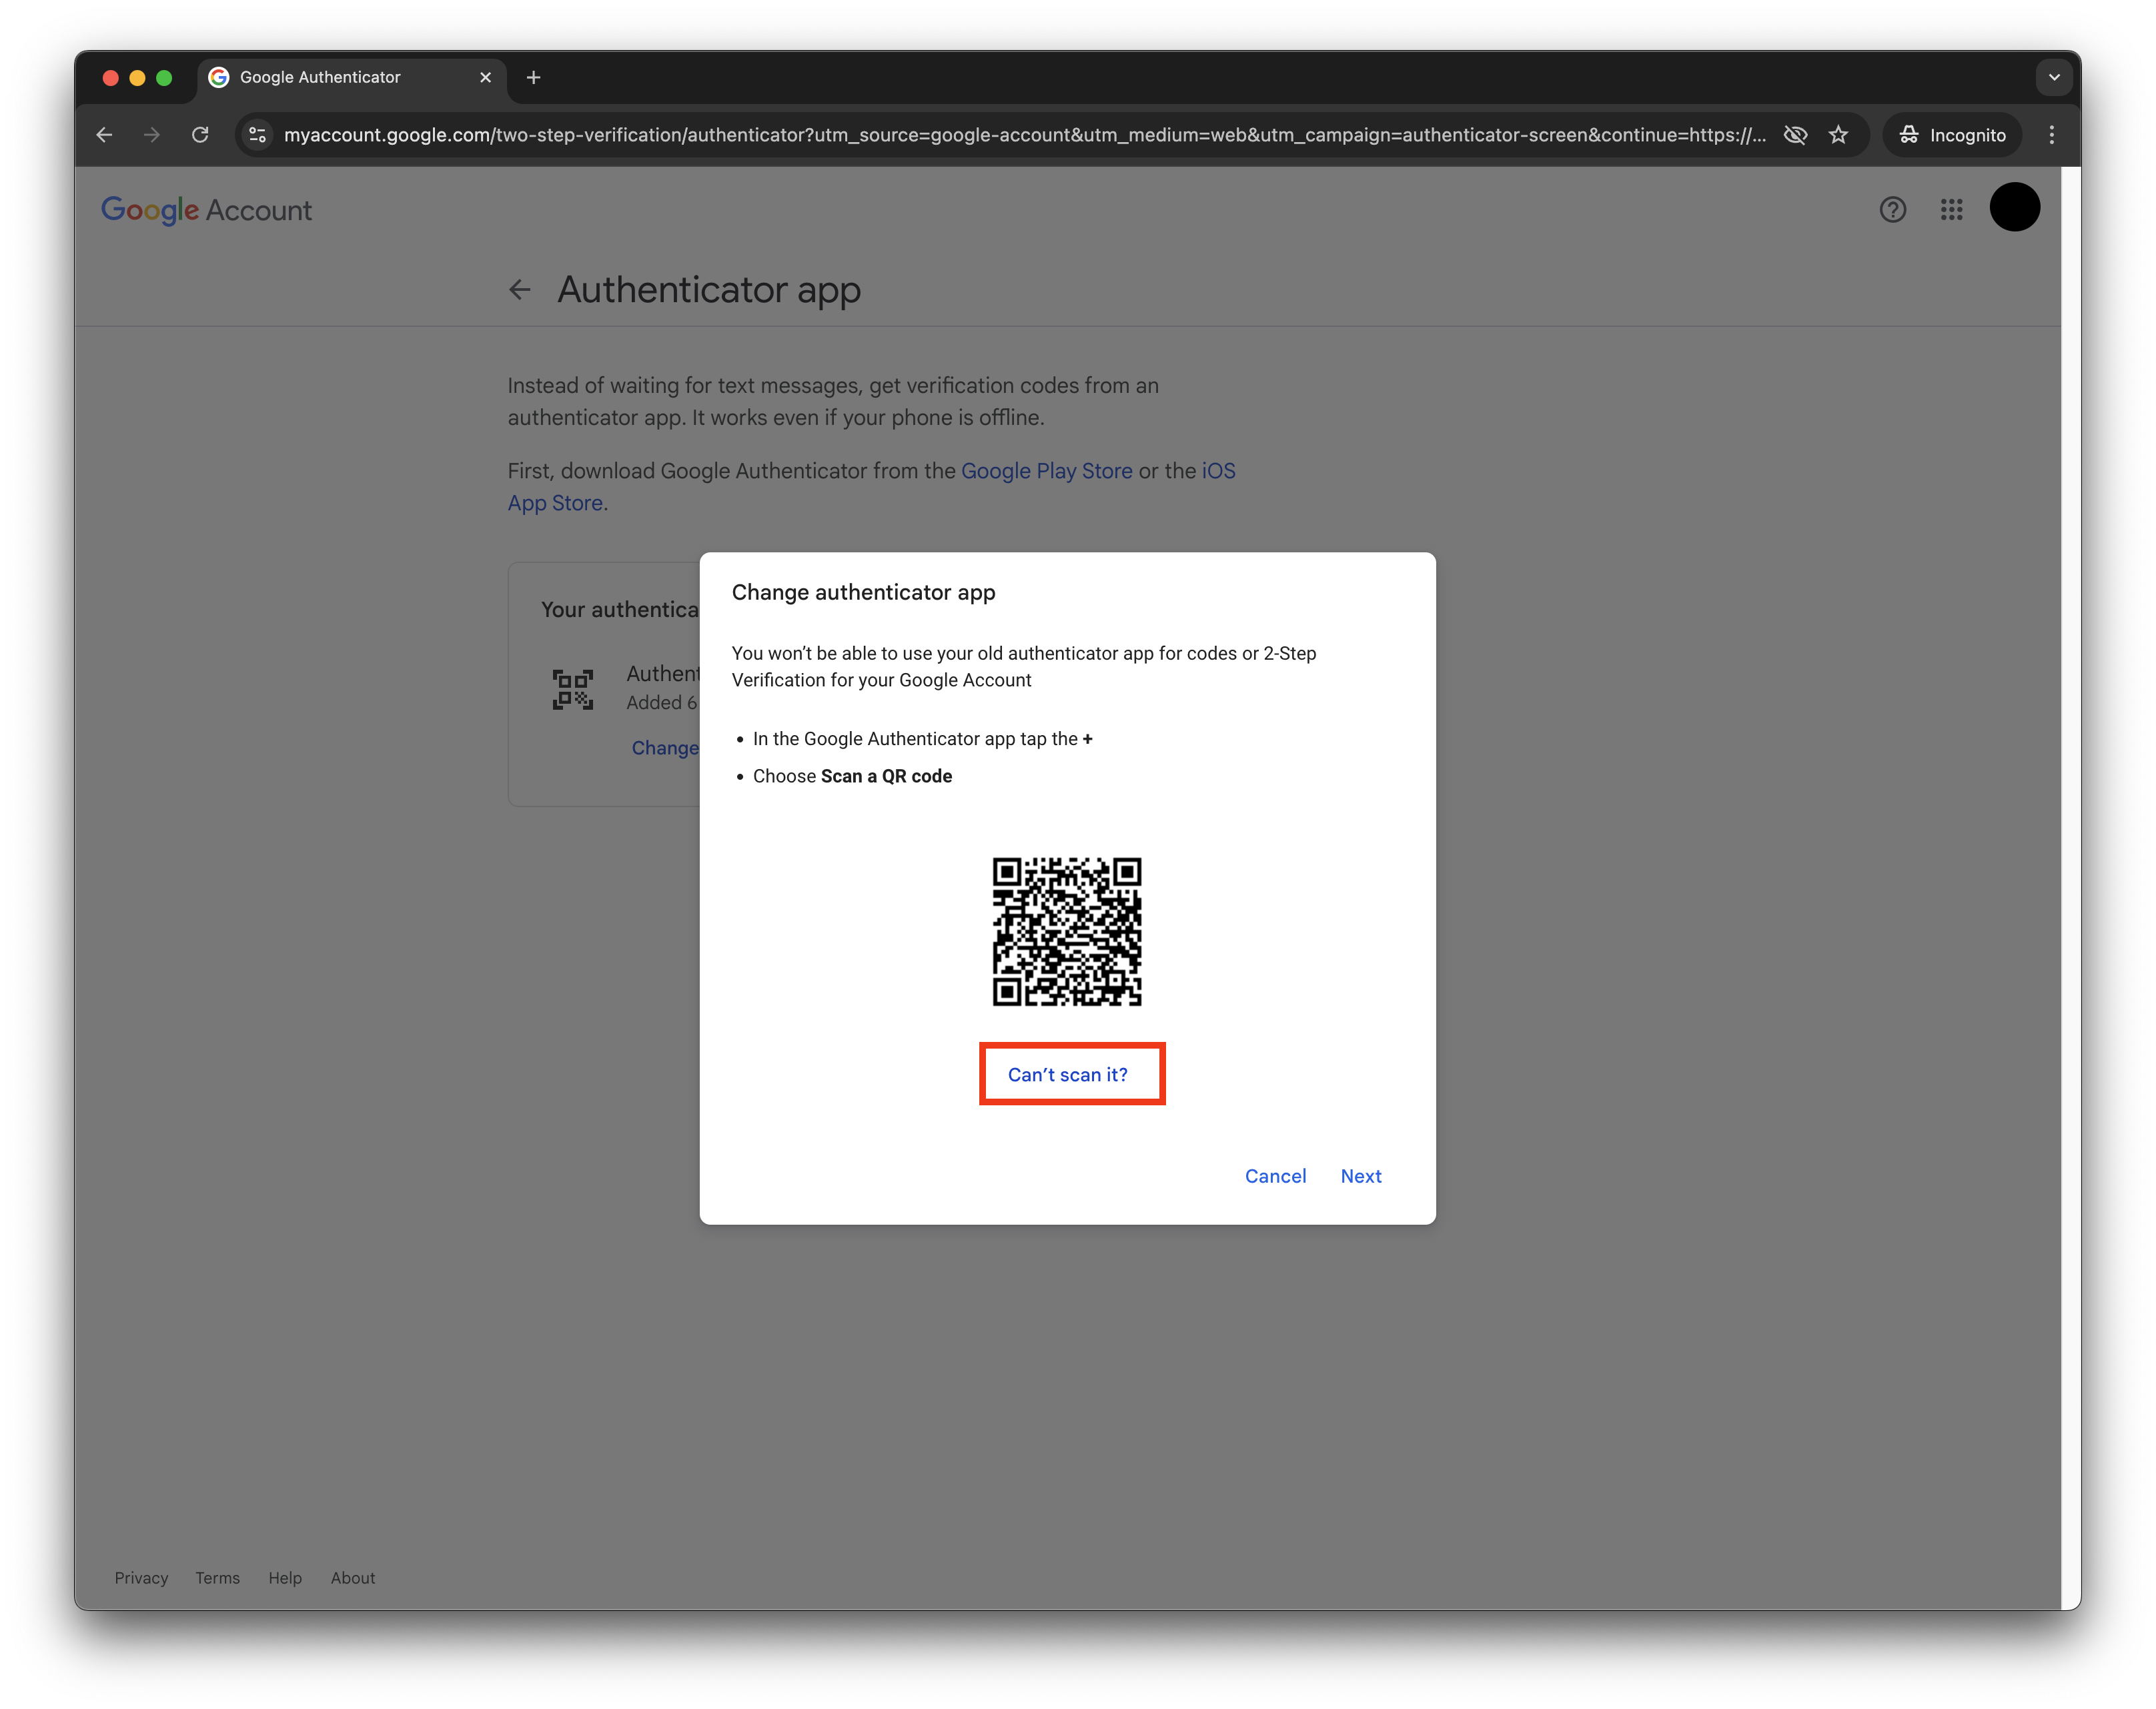
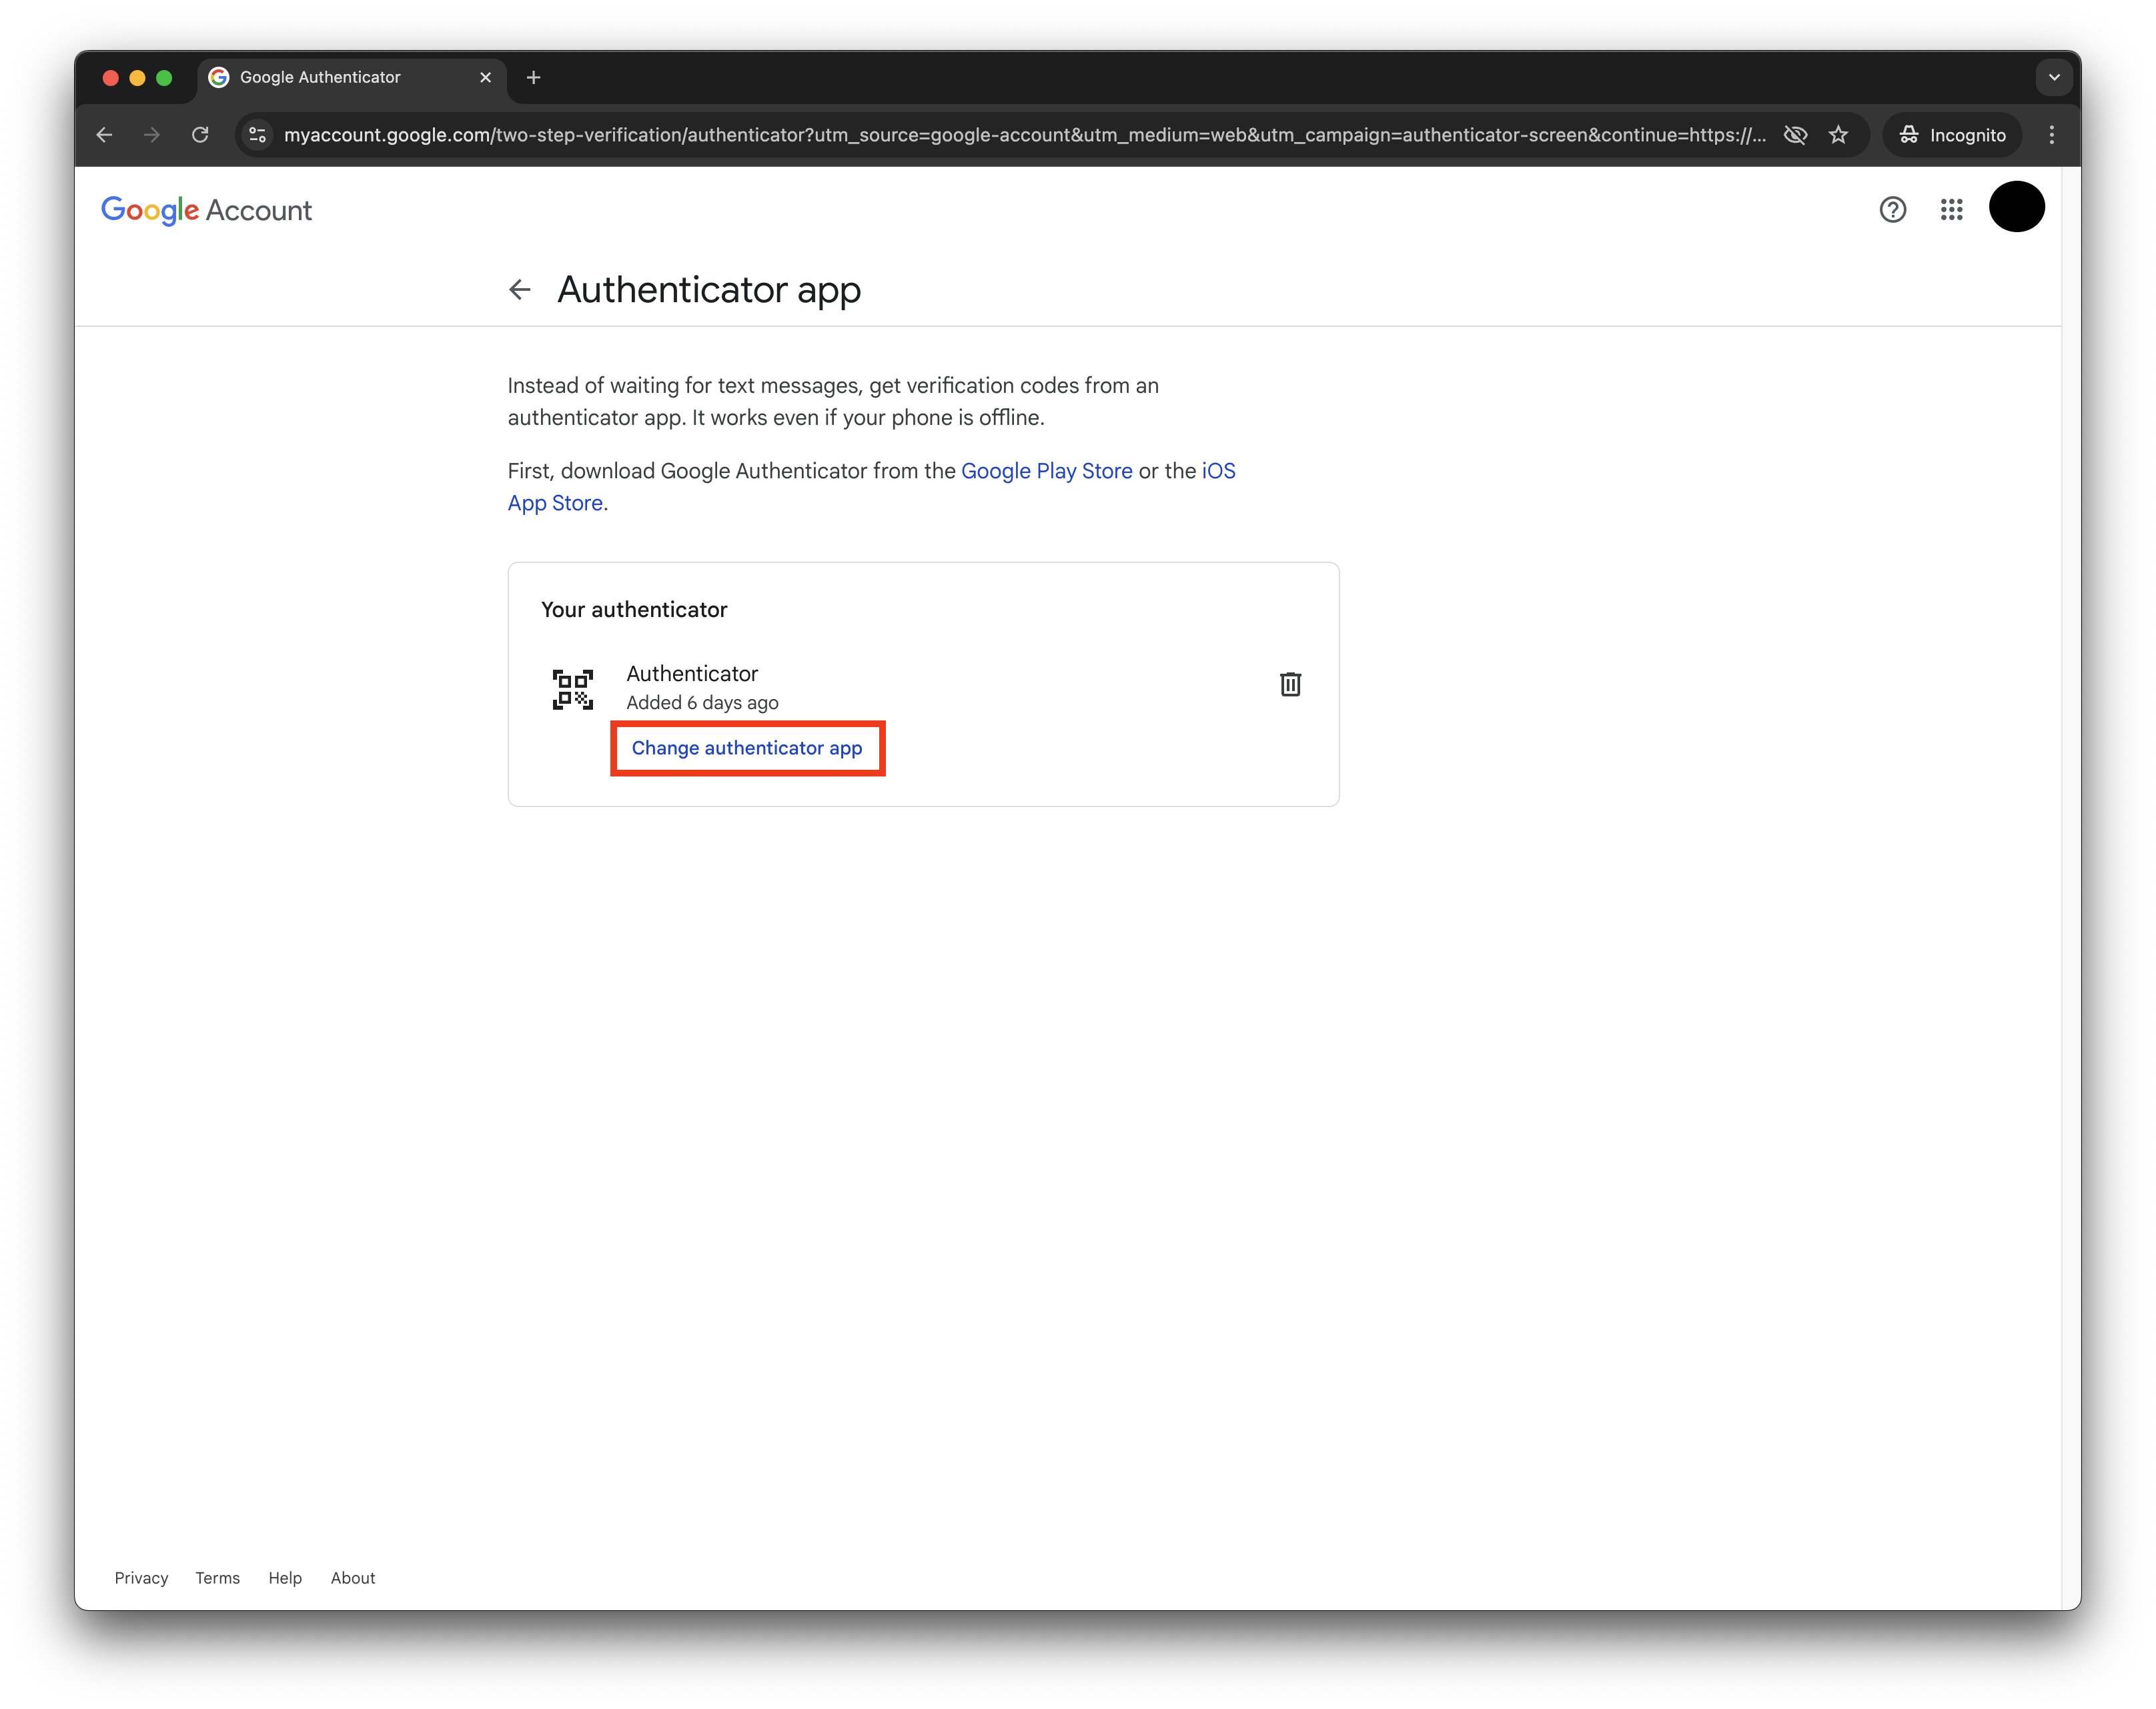 When the QR code pop-up appears:
1. Click 'Can't scan QR code'
2. This will reveal the OTP secret in text format
You'll also want to store this to use as `otpSecret` with the `authWithGoogle` SDK method
When the QR code pop-up appears:
1. Click 'Can't scan QR code'
2. This will reveal the OTP secret in text format
You'll also want to store this to use as `otpSecret` with the `authWithGoogle` SDK method
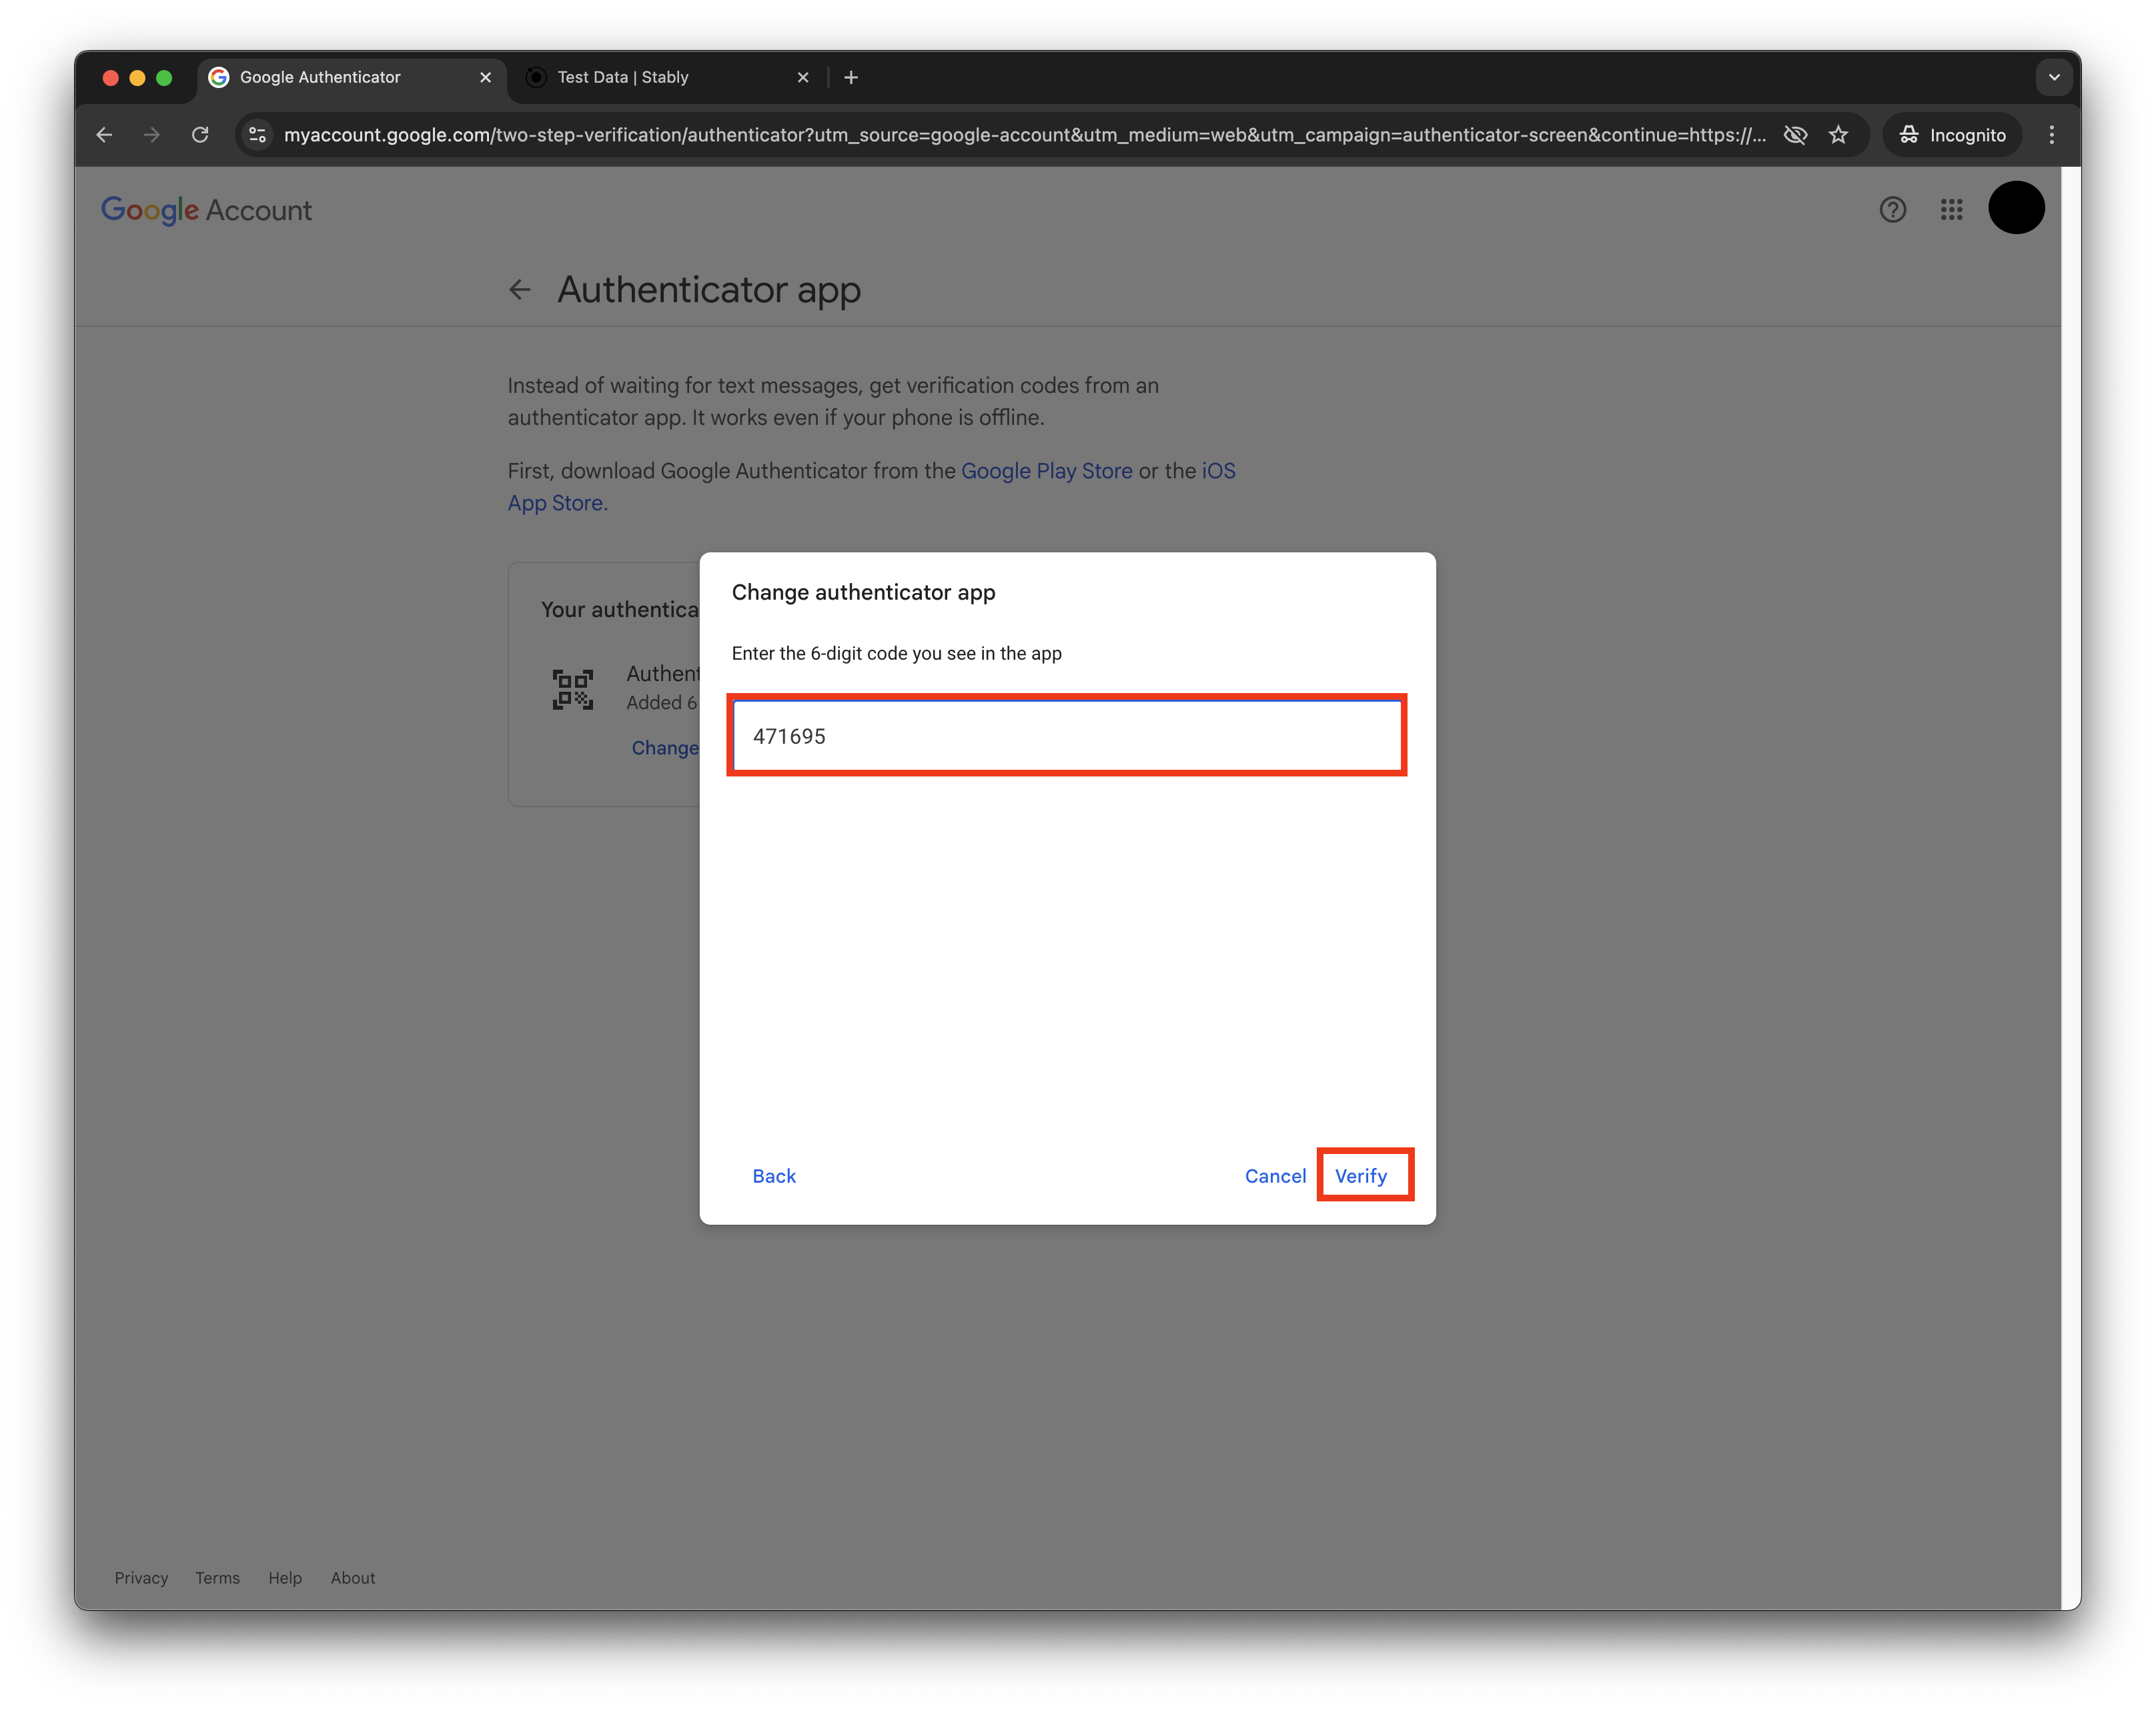
 Open [Stably's OTP util](https://app.stably.ai/utils/google-otp-secret) in a new tab.
You'll see an OTP with a 30-second timer. Click 'Copy OTP' to copy it.
Go back to the Google Accounts pop-up, click 'Next', paste the copied OTP, and click 'Verify'.
Open [Stably's OTP util](https://app.stably.ai/utils/google-otp-secret) in a new tab.
You'll see an OTP with a 30-second timer. Click 'Copy OTP' to copy it.
Go back to the Google Accounts pop-up, click 'Next', paste the copied OTP, and click 'Verify'.
 Go back to the Google Accounts page, turn on 2FA, and under 'Second Steps', make sure only the Authenticator is enabled (you might have to sign out of the Google Account on mobile devices).