Authentication is a critical part of any application. If you’re building tests that cover the parts of your app users actually care about, chances are you’ll need to log in. Whether it’s a simple email/password form or a more complex Google SSO flow, being able to authenticate reliably is key to building meaningful and trustworthy tests.
In this guide, we’ll walk you through how to set up and use authentication in your tests using Stably.
Setting Up Test Accounts
Before testing authentication, you’ll need to set up some test credentials.
Email-Based Test Accounts
You can store these as environment variables within your project:
-
Go to app.stably.ai
-
From the sidebar, click Test Data
-
Navigate to the Variables tab
-
Fill out the name-value pair (you can use JSON):
Name: test_account
Value: { "email": "test@email.com", "password": "testpassword" }
-
Click Save
You can now access this test account in your test logic using:
VARS.test_account.email
VARS.test_account.password
SSO Test Accounts (e.g. Google)
Set up your SSO test accounts under the same Test Data > Test Accounts section.
We’ve already documented how to do this. You can follow the detailed guide here:
Google OAuth Setup
Logging Into Your App in a Test
Once your test accounts are set up, here’s how to use them during test recording.
Email-Based Logins
A quicker alternative to the steps below is to use Stably’s AI agent to create the login actions. In the Add Step menu, simply select the Generate with AI option and instruct it to log in using your test account variable (i.e., “Log in using the test_account credentials”).
- Start recording your test as usual.
- When the login screen appears:
- Right-click the email field → choose Fill
- In the modal, set the input type to Dynamic
- Enter:
VARS.test_account.email
- Repeat the same steps for the password field using
VARS.test_account.password
- Click Login and continue recording the rest of your test.
Google SSO Logins
Ensure your Google test account is already set up.
- From the Add Step or Add Operation menu, choose Login to Google
- In the modal, select the test account you want to use from the dropdown
- Click Select to confirm
- Begin recording your test
- When prompted in the login form, click Sign in with Google. The login flow should proceed automatically since the Google account is already logged in thanks to the previous “Login with Google” action.
- (Optional) Visit https://accounts.google.com in the recorder to confirm that the login worked
Reusing Login Steps
Once you’ve created login steps in one test, you can easily reuse them across multiple tests by creating a reusable component. This saves time and ensures consistency across your test suite.
Creating a Login Component
Create the login steps
Create the login steps like you would normally (following the steps above for either email-based or Google SSO logins)
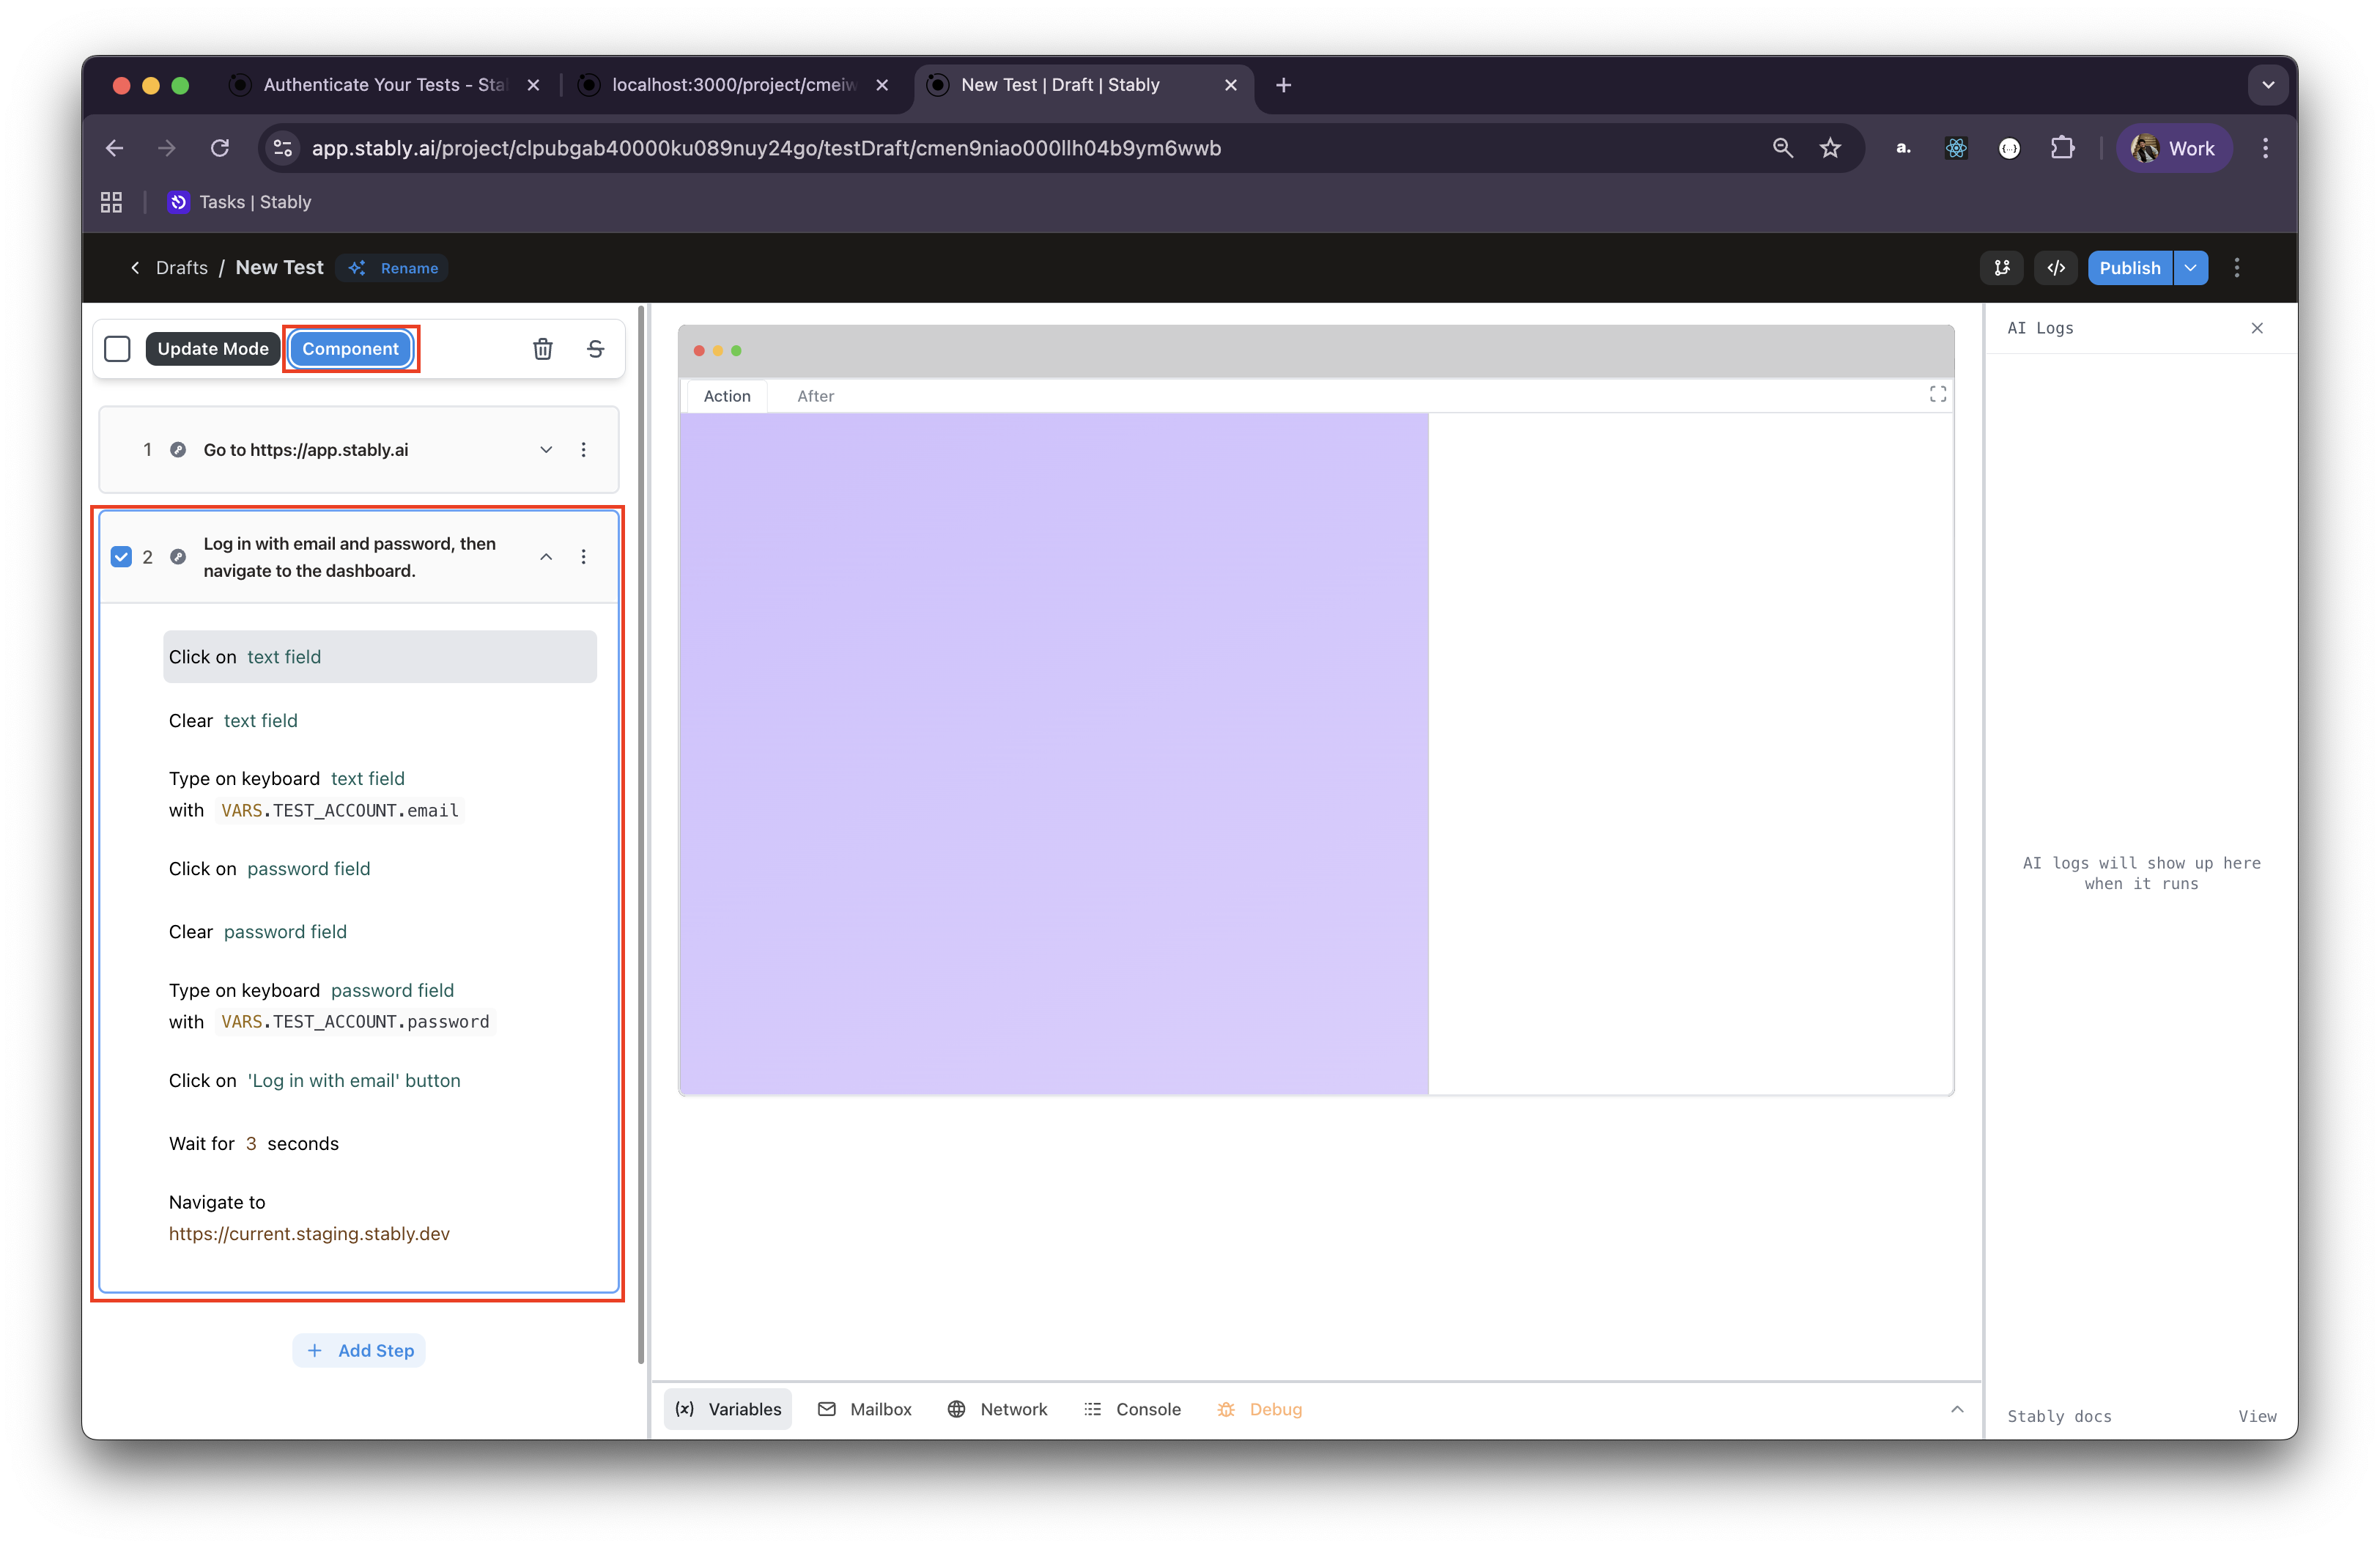
Select the login actions
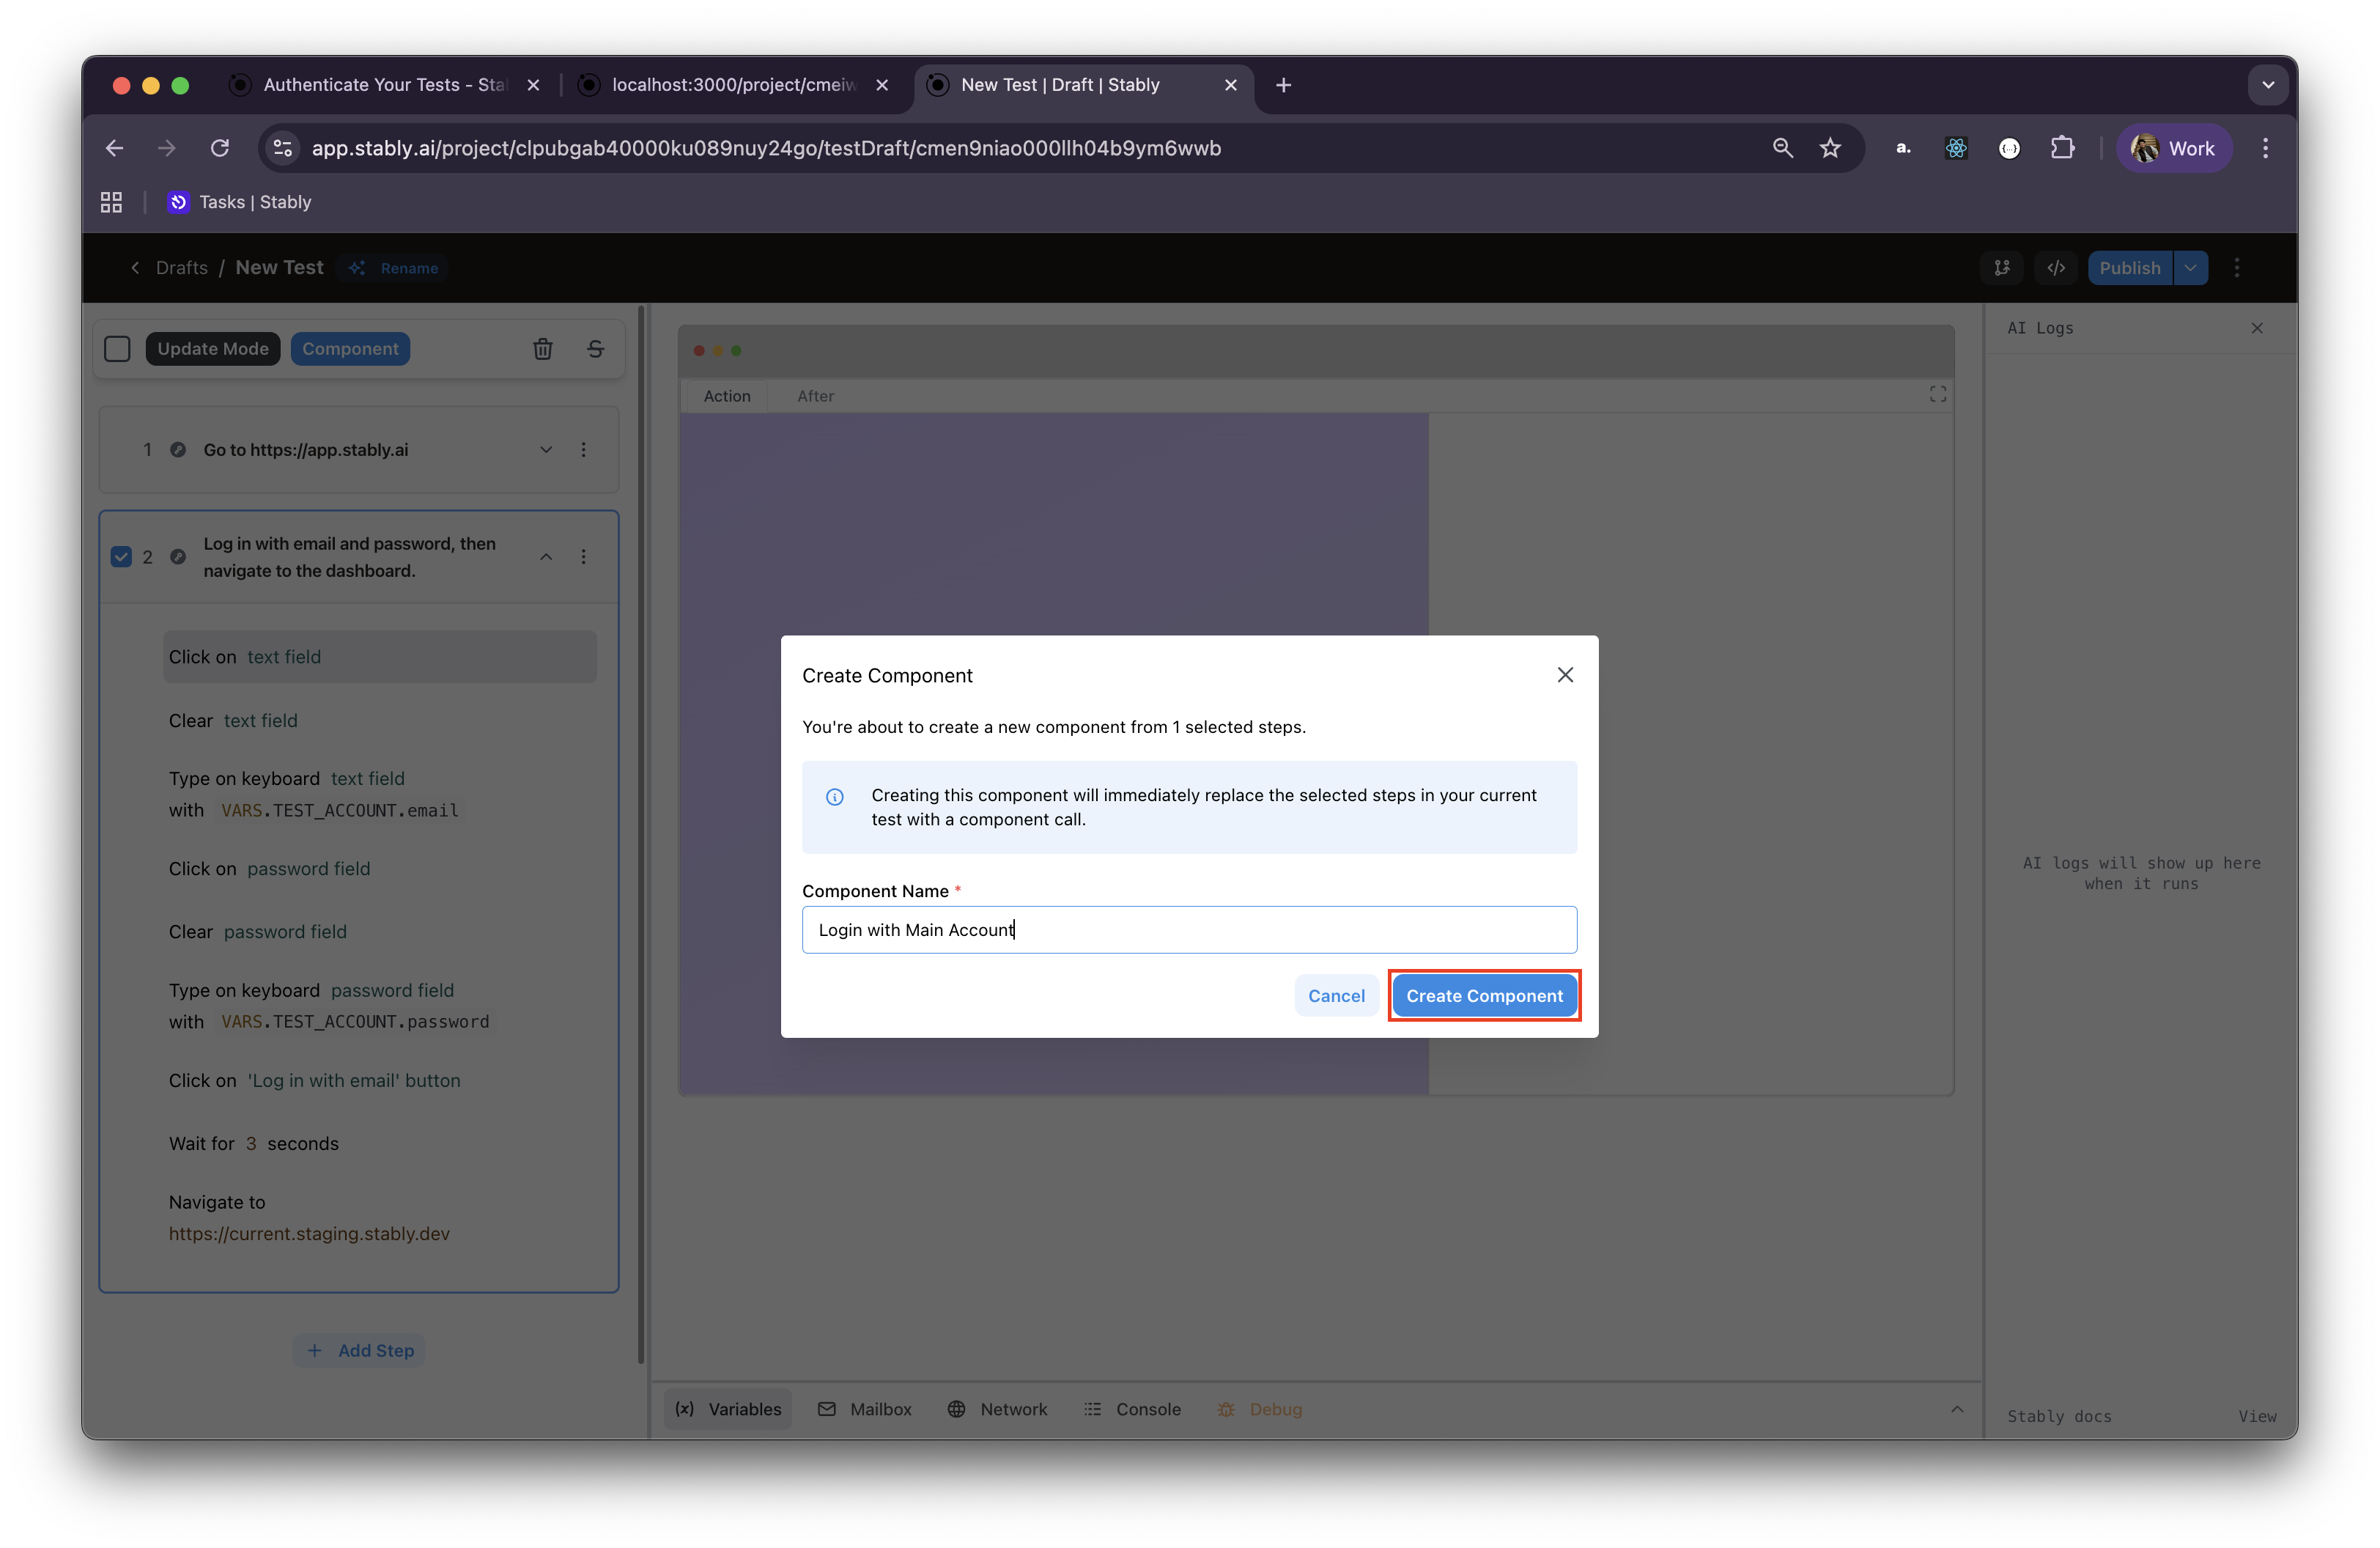
Select all the actions that make up the login flow and click “Create Component” Name your component
Give the component a unique and relevant name (e.g., “Login with Main Account”) and create the component Component replacement
Stably will automatically replace the actions with the component call in your current test
Using Login Components in New Tests
In future test drafts, you can quickly add your login flow:
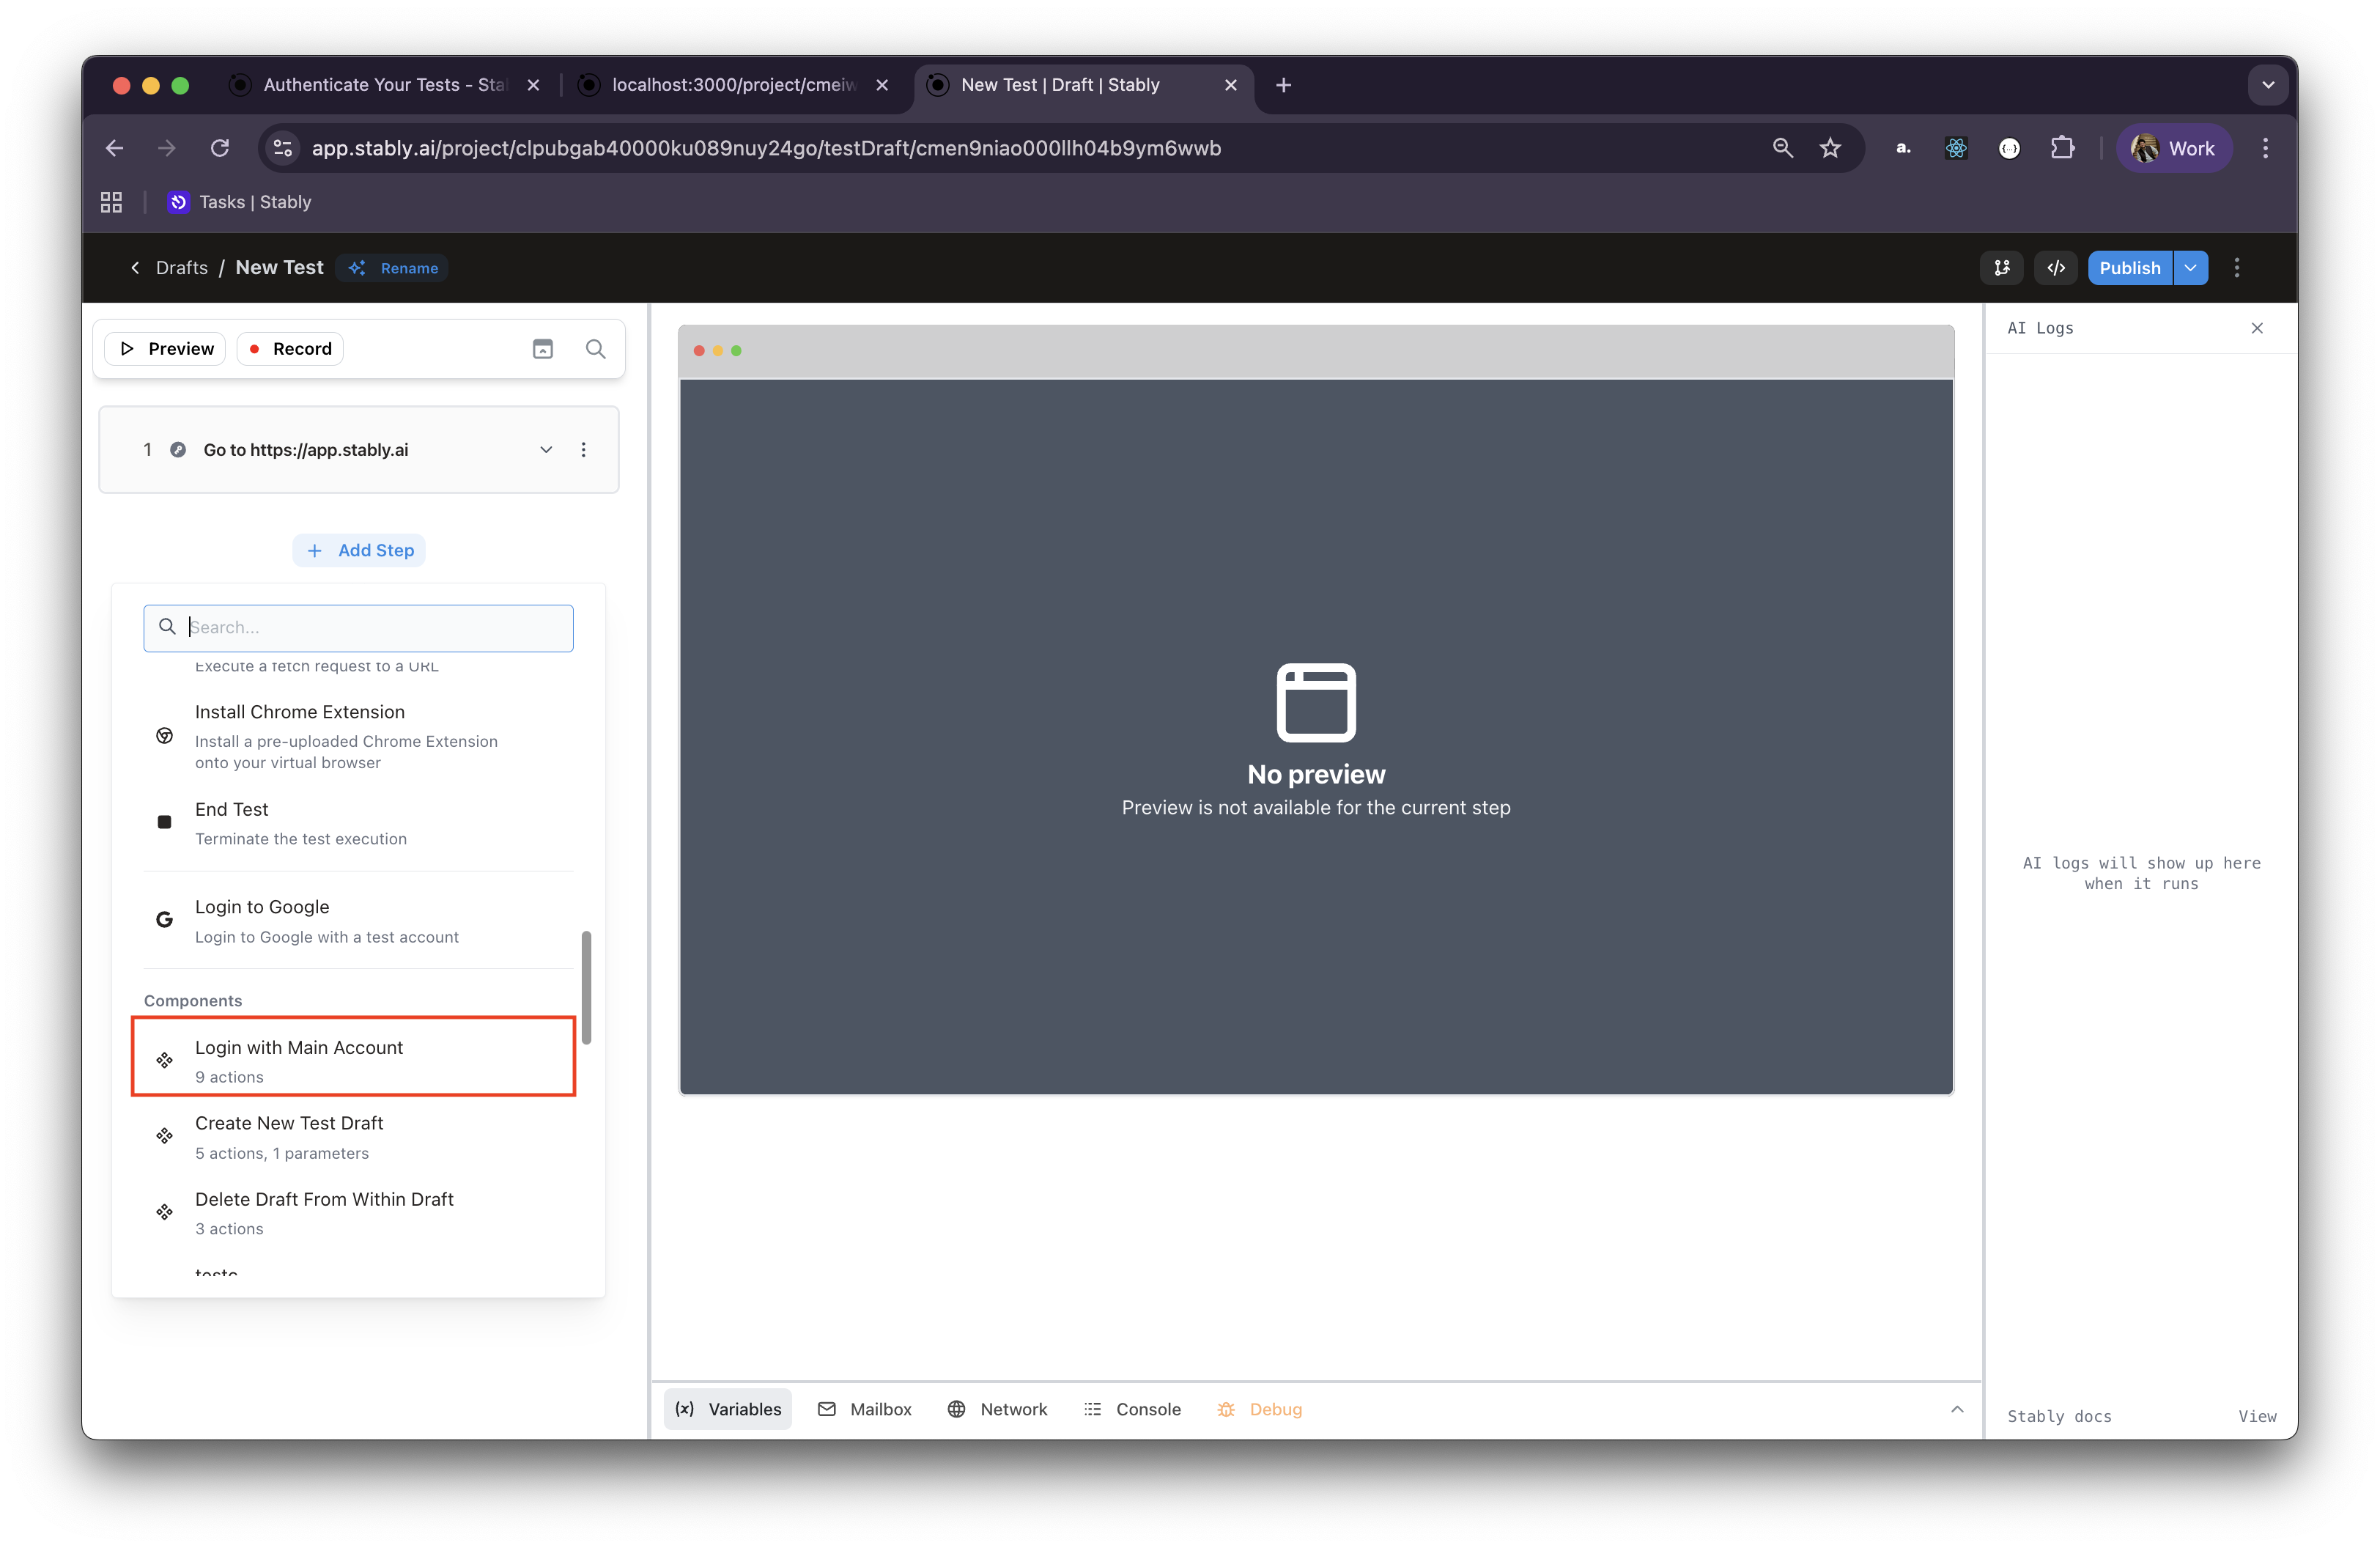
Open Add Step menu
Open the “Add Step” menu in your test draft
Find your component
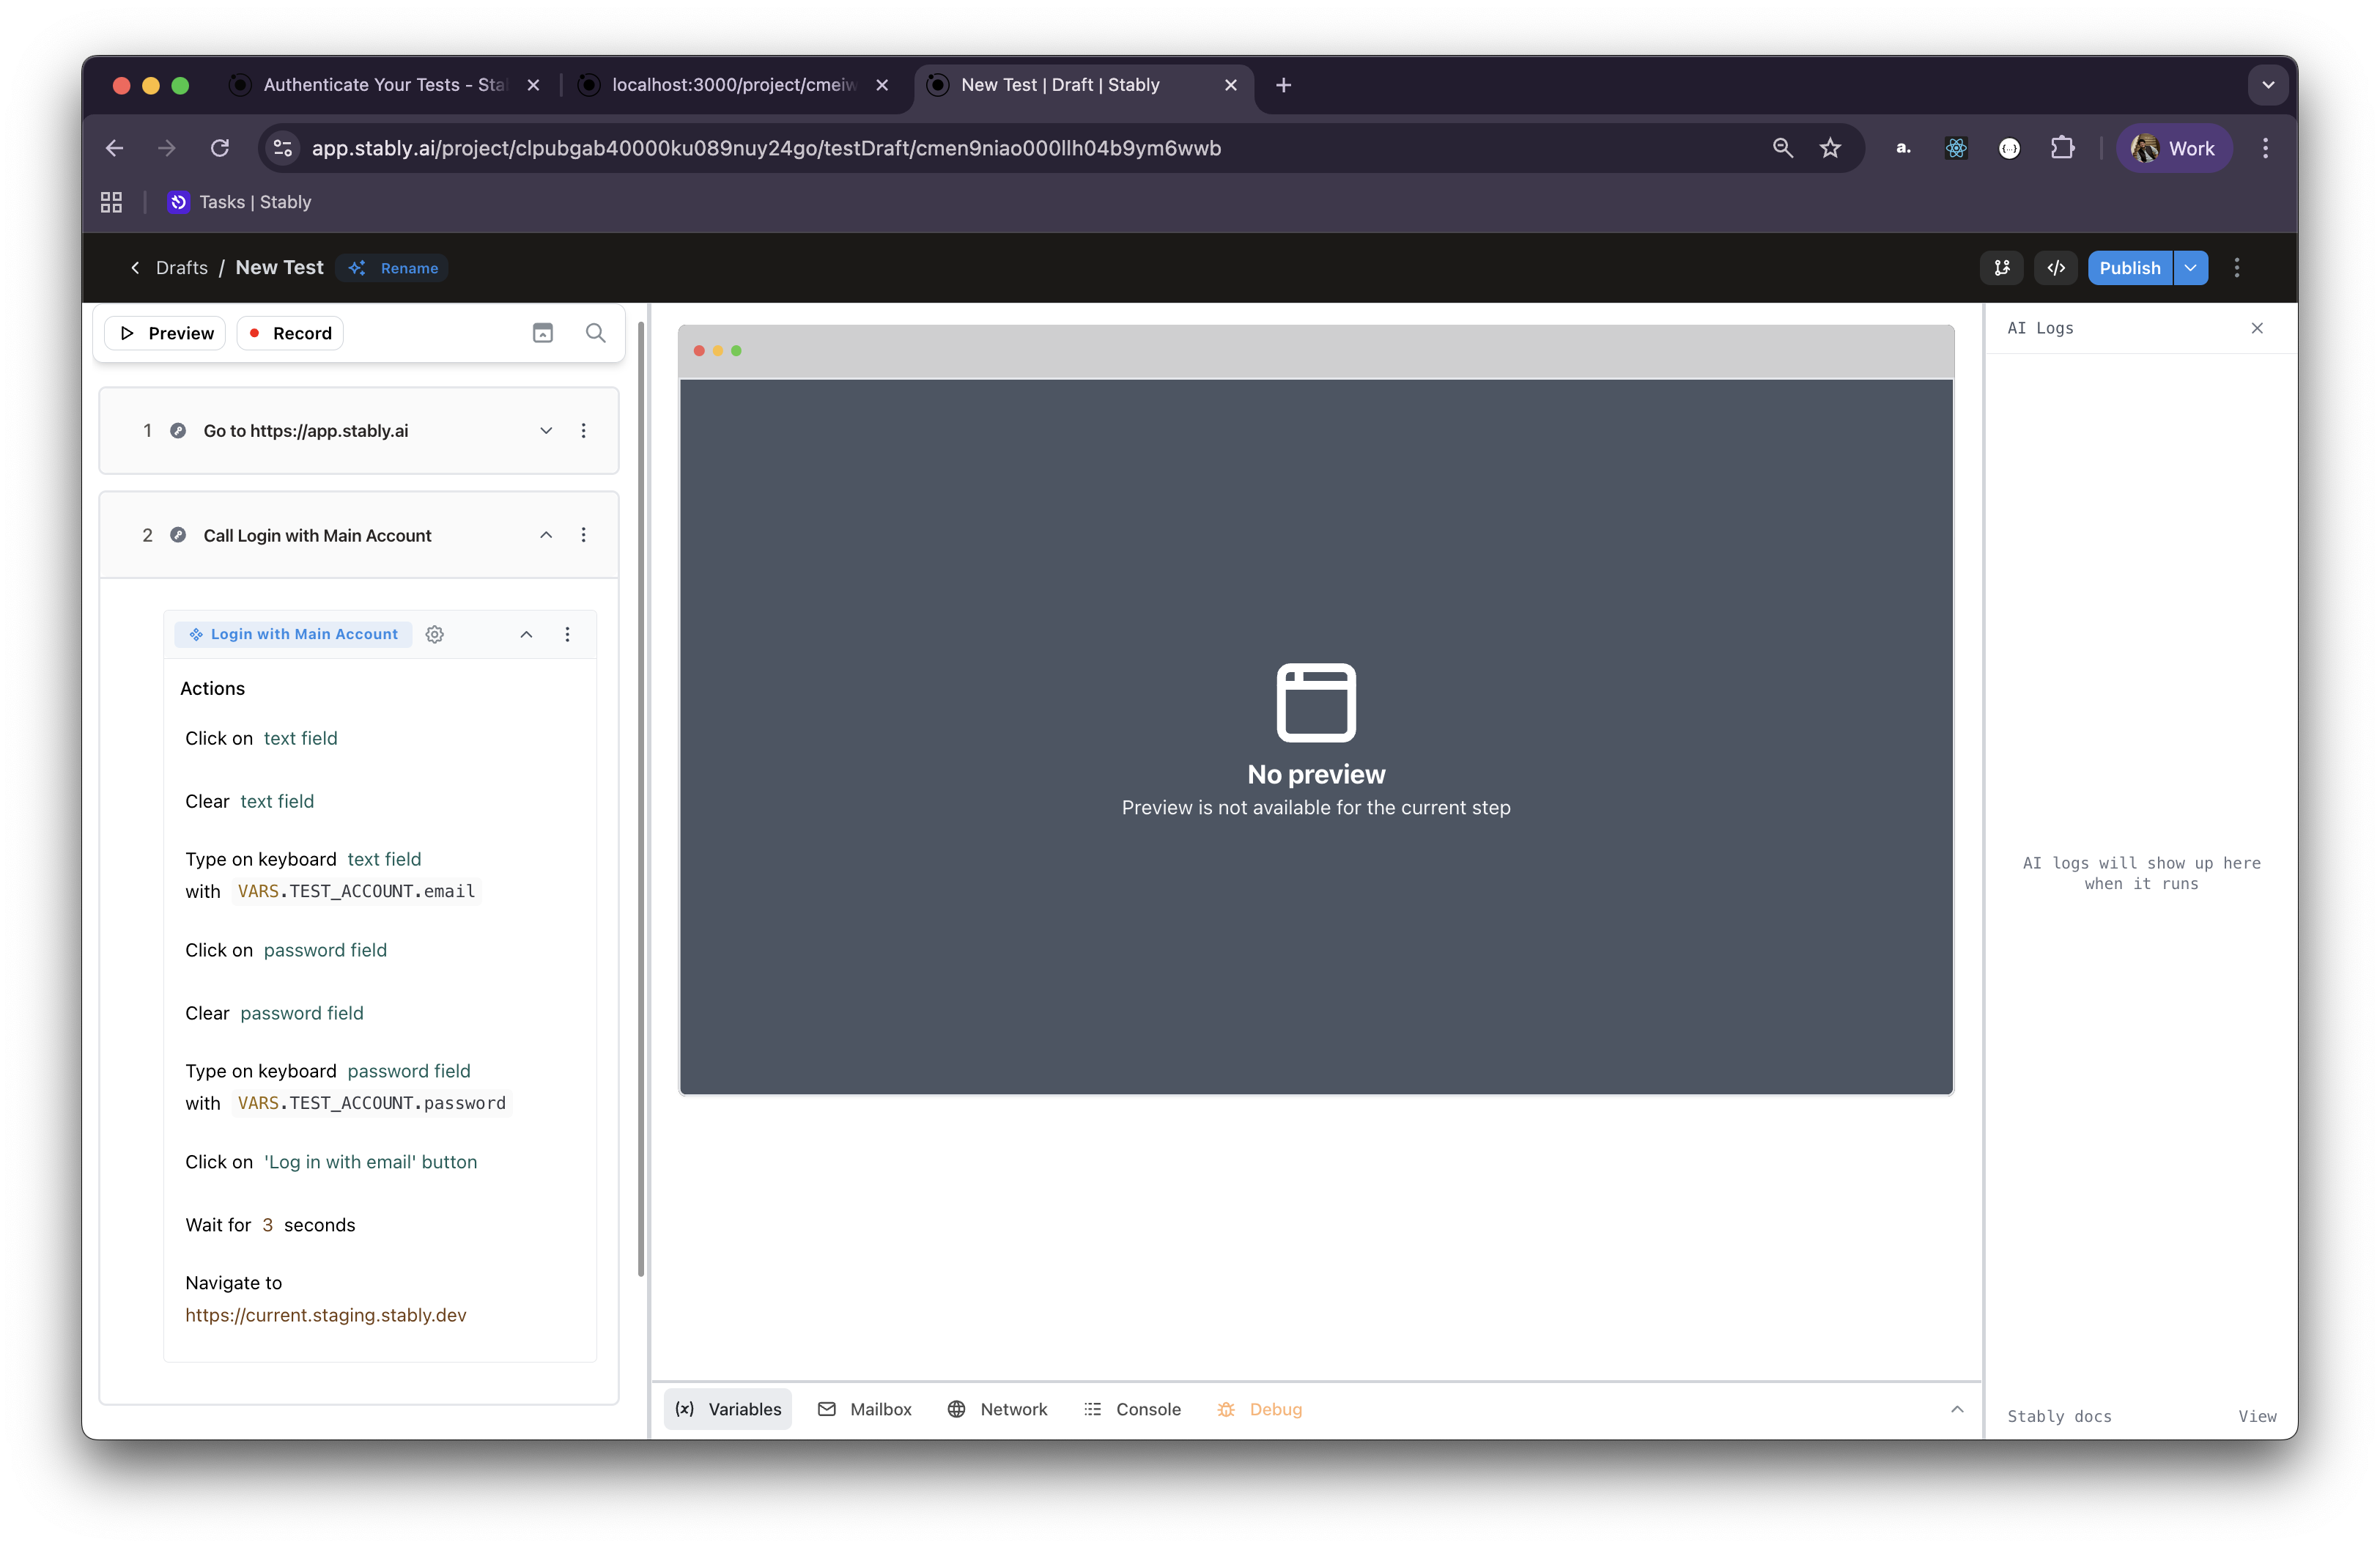
Scroll down or search to find your component (e.g., “Login with Main Account”) Add to test draft
Click on it to add the entire login flow to your test draft Login components are particularly useful for regression testing and when building test suites that require authentication across multiple user flows.
Migrating from the Old “Auth Steps”
If you’ve used Stably before, you might be familiar with the older auth steps — AI-powered steps that bundled all the logic into a single step.
These legacy auth steps have now been deprecated.
They’ve been replaced with more flexible, modular actions like “Login to Google”, which you can combine with regular Playwright actions (click, fill, etc.) and Stably environment variables to create reliable, customizable login flows.
Final Notes
Authentication can be complex — especially when anti-bot measures are in play. With Stably’s new modular login features and environment variable support, we aim to make testing auth flows as seamless and flexible as possible.
Need help with authentication? Don’t hesitate to reach out to our team at help@stably.ai