This documentation is for Stably Classic. For the new Stably Web Editor, see Stably Web Editor.
Introduction
Traditionally, testing Chrome extensions has been a challenge. Between packaging requirements, browser security restrictions, and setting up custom environments, it’s often much more complicated than testing a standard website. Stably simplifies all of this. With just a few quick steps, you can upload, install, and test Chrome extensions directly in your automated flows — no complicated setup needed.Uploading
Before you upload your extension, it’s important to package it correctly:1
Package the Extension Properly
Open the extension’s root folder, and select all the contents inside (including 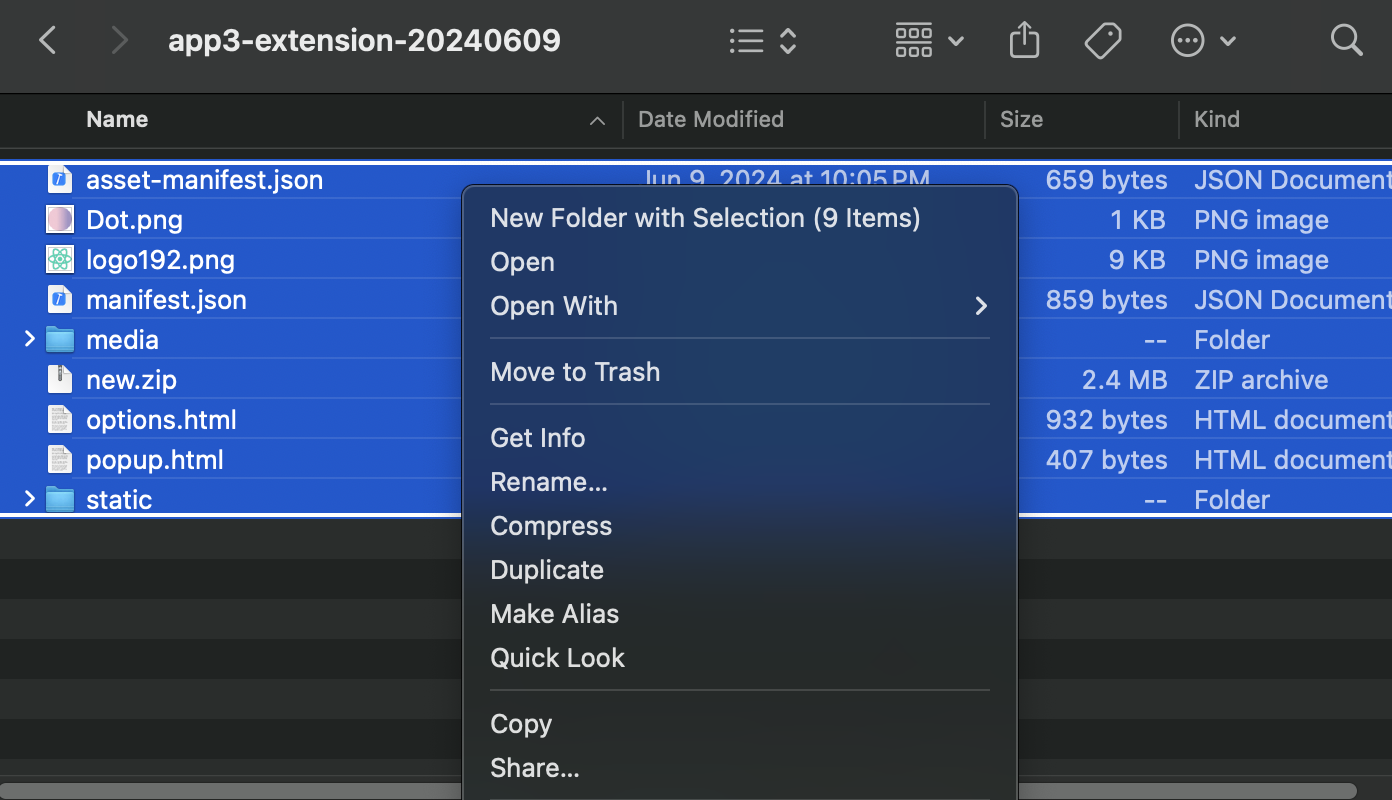
manifest.json). Right-click and select Compress, and save the new .zip file, we’ll need it later.Tip: Do not compress the parent folder itself — only the files inside it.
2
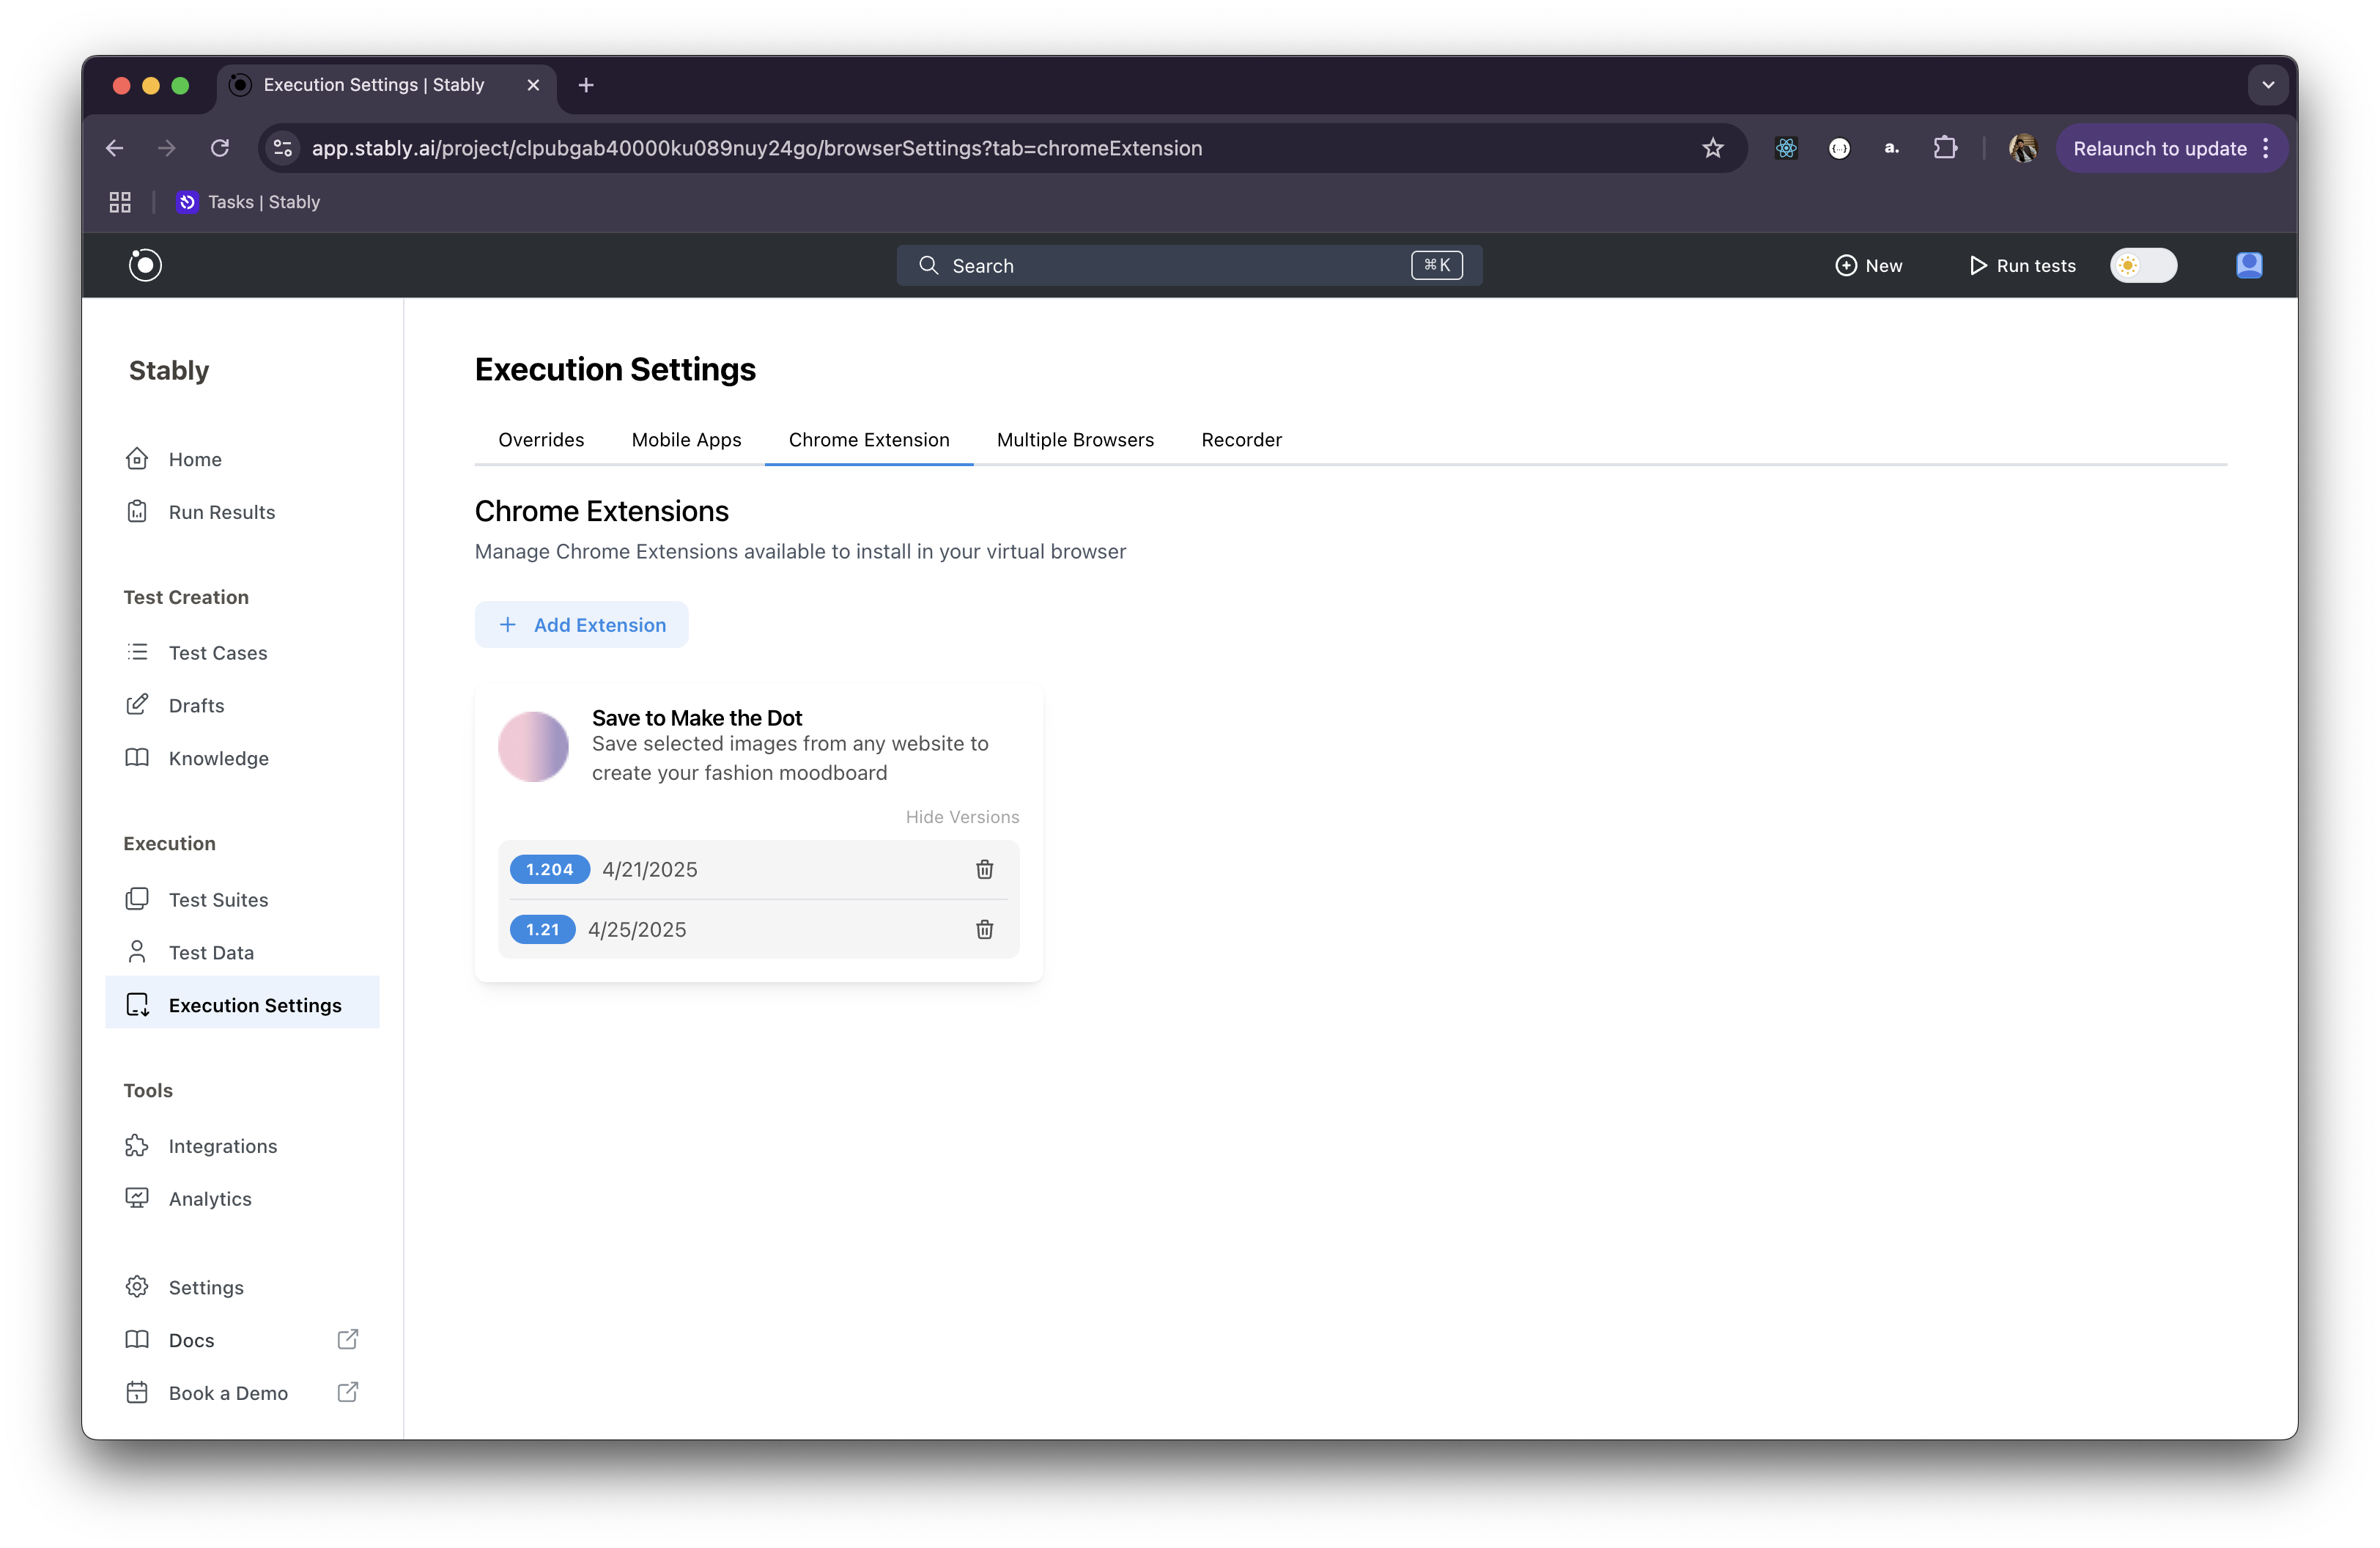
Navigate to Stably's Execution Settings
Log in to your workspace in Stably, and from the sidebar menu, go to Execution Settings, and click the Chrome Extension tab at the top.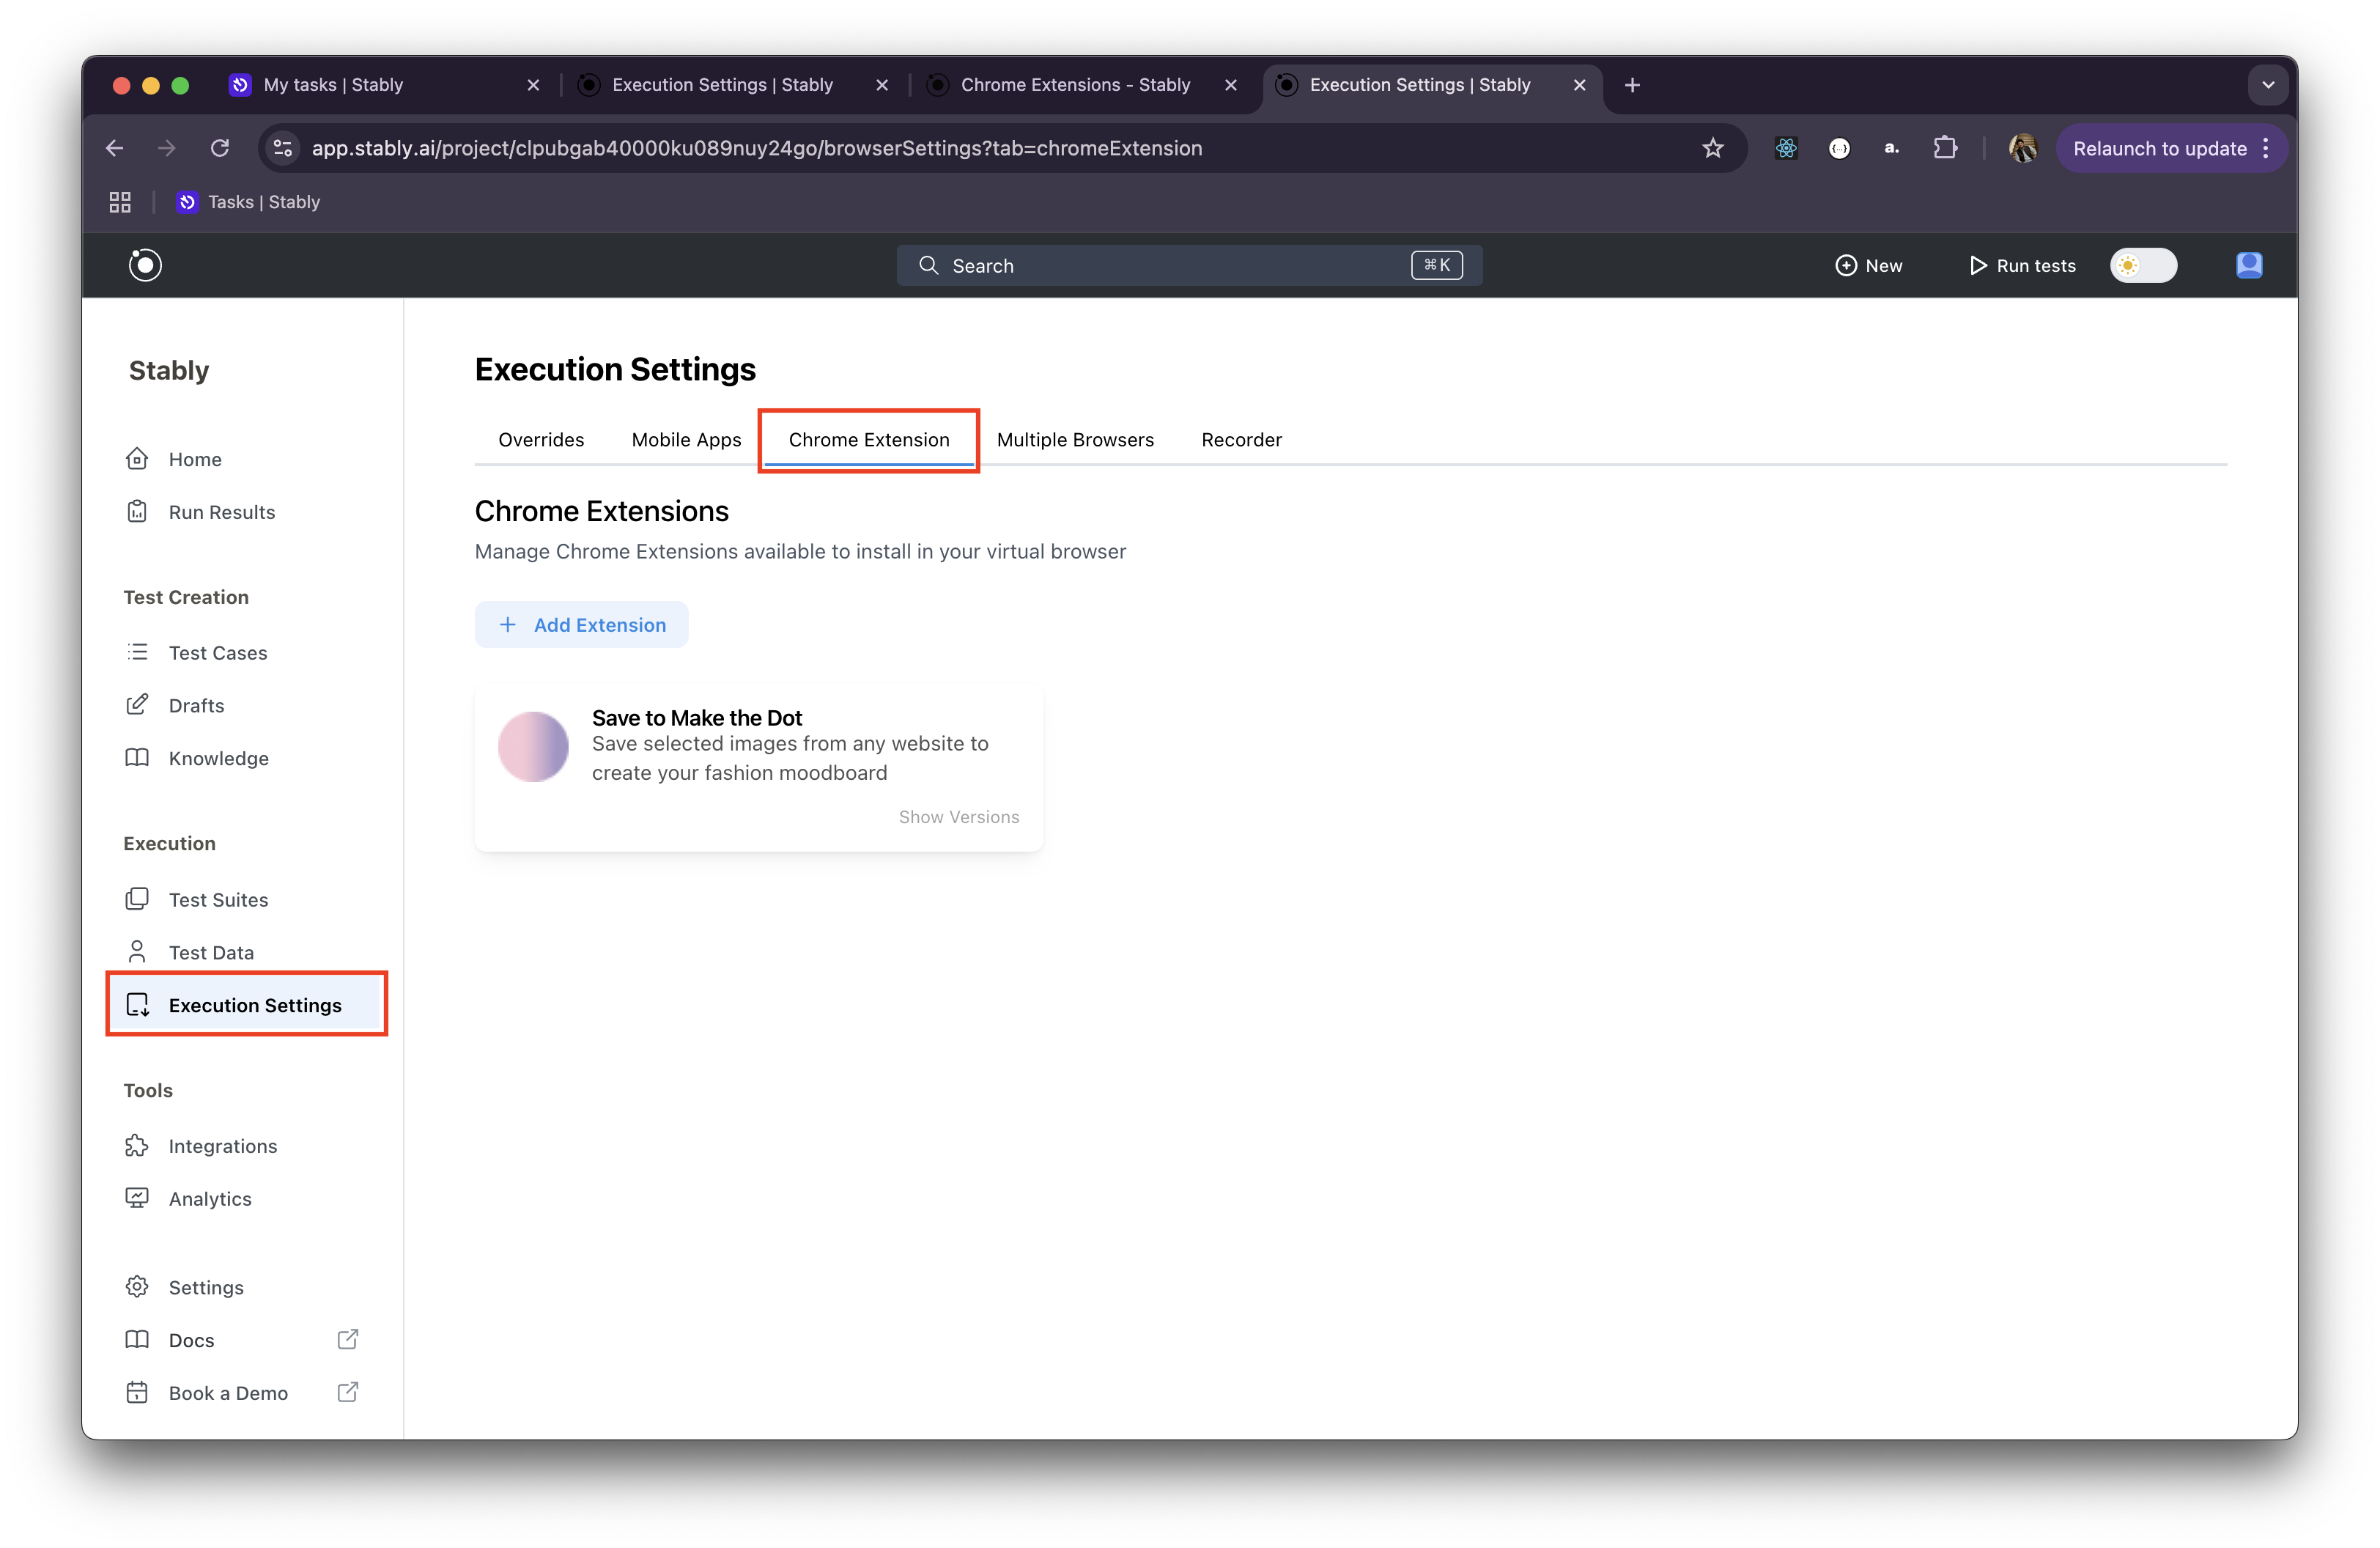
3
Upload Your Extension
Click + Add Extension, and select the packaged 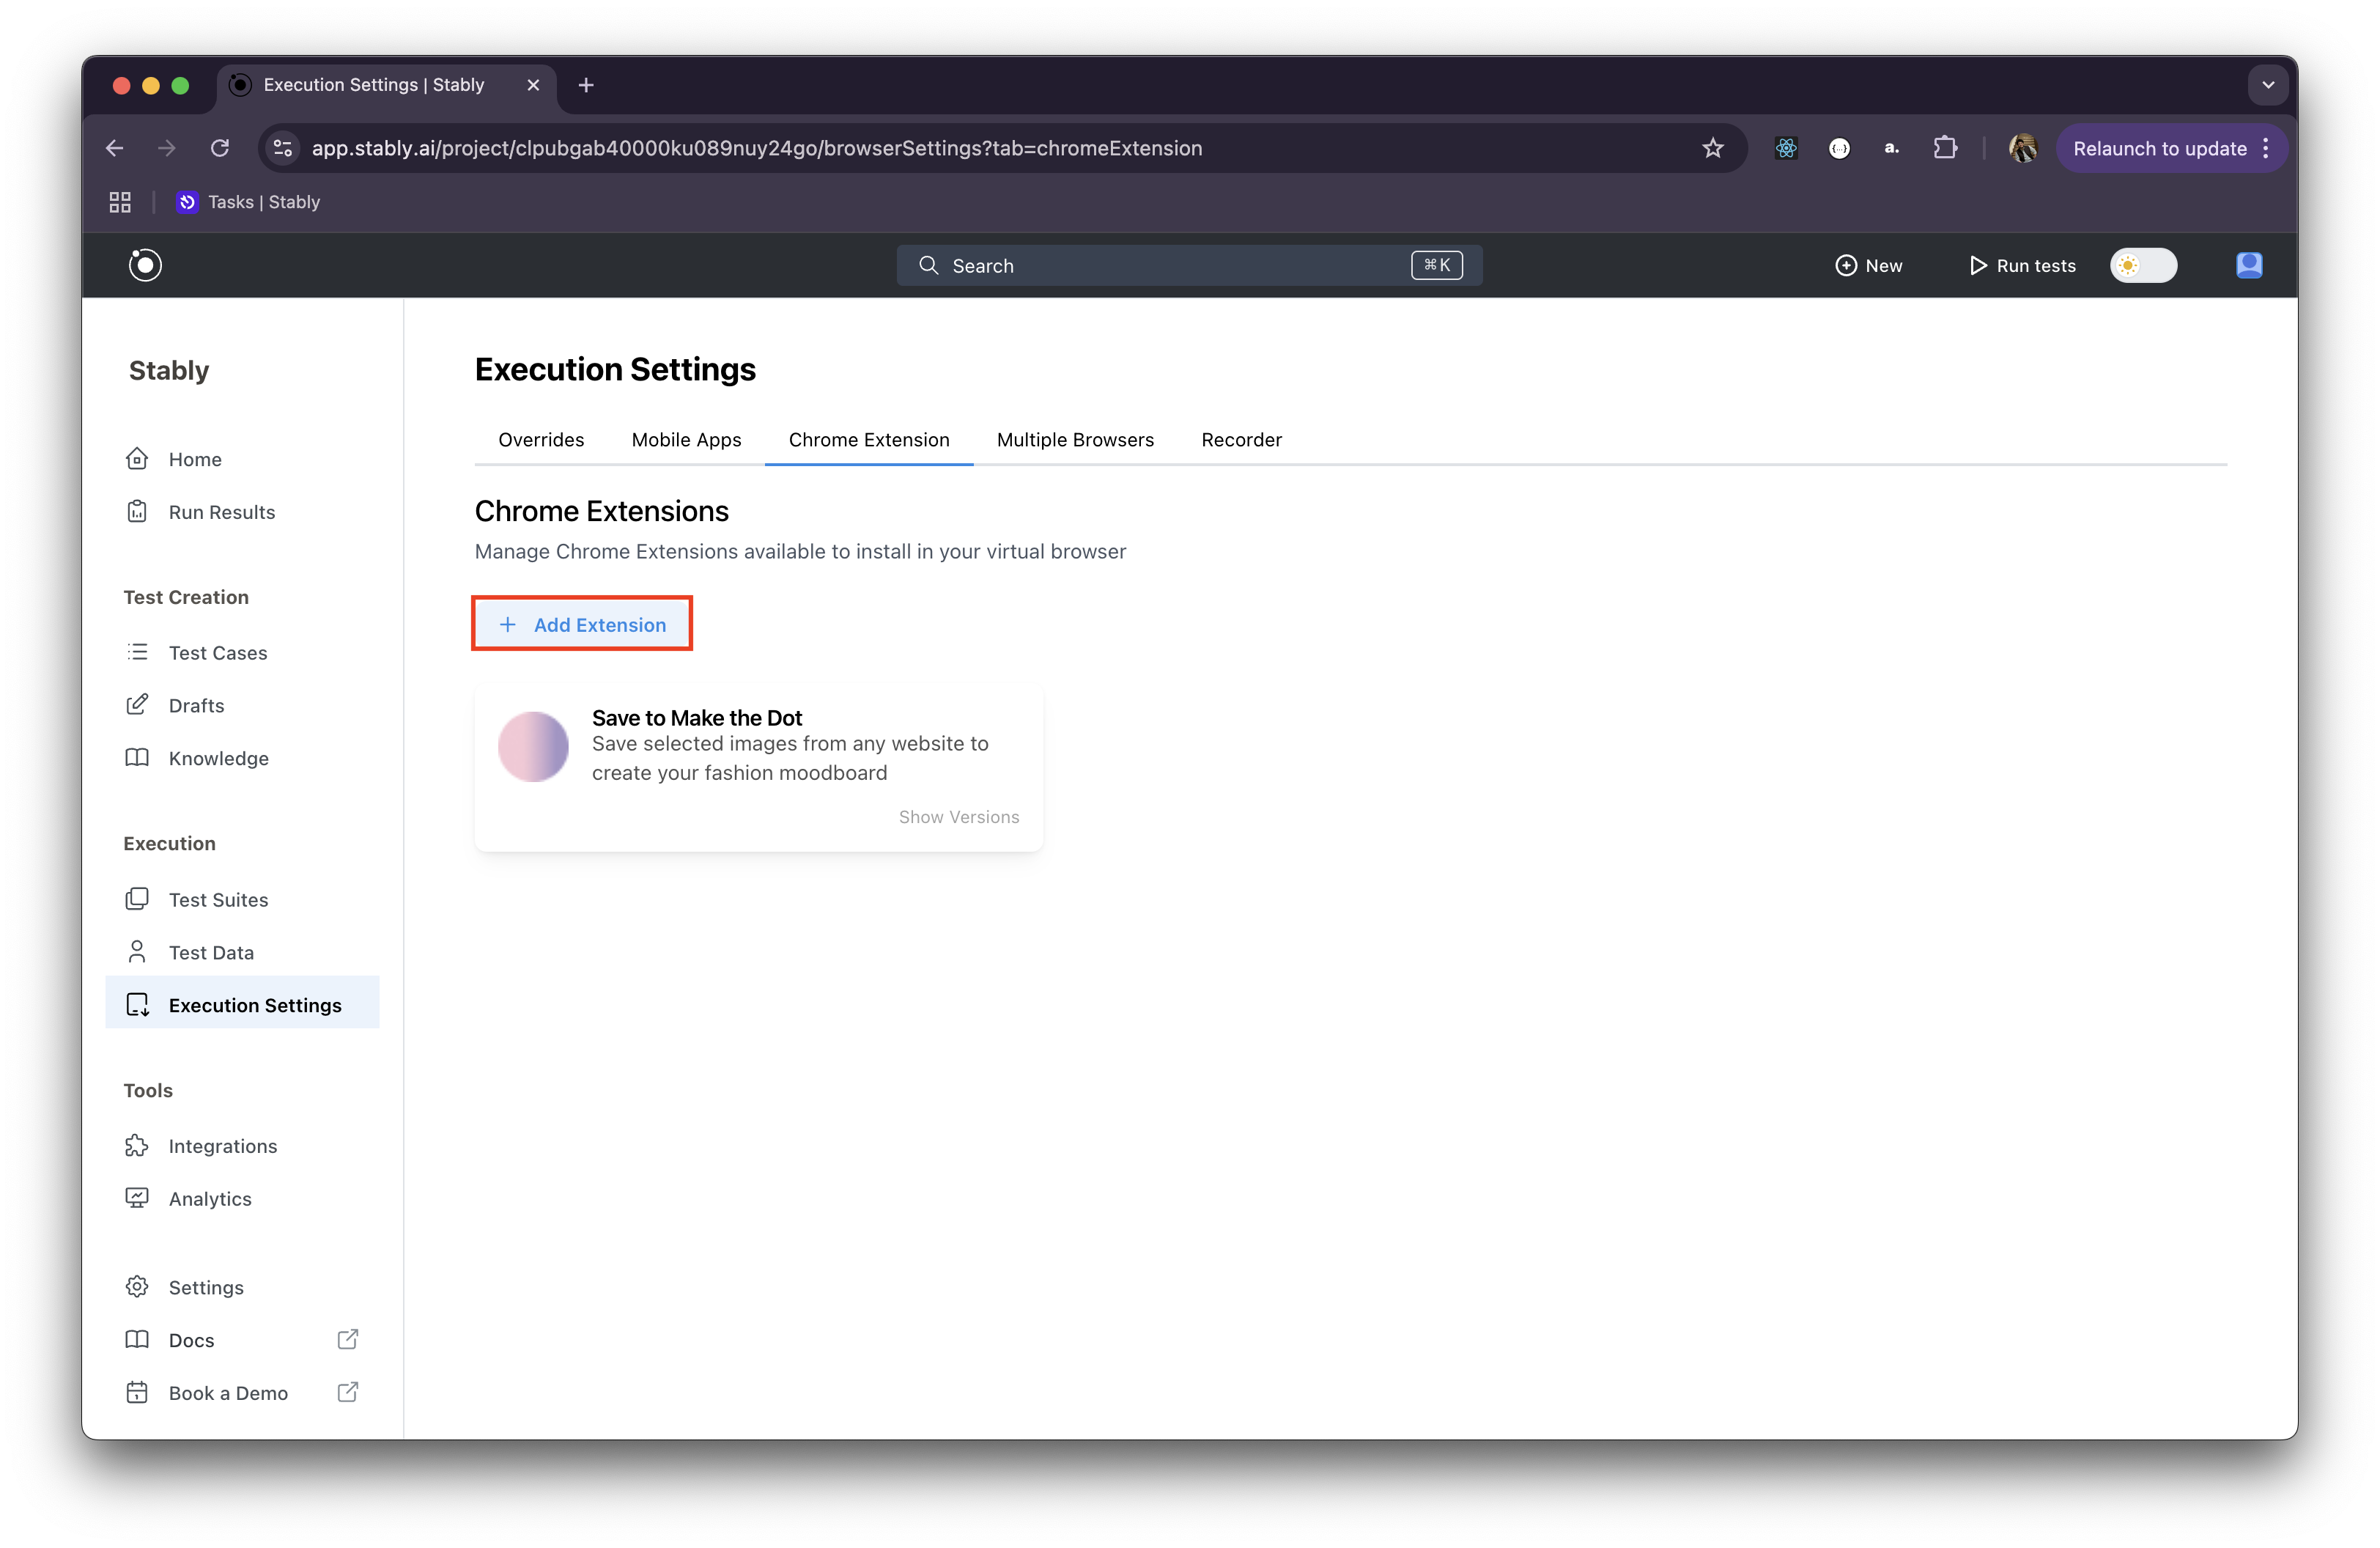
.zip file you created earlier.4
Verify and Complete Upload
Review the displayed extension information, and when satisfied, click Upload. Once the upload is complete, your extension will appear among the others on the same page. If a previous version of the extension already exists, the new upload will be grouped under the same name and versioned accordingly.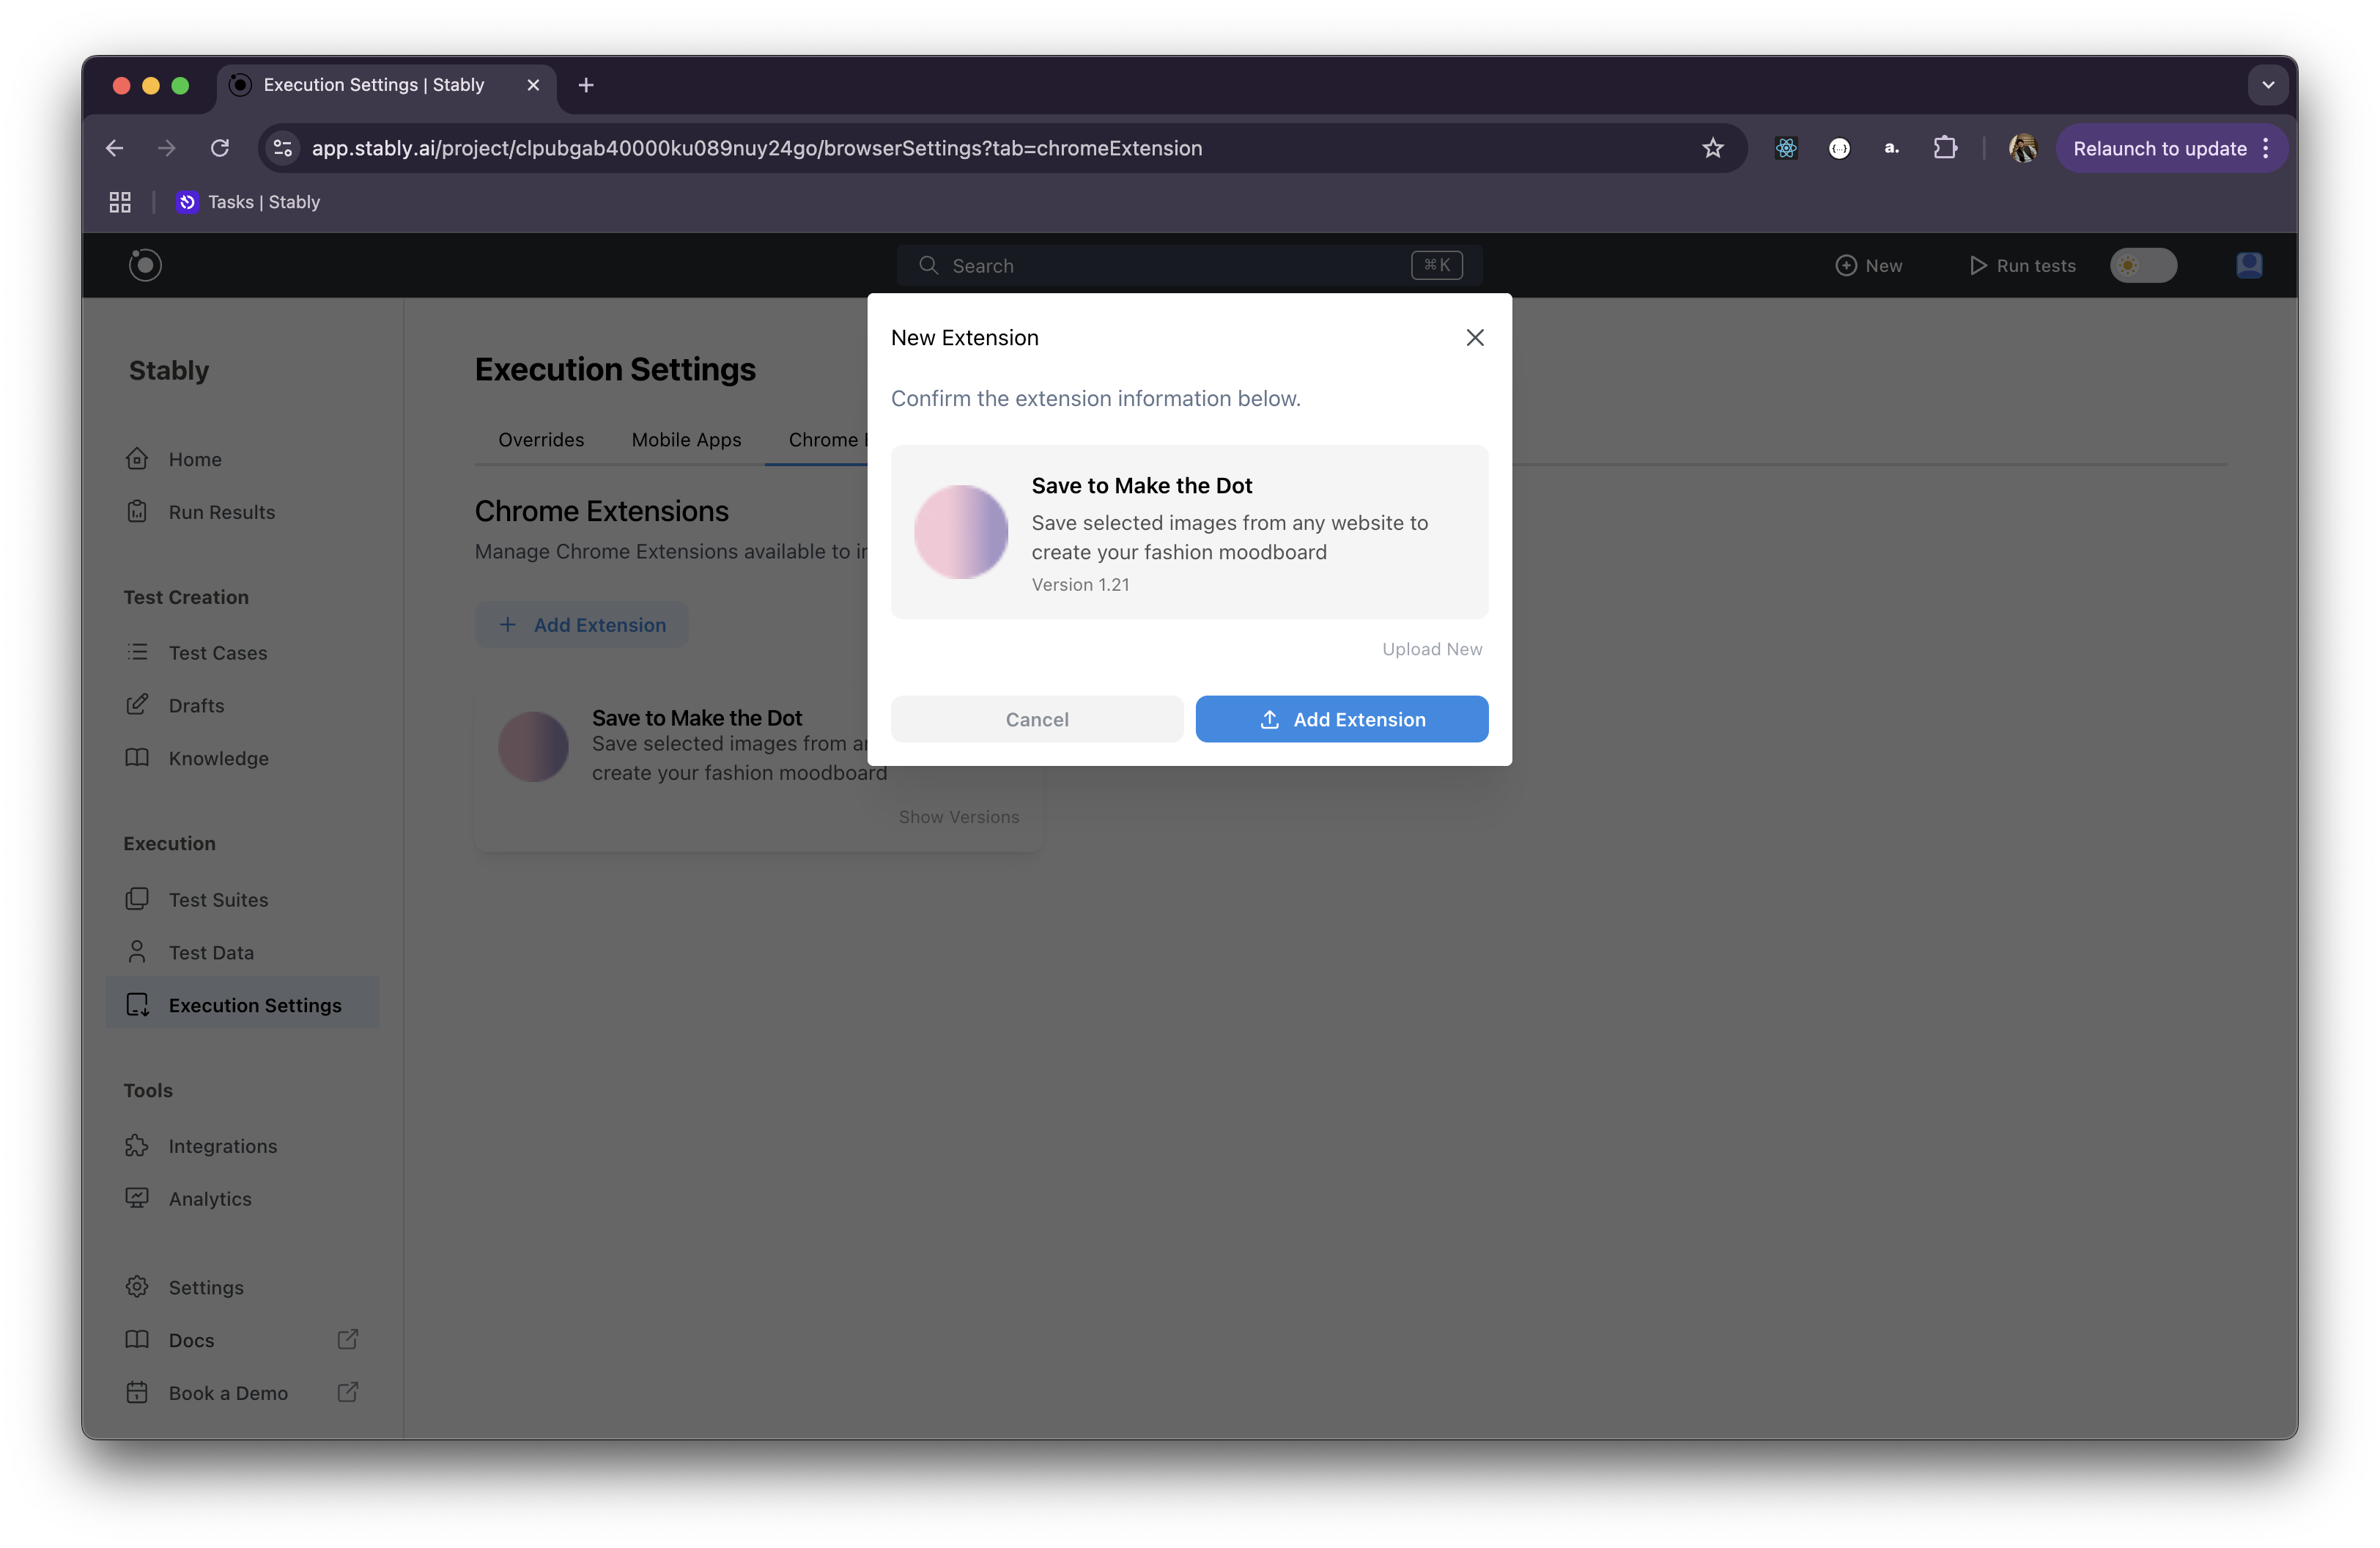
Using in Tests
Once your extension is uploaded, using it in your tests is easy:1
Create a New Test Draft
Choose the Desktop Web test format when creating a new test.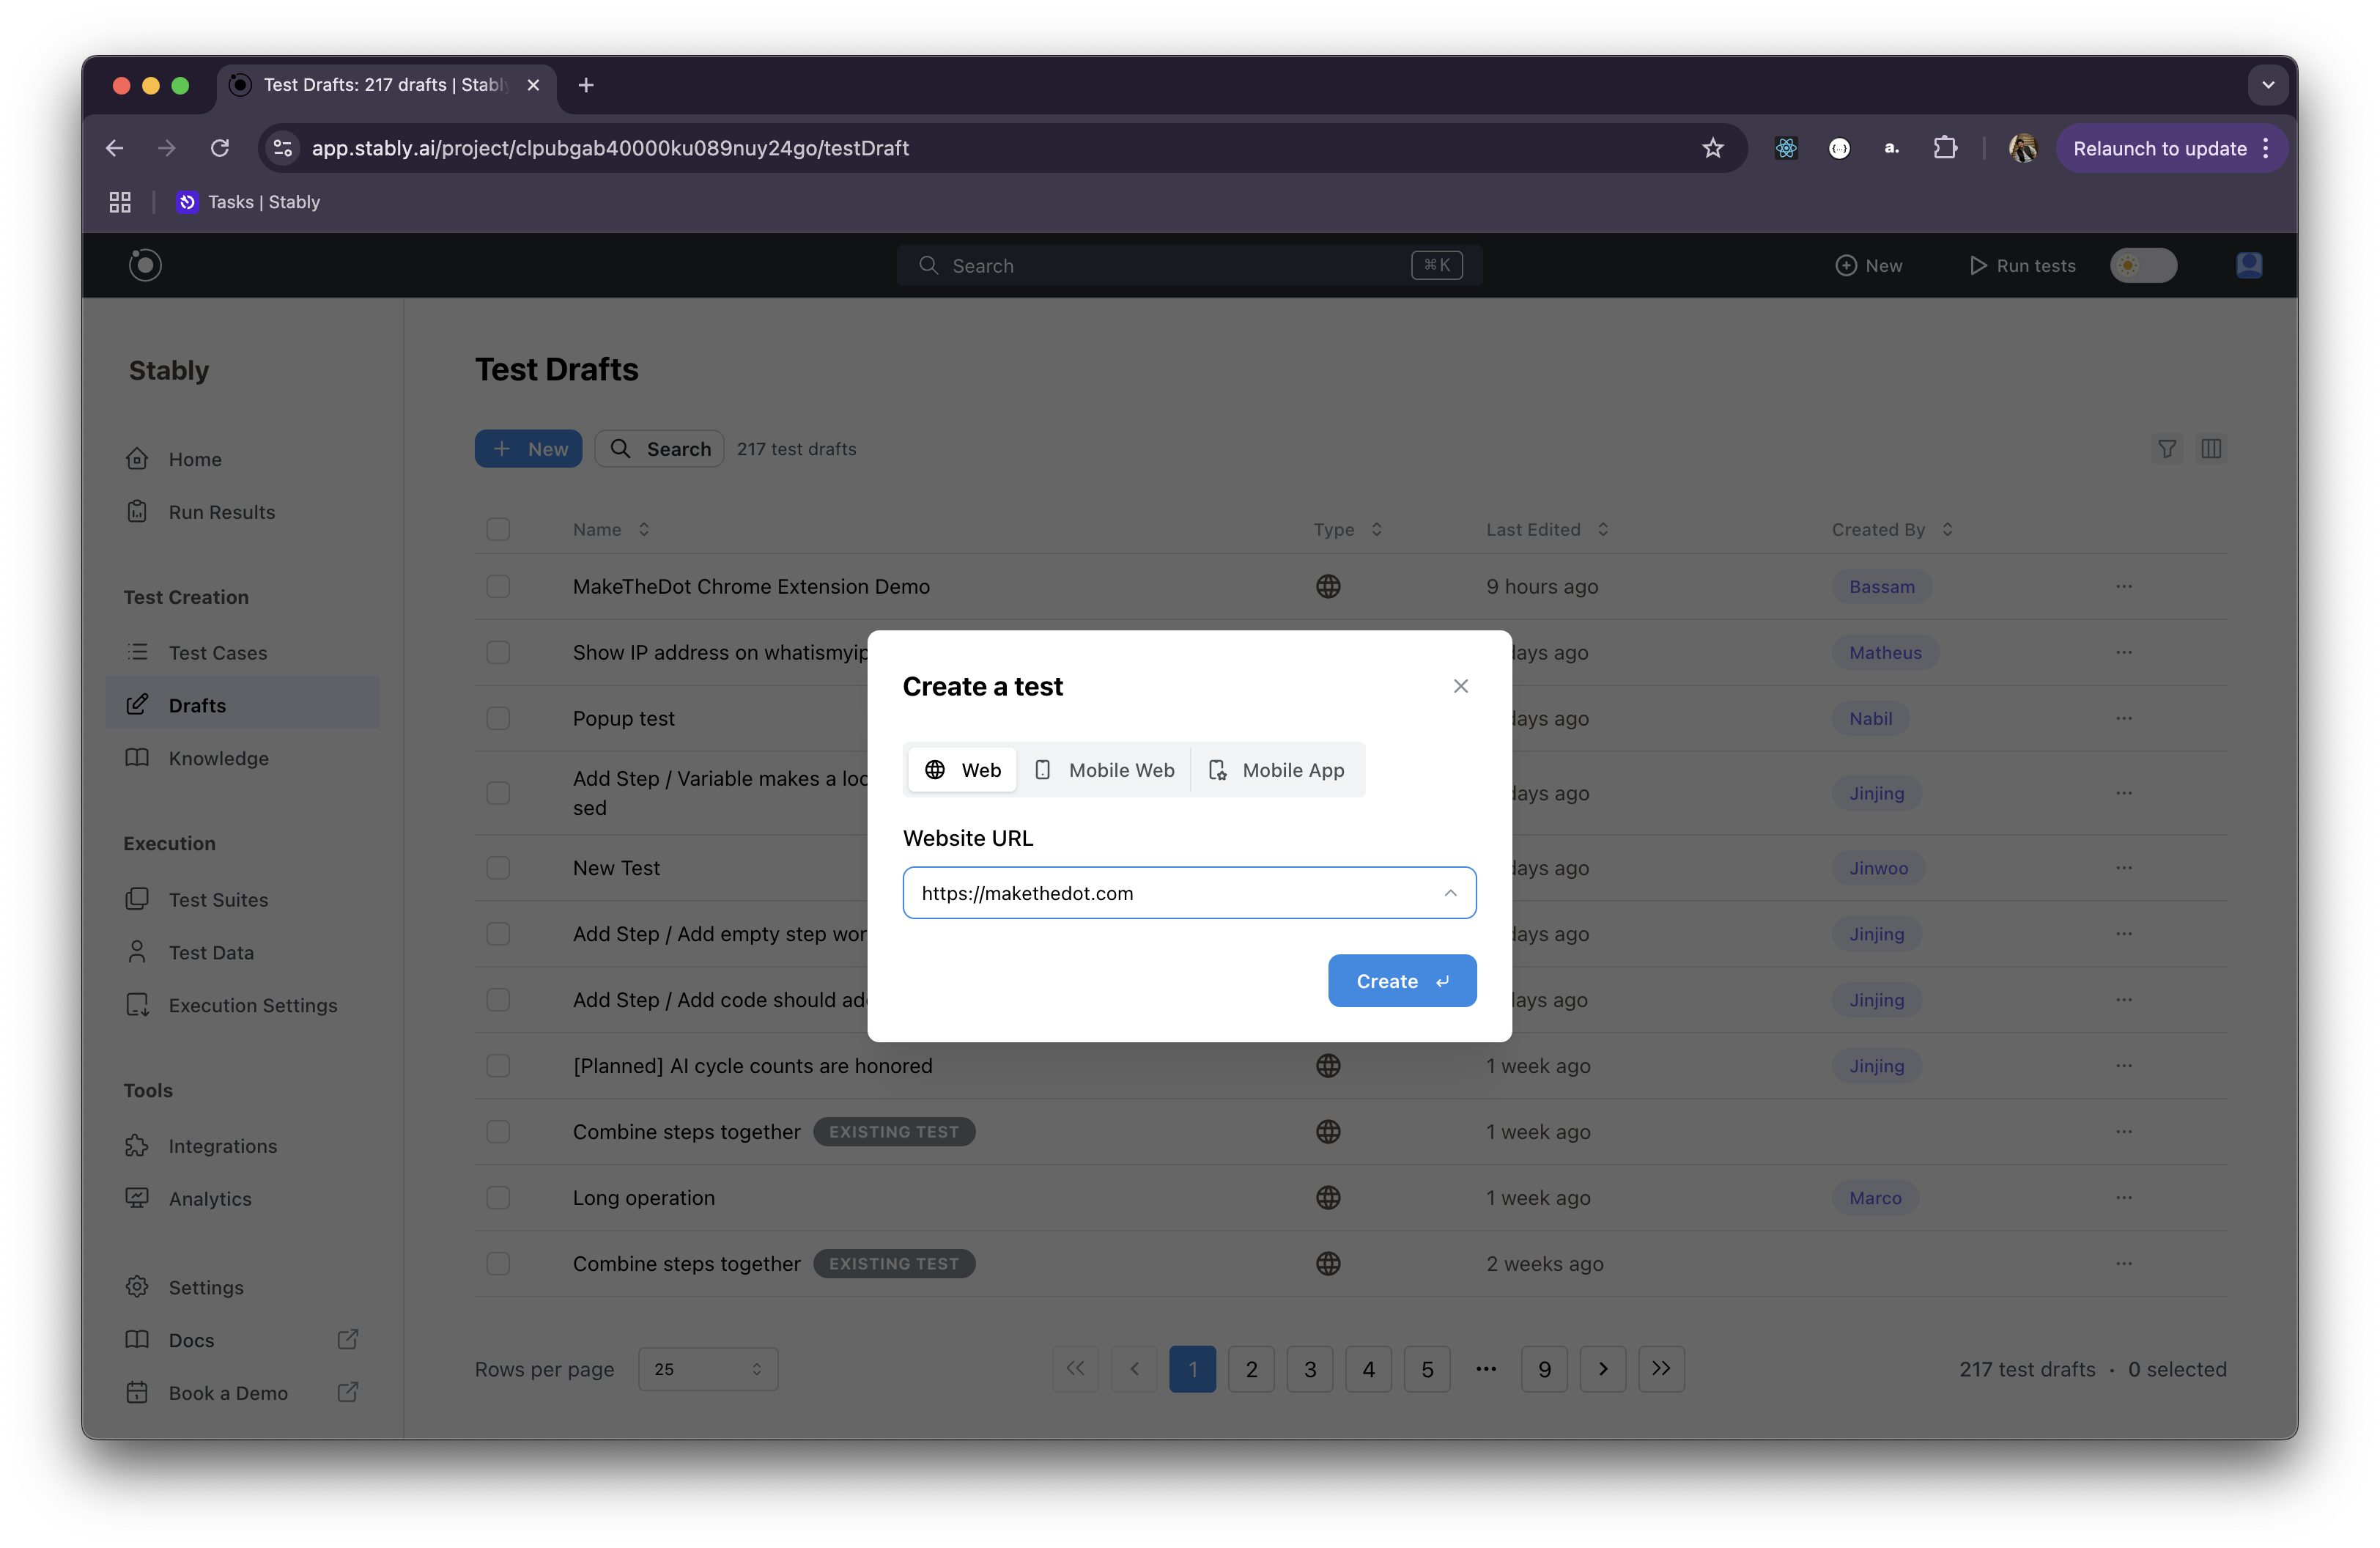
2
Install the Extension
To install the extension onto your virtual browser, select Install Chrome Extension from the Add Step menu.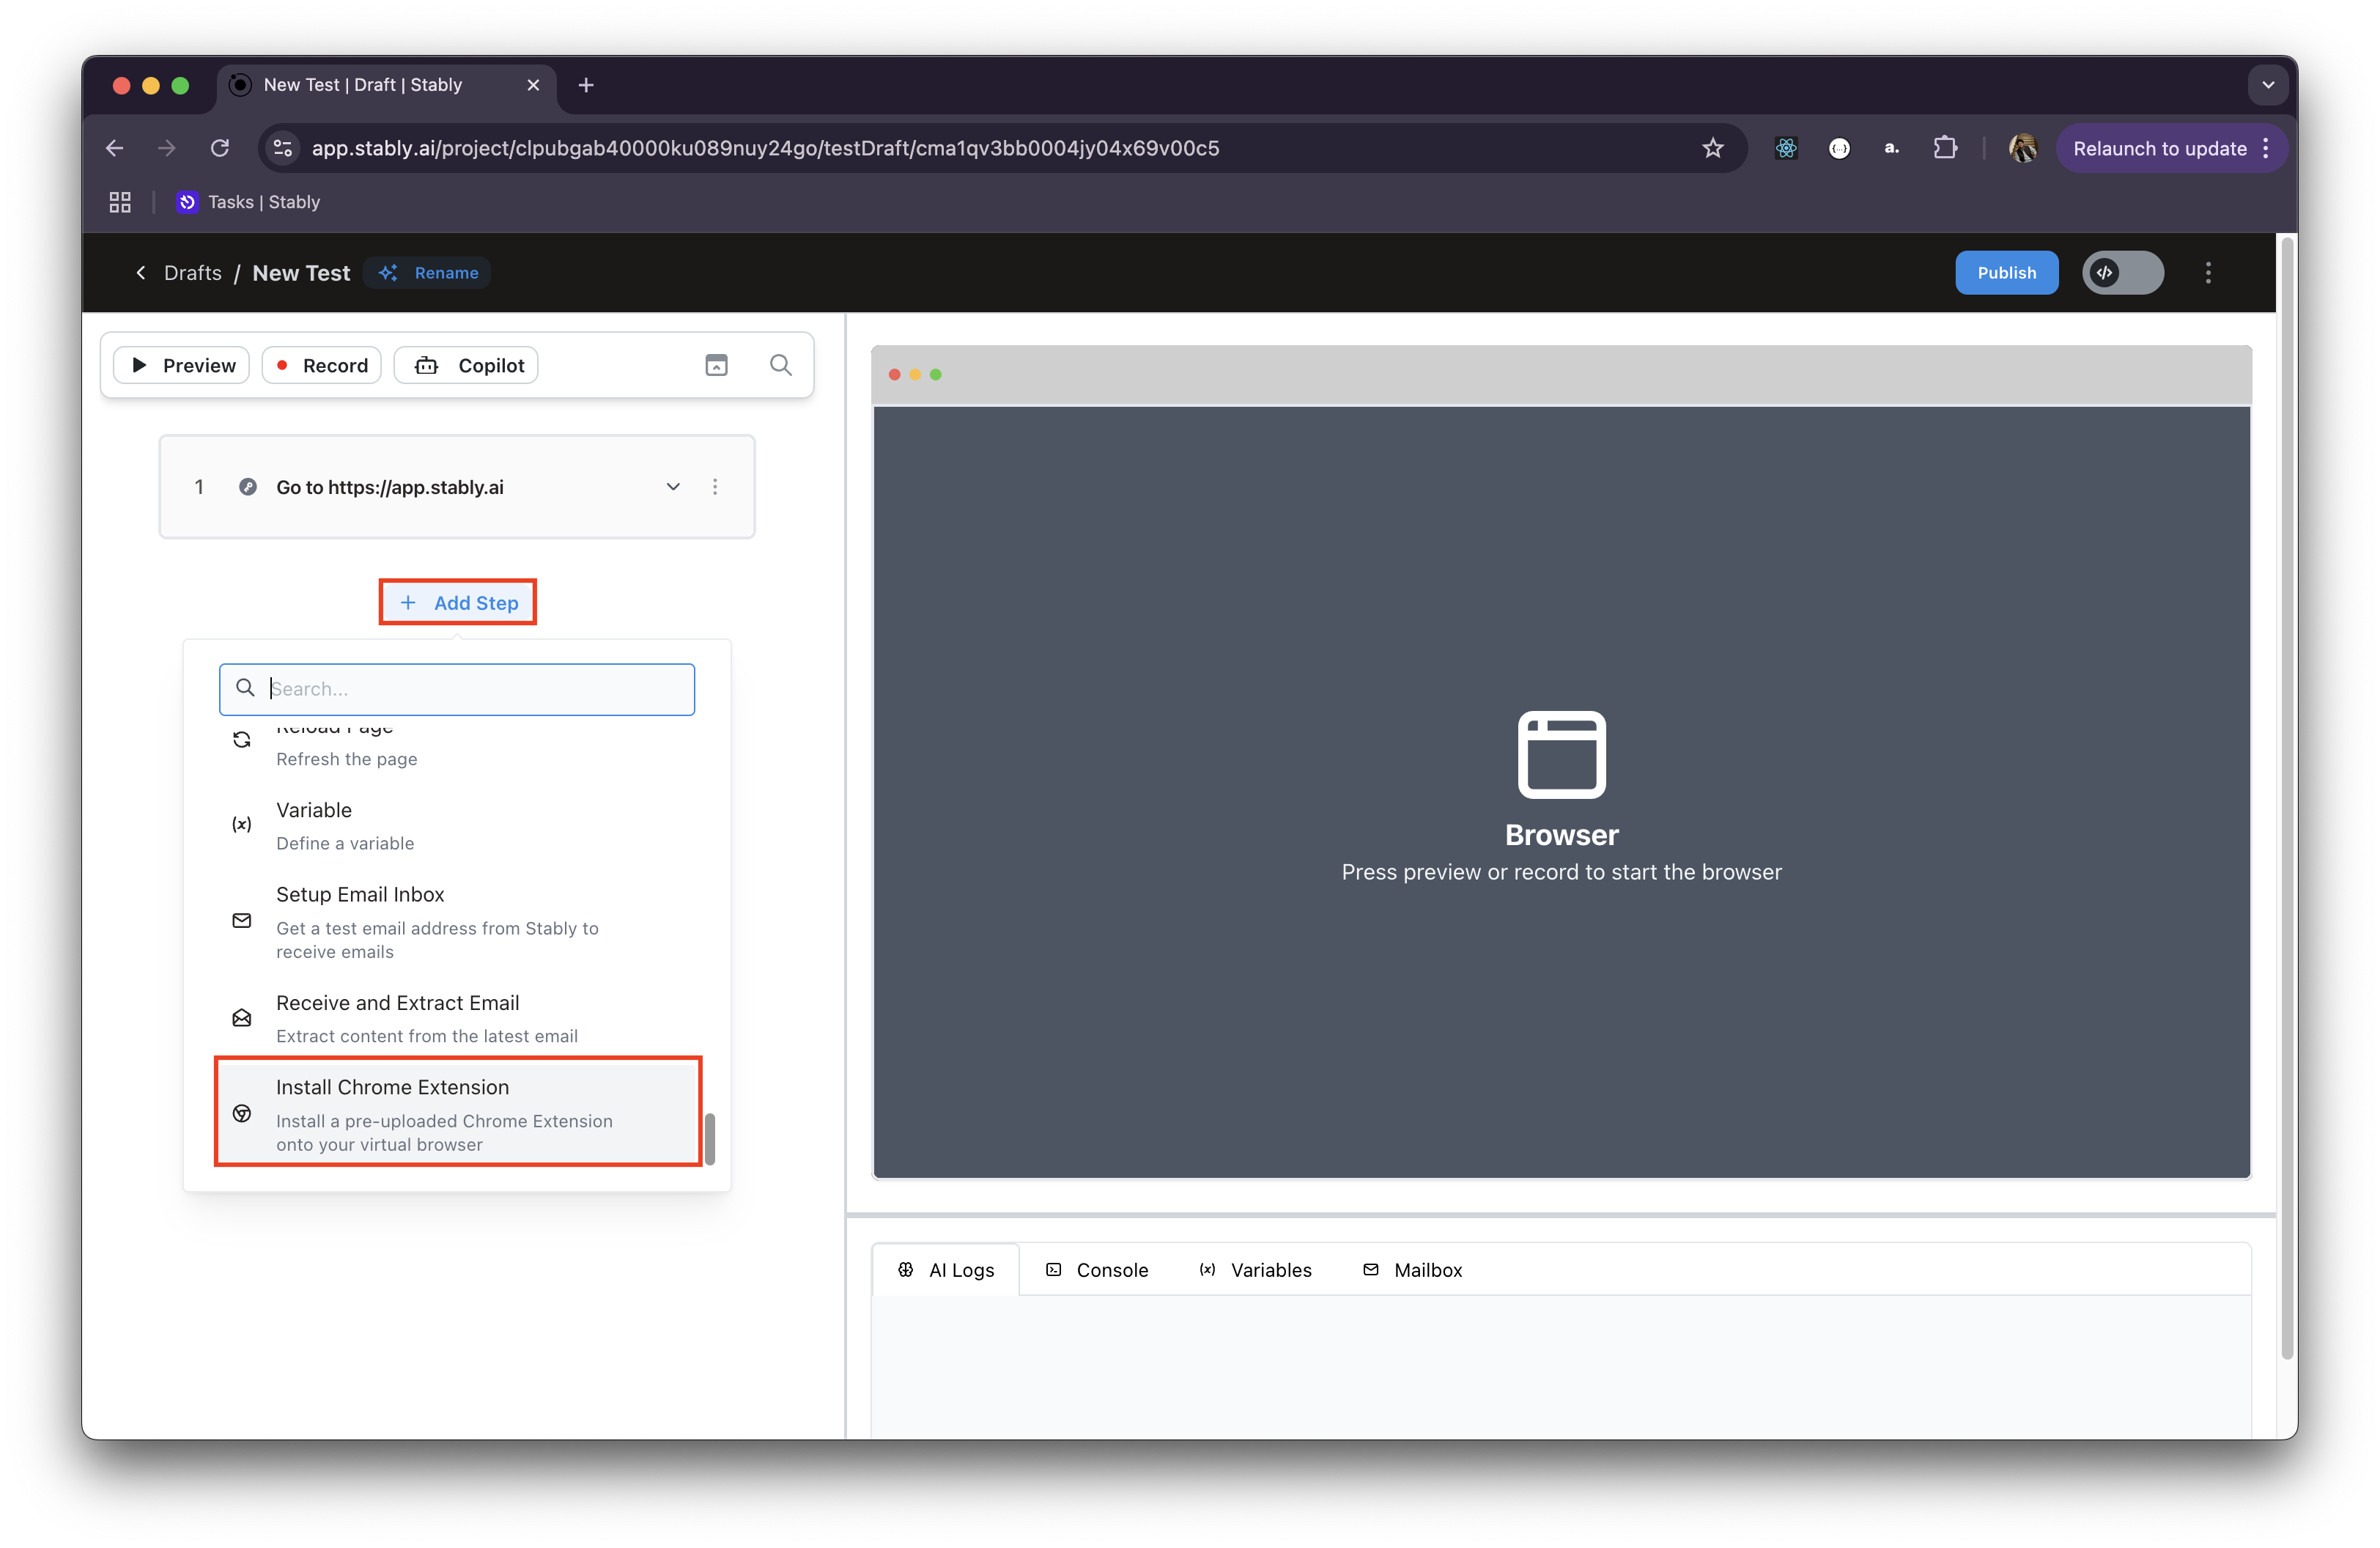
3
Choose the Extension and Version
Pick the Chrome extension and version you want installed on the virtual browser for your test, and click Install.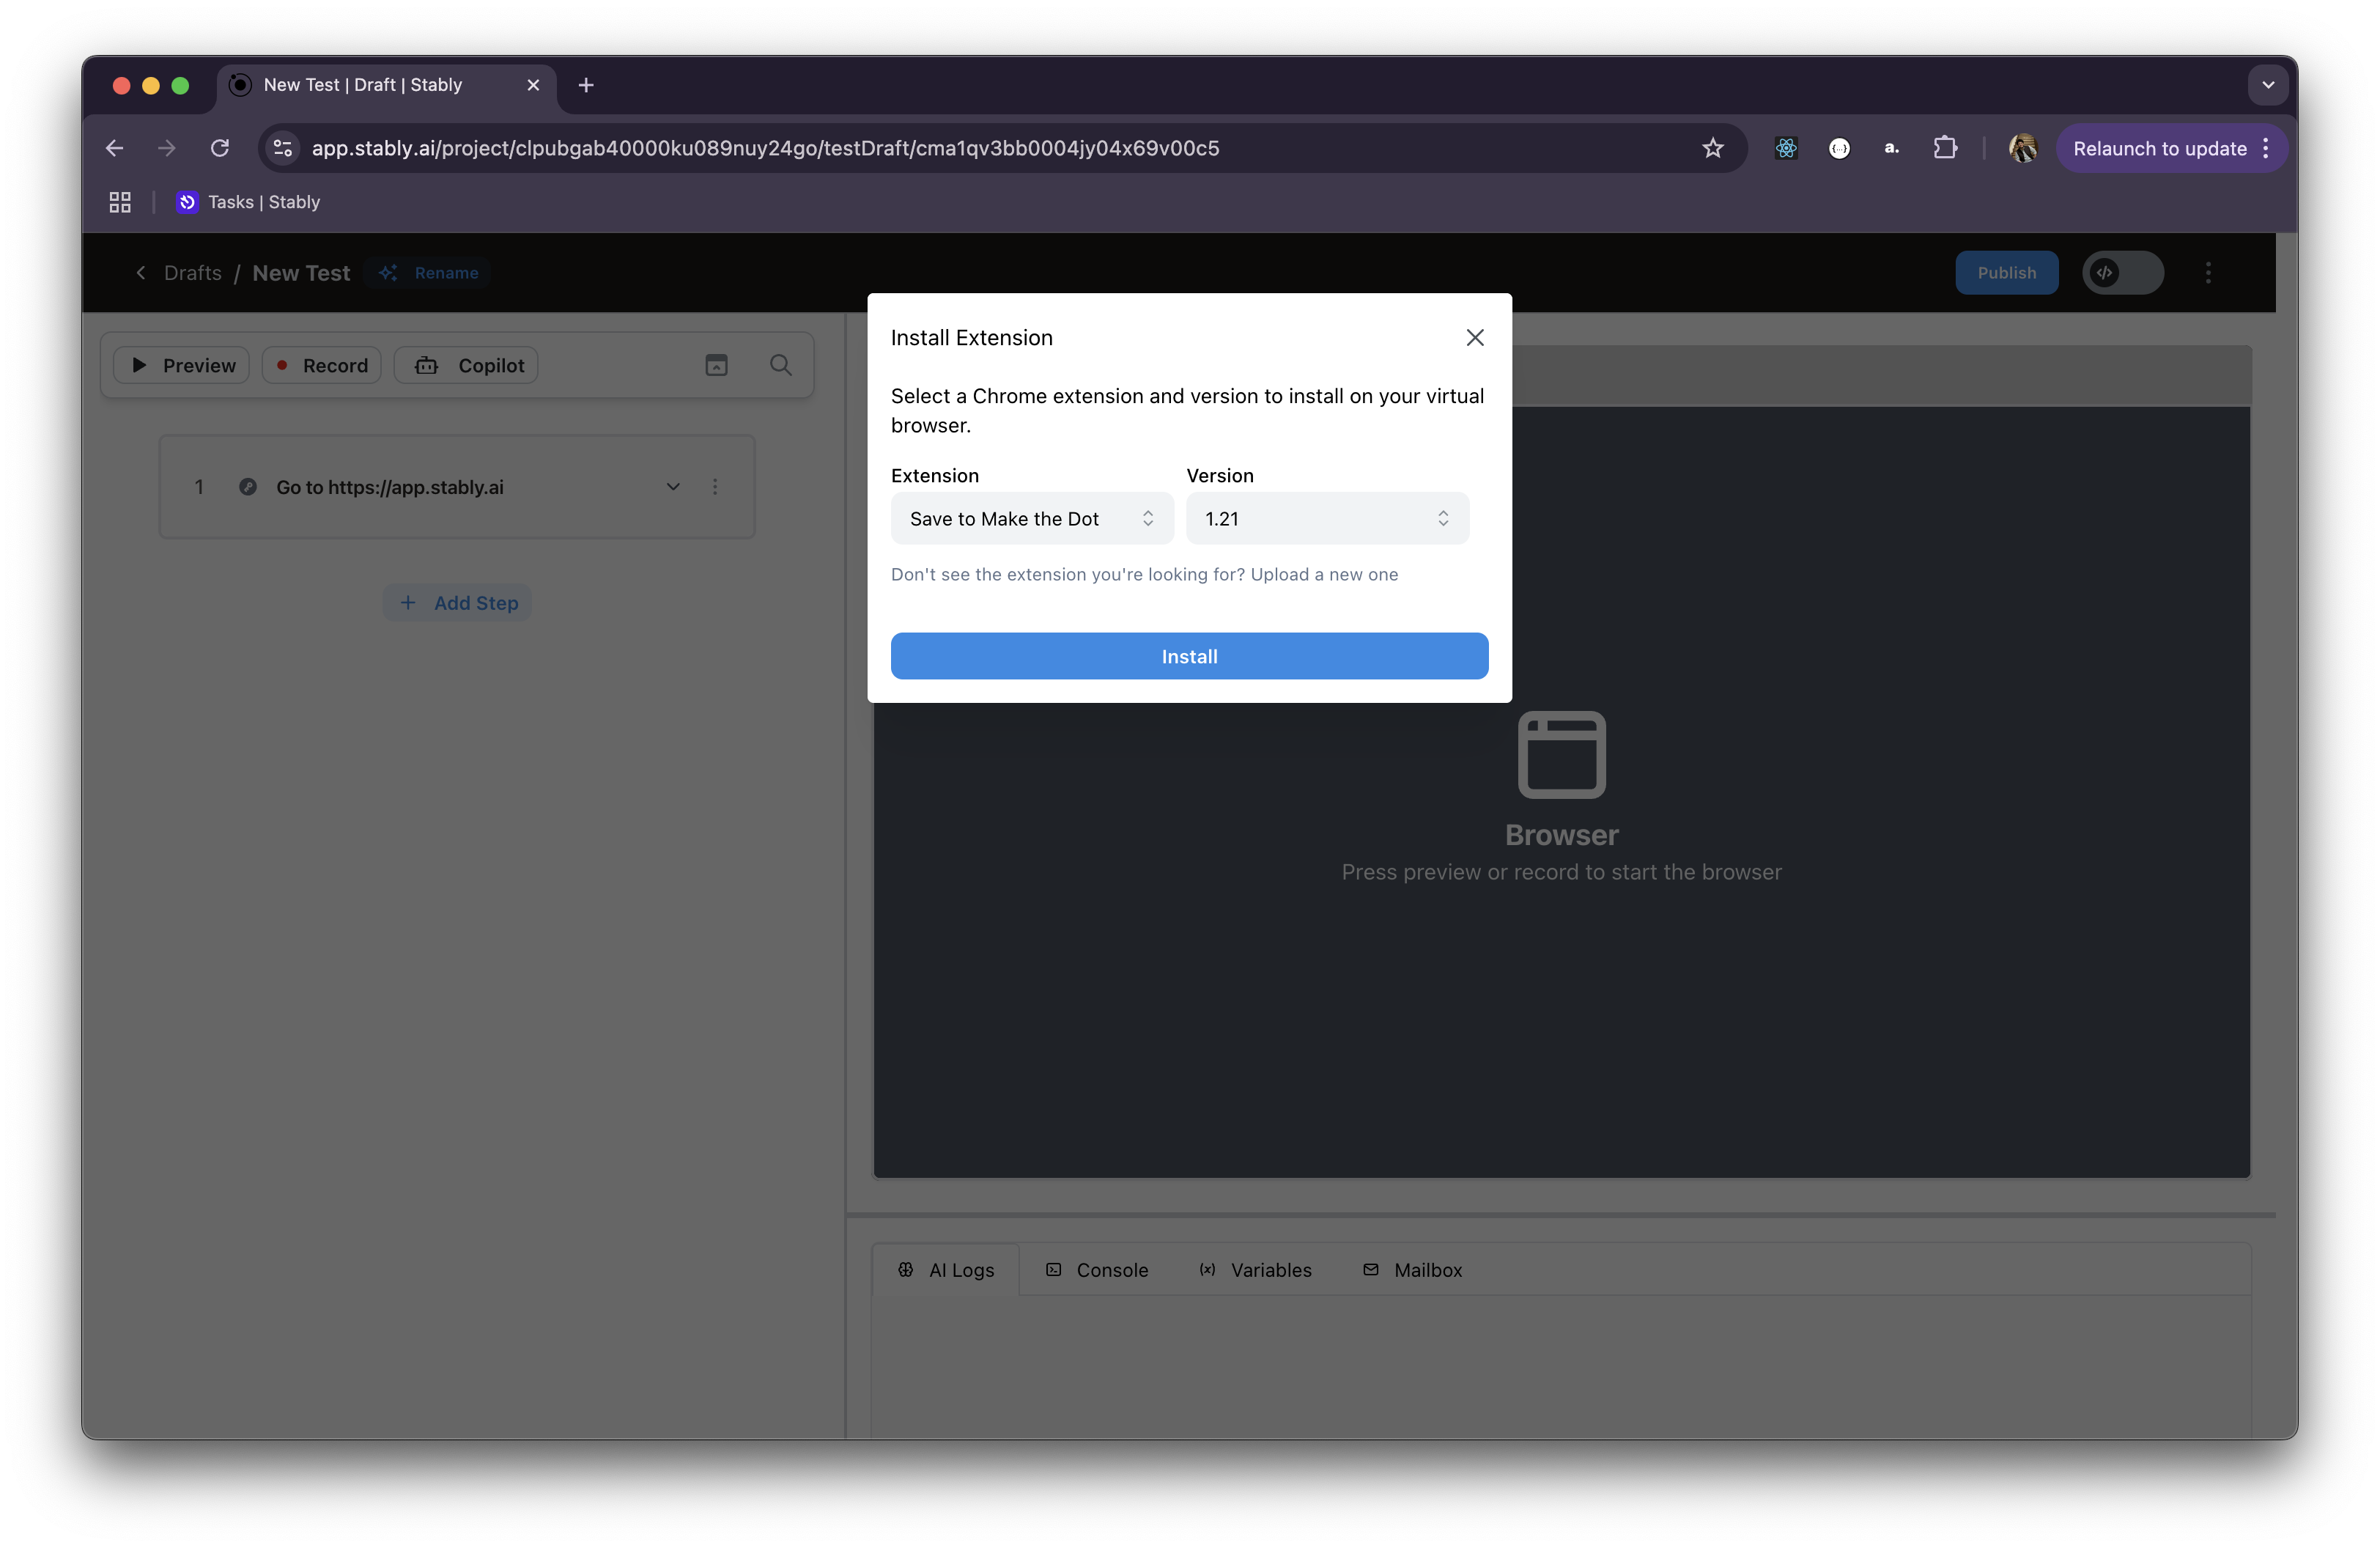
4
Start Testing!
Continue building your test flow as usual. The extension will be available just like in a real Chrome environment.
Pro Tip:
To quickly verify that the extension is installed, navigate to
To quickly verify that the extension is installed, navigate to
chrome://extensions inside your test, and verify that your extension is listed there.