This documentation is for Stably Classic. For the new Stably Web Editor, see Stably Web Editor.
Introduction
Components are reusable sequences of test steps that can be shared across multiple tests. Think of them as building blocks that encapsulate common workflows like login sequences, navigation patterns, or complex user interactions. By creating components, you can:- Reduce duplication across your test suite
- Improve maintainability by updating logic in one place
- Ensure consistency in how common workflows are executed
- Speed up test creation by reusing pre-built sequences
Creating Components
You can create components from existing test steps in any test. Once created, components become available across your entire workspace for reuse in other tests.From Existing Test Steps
Select the steps to componentize
In your test editor, select all the steps that you want to turn into a reusable component. You can select multiple consecutive steps by clicking on the first step, then holding Shift and clicking on the last step.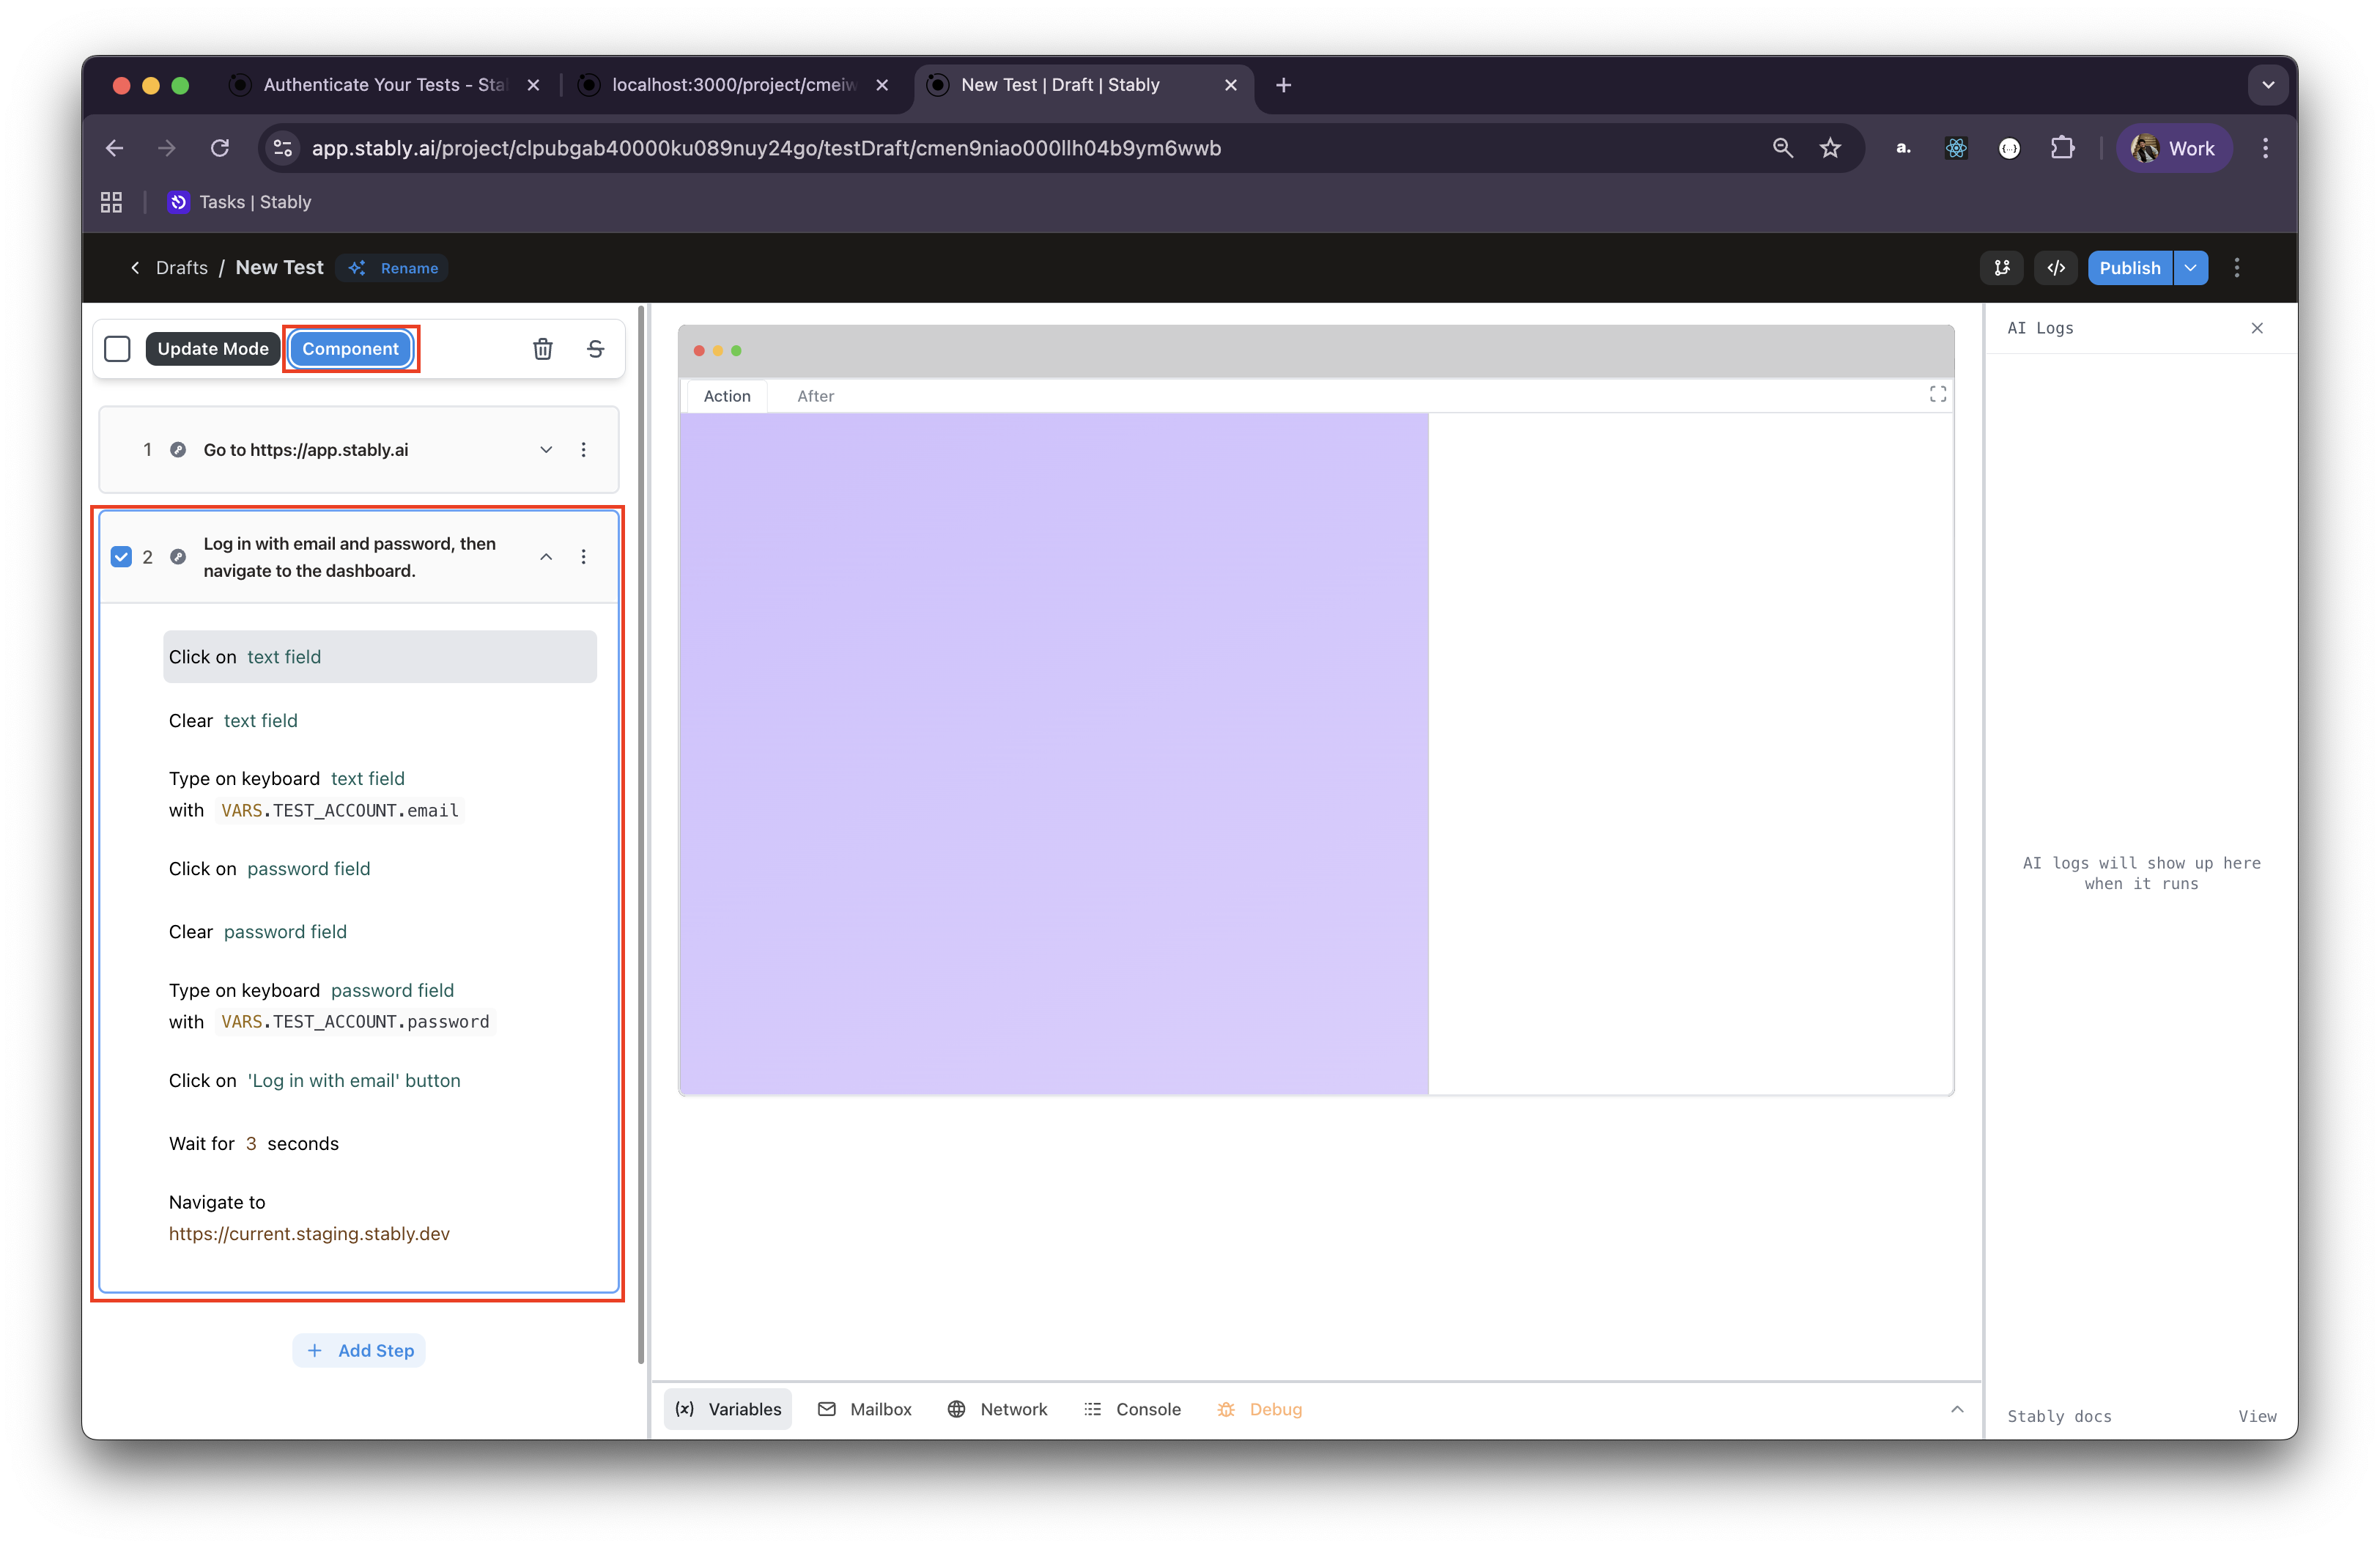
Create the component
With your steps selected, click “Create Component” from the action menu.
This will open the component creation dialog.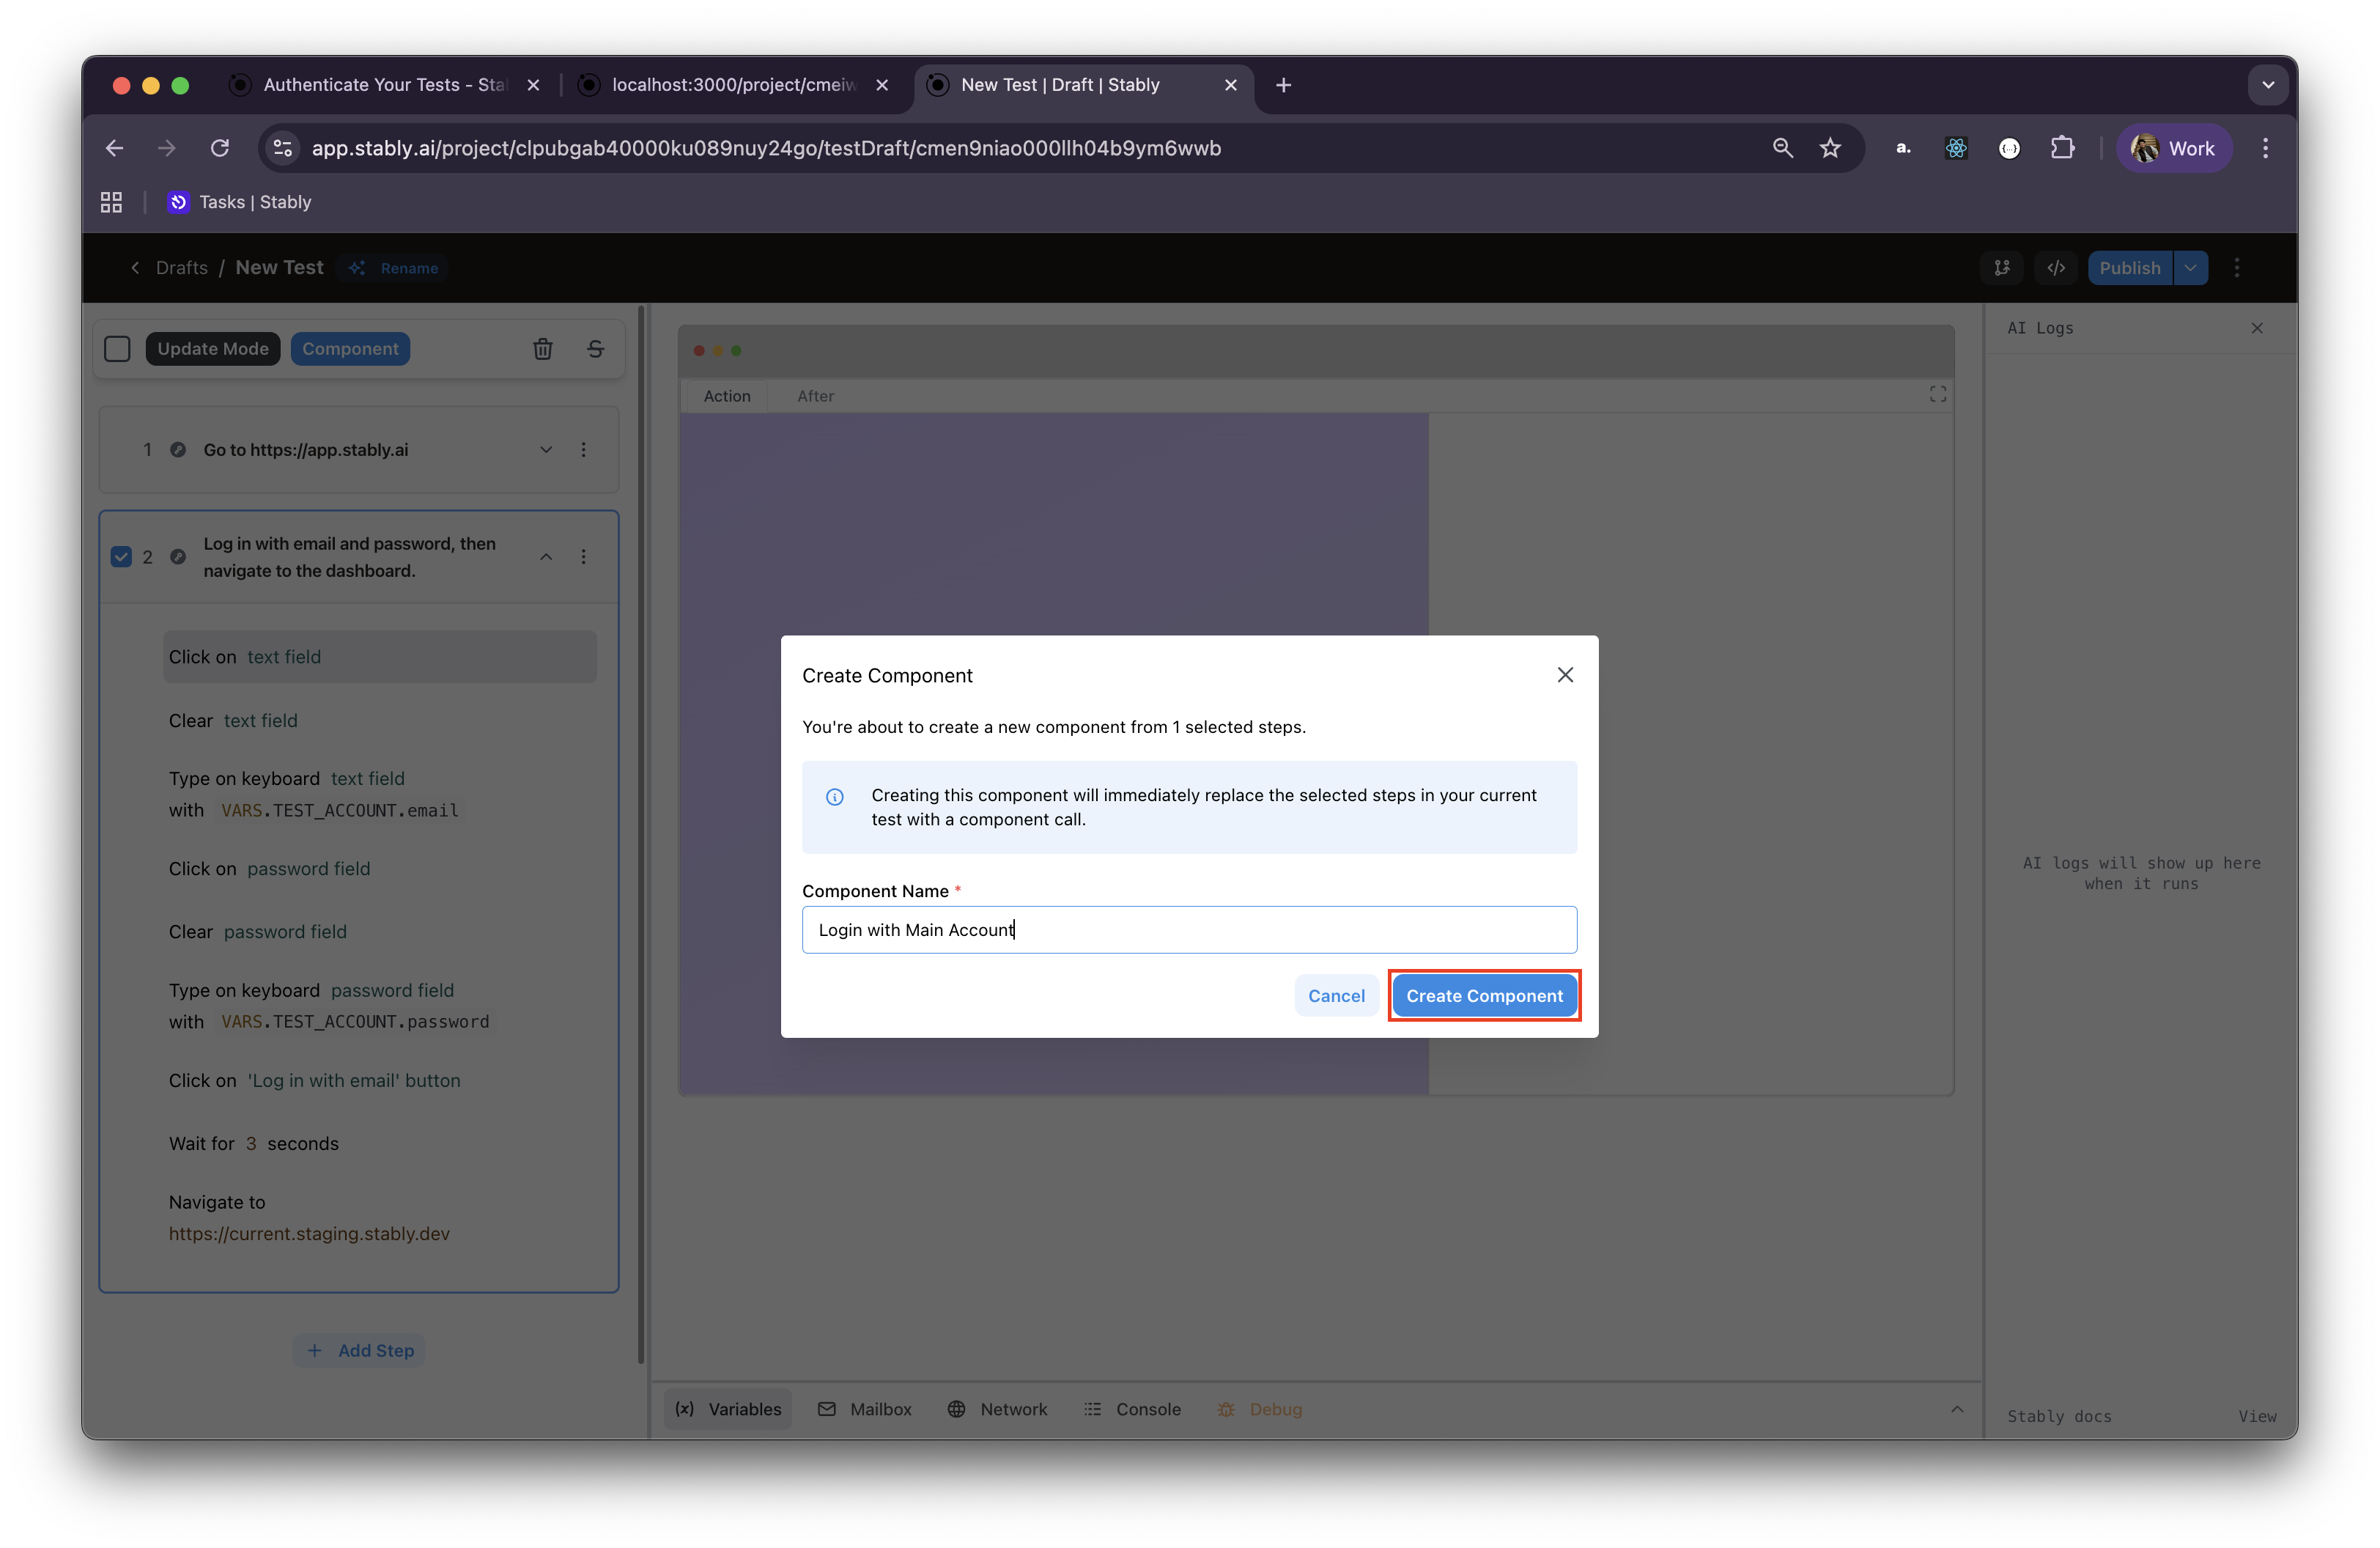
Name and describe your component
Give your component a clear, descriptive name that reflects its purpose. Good examples include:
- “Login with Admin Account”
- “Navigate to User Profile”
- “Complete Checkout Process”
- “Setup Test Data”
Component Parameters: Components can accept parameters to make them more
flexible. If your component uses variables, those variables will be accessible
when the component is called.
Using Components in Tests
Once created, components can be easily added to any test in your workspace through the step menu.Adding Components to New Tests
Open the Add Step menu
In your test editor, click “Add Step” at the position where you want to insert the component.
Find your component
Scroll down or use the search functionality to find your component. Components
are typically listed under their own section in the step menu.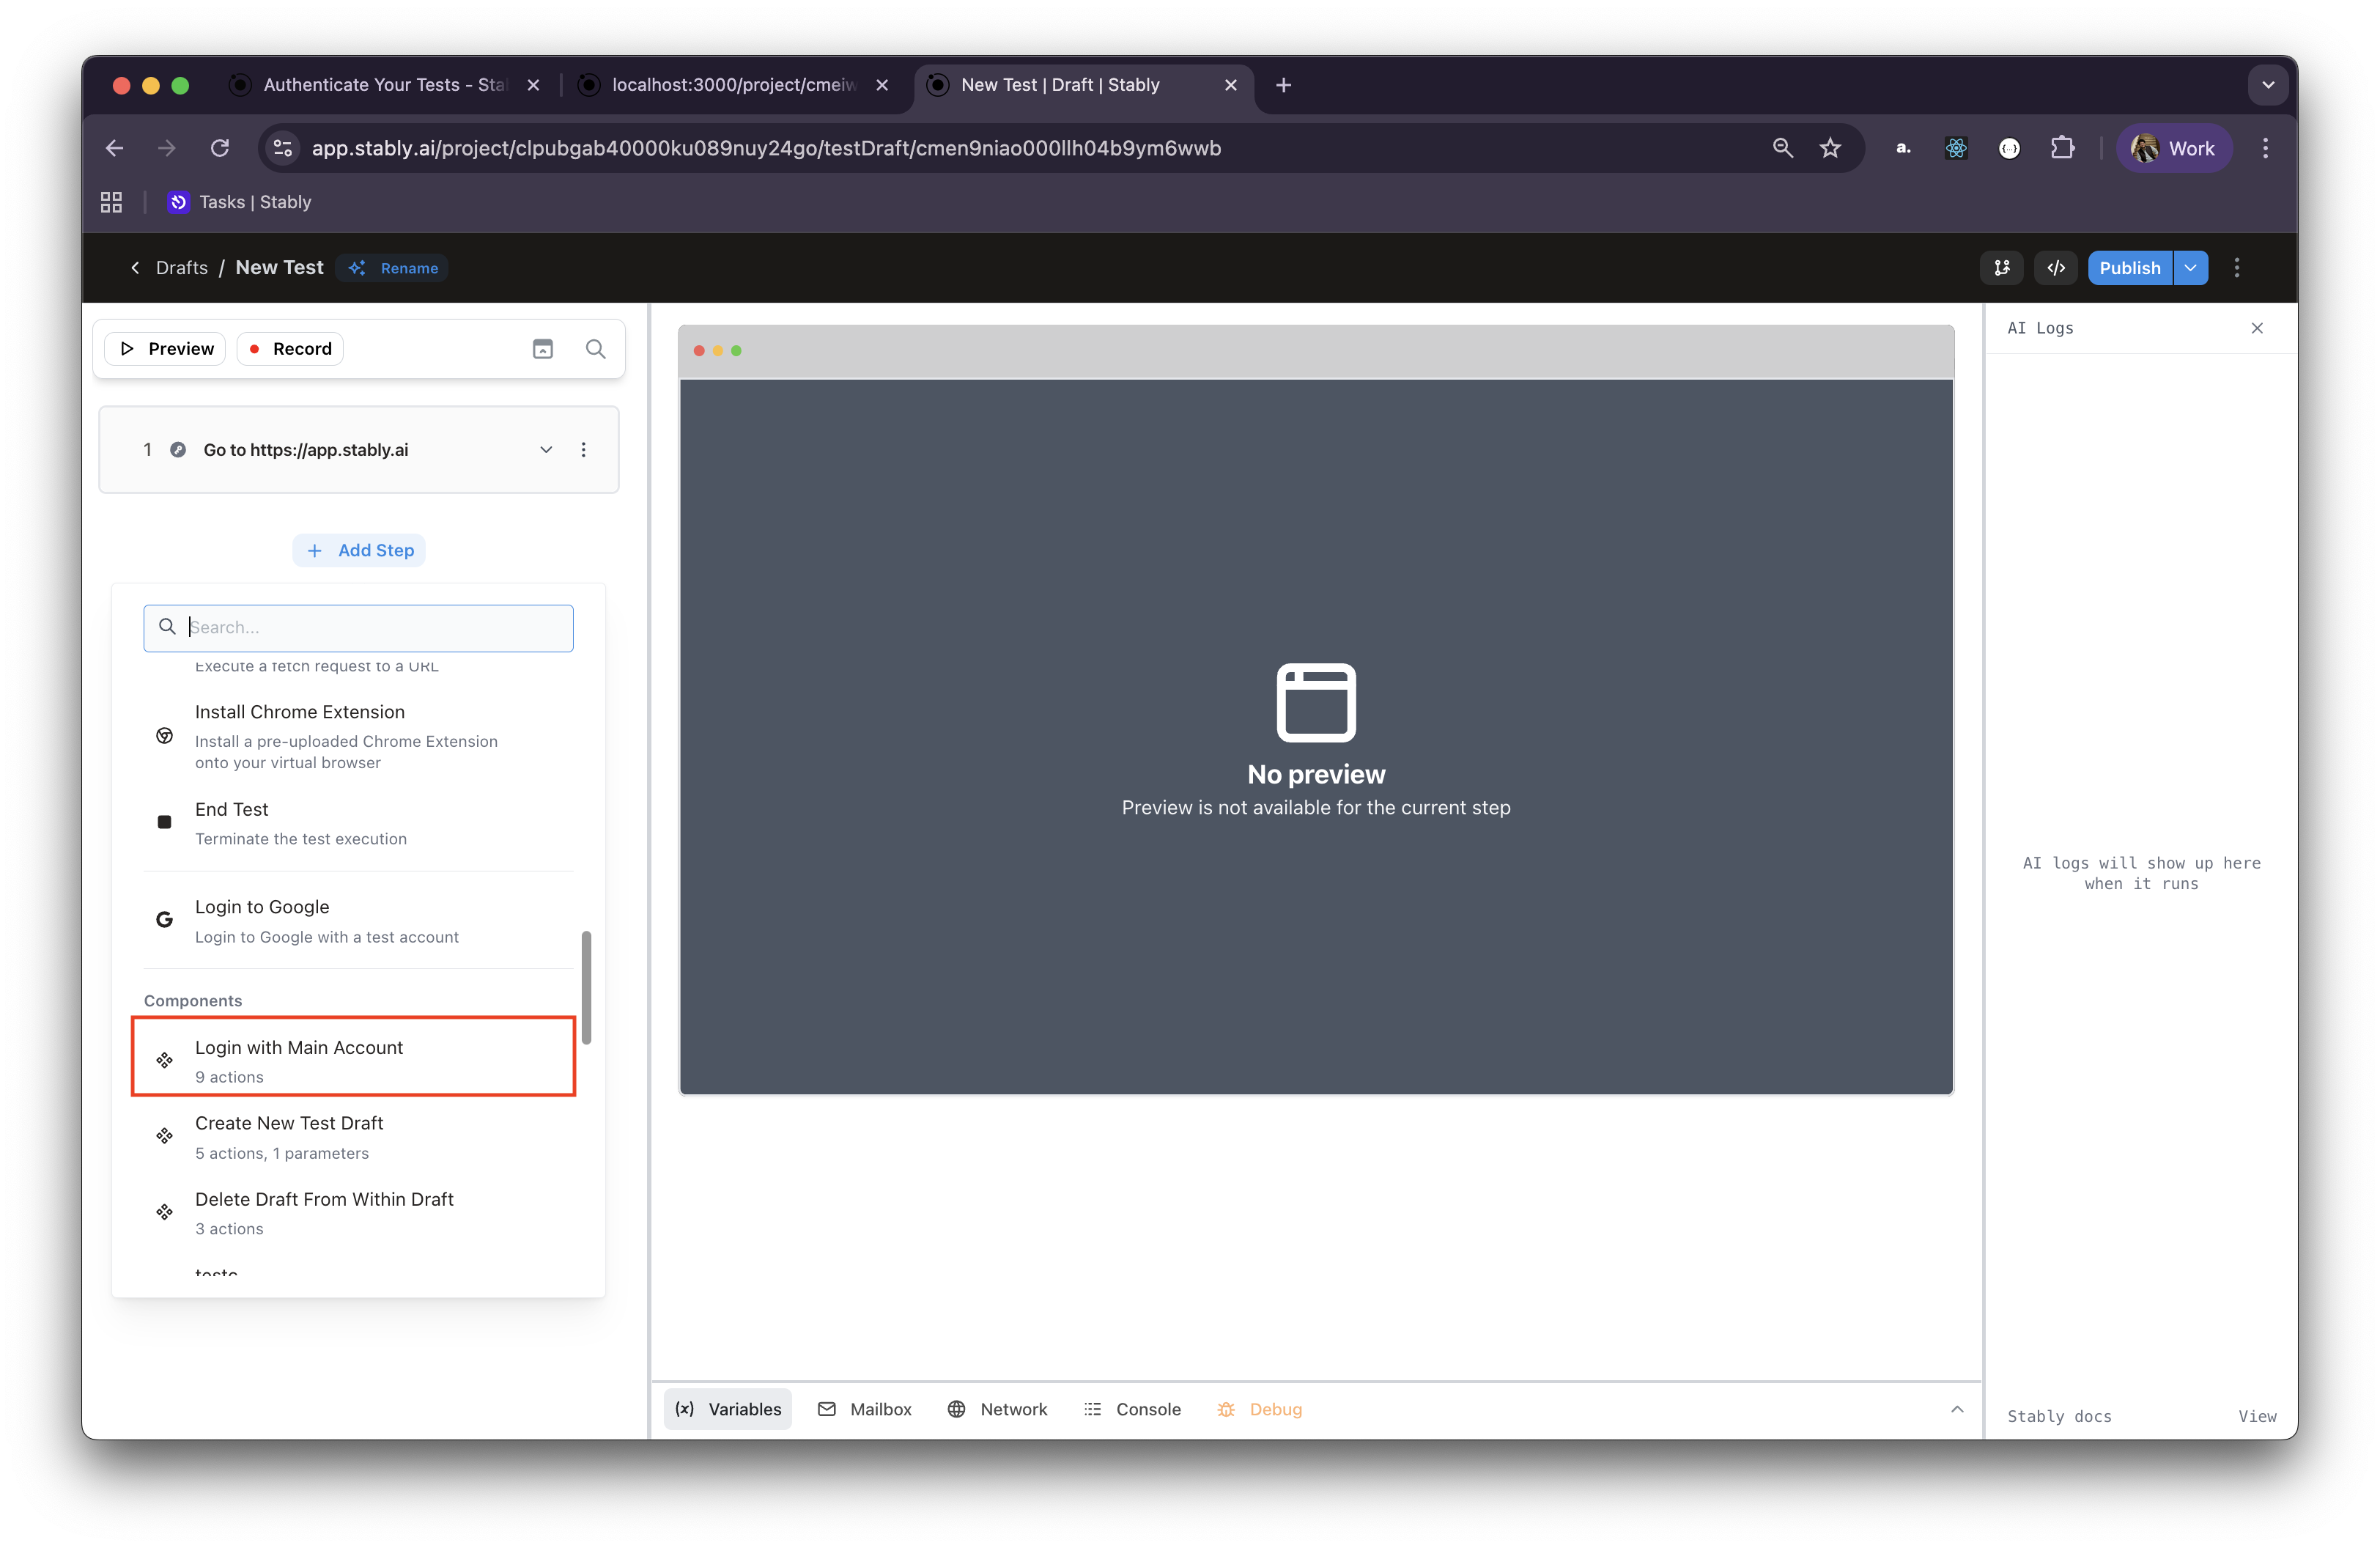
Configuring Component Parameters
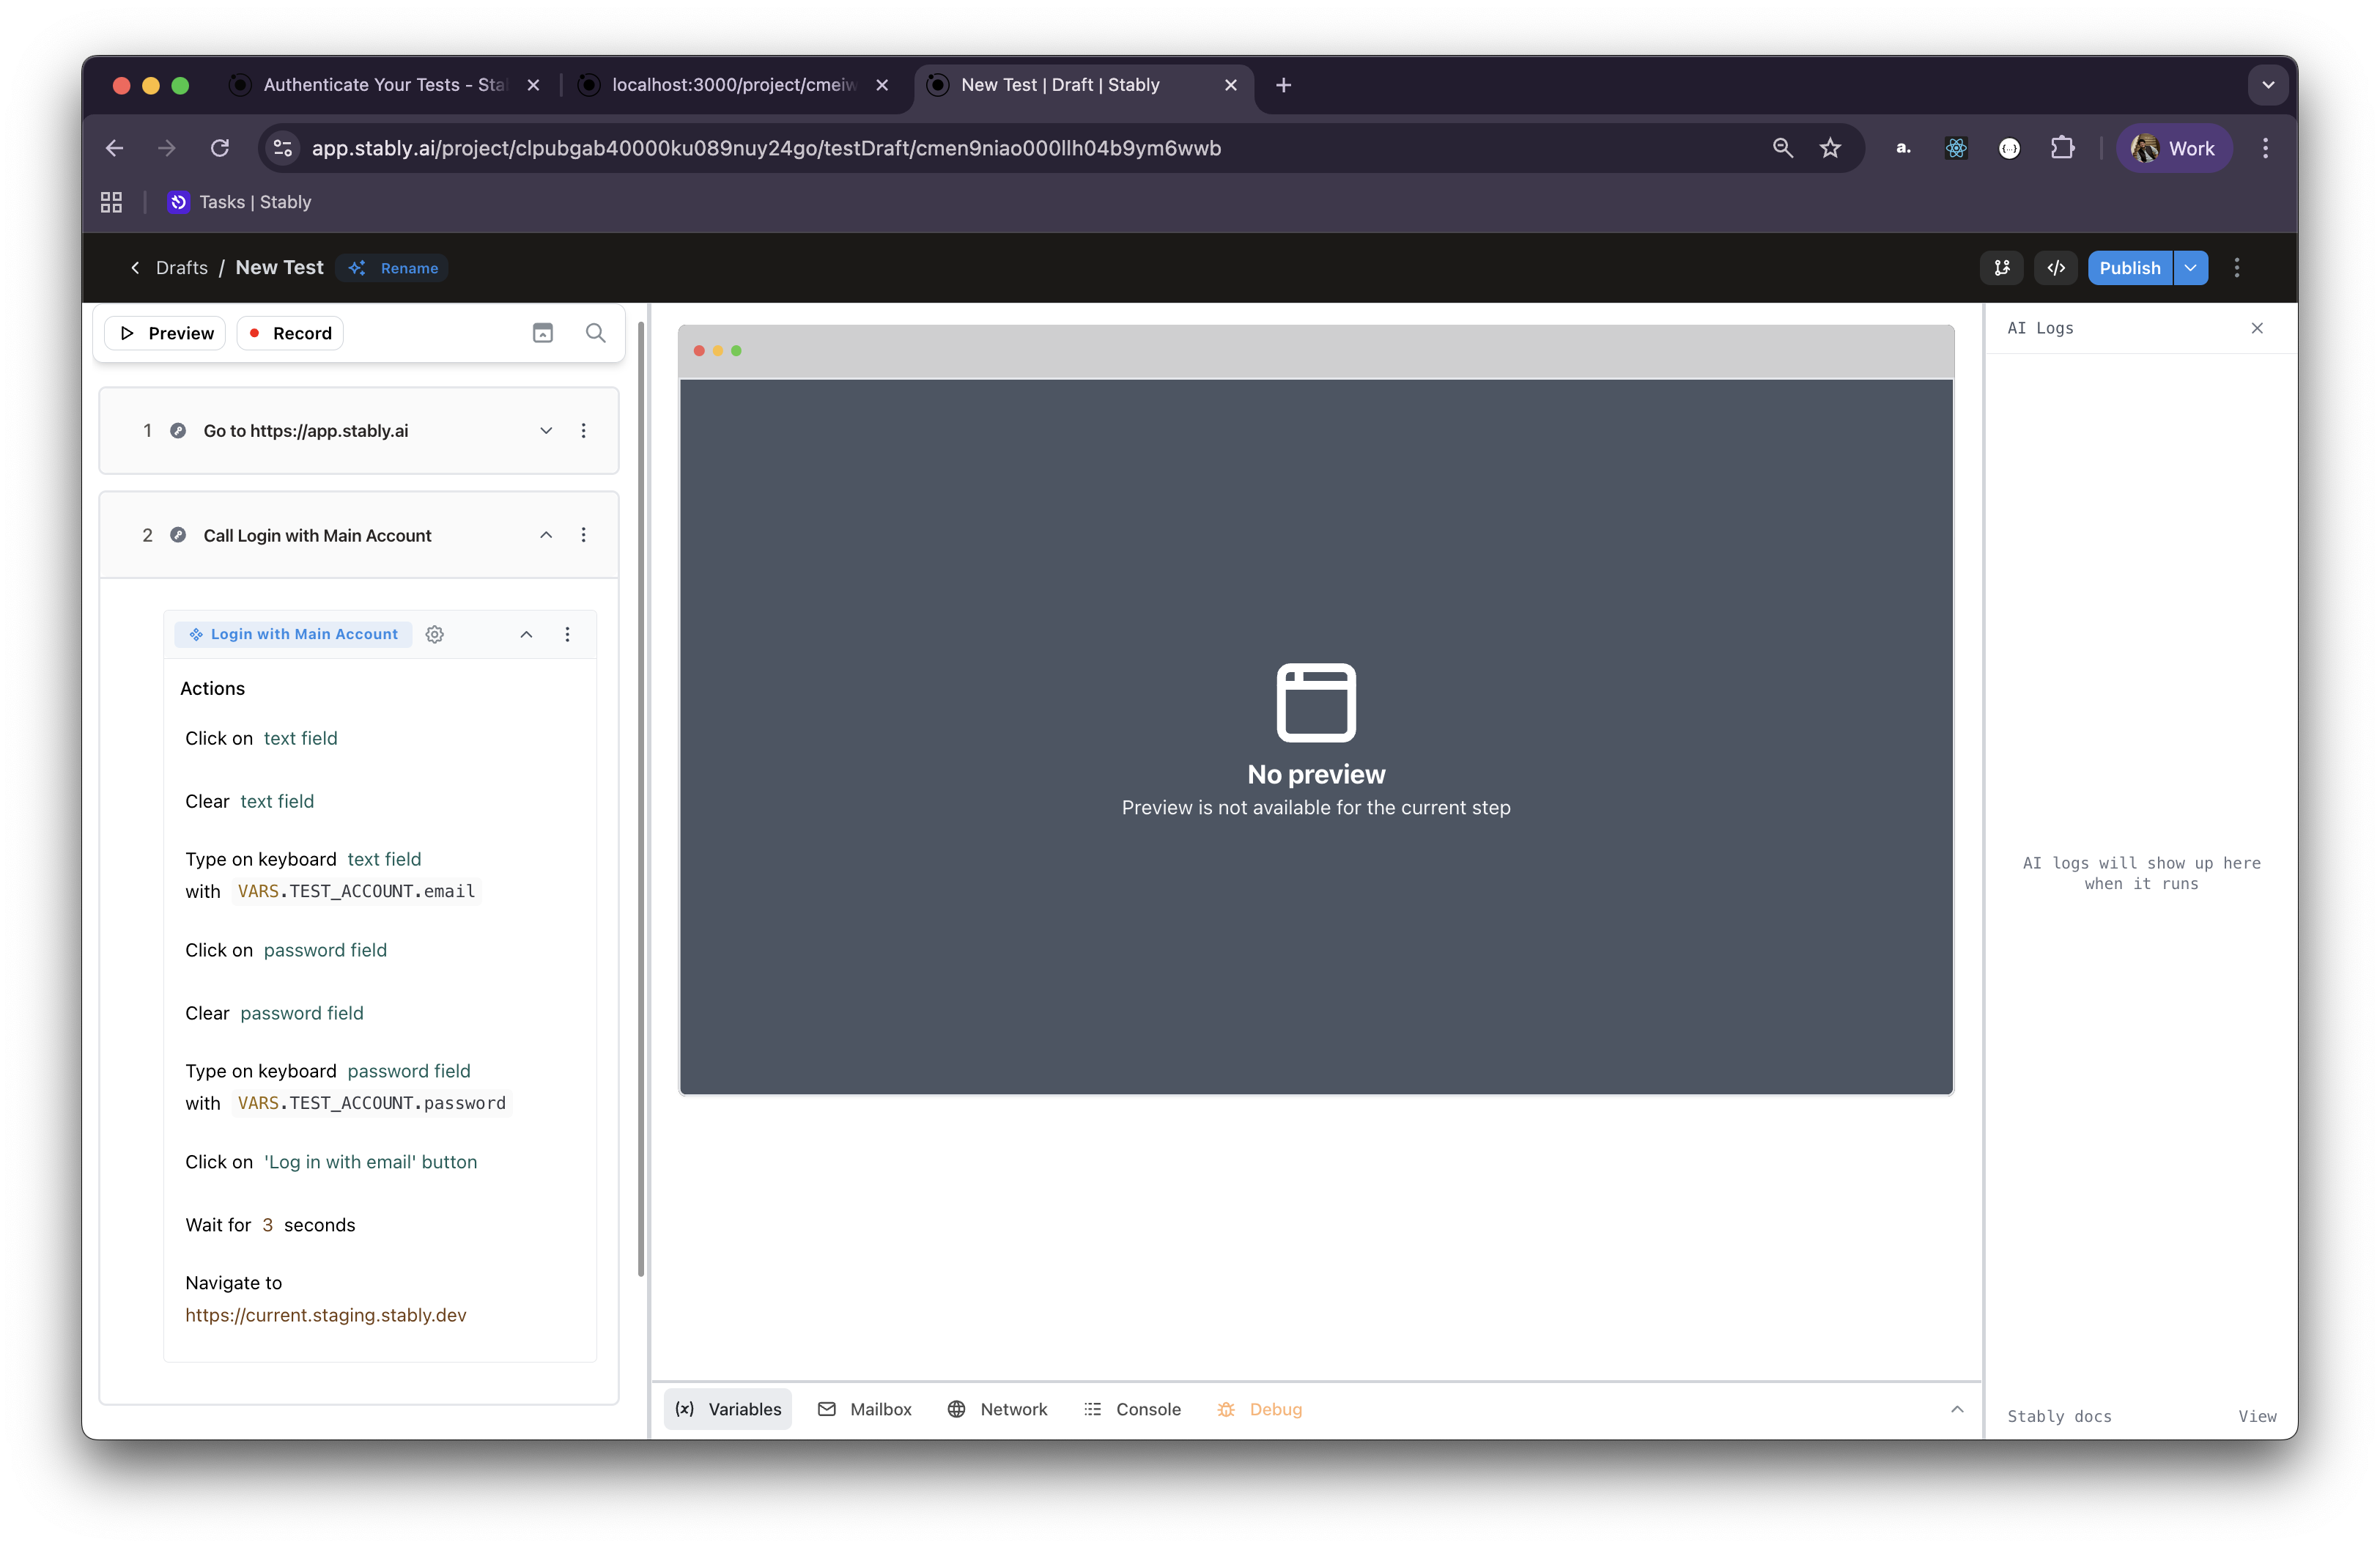
The component parameters dialog provides an interface for configuring your component’s inputs. You can open the component parameters dialog by clicking the Gear Icon on the component action.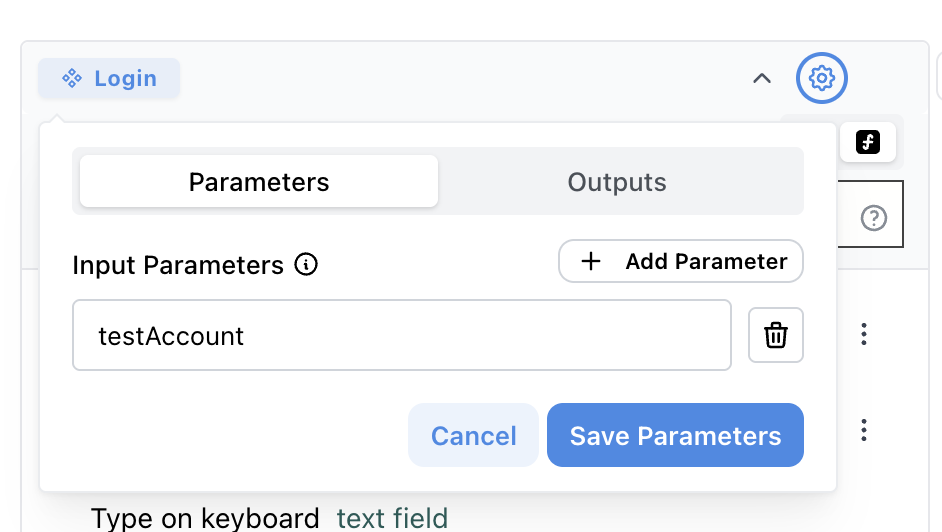
- Input Parameters Section: Lists all parameters that the component expects, showing their names and any default values
- Parameter Management:
- Add new parameters using the ”+ Add Parameter” button
- Remove unnecessary parameters with the trash icon
Configuring Component Output Parameters
Components can return data to the test level through output parameters. This allows components to pass processed data, extracted values, or computed results back to the test level. It will be treated the same as test variables.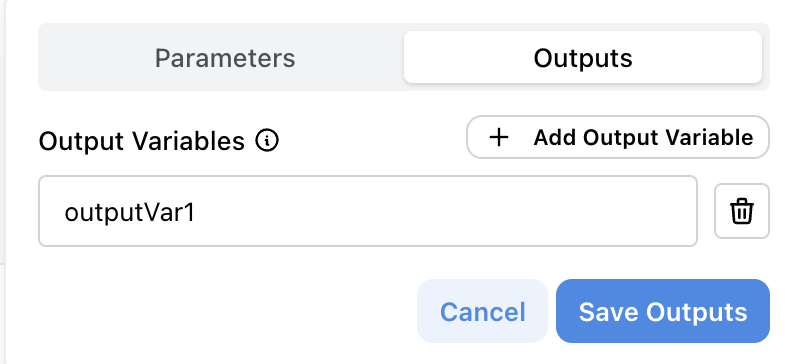
Common mistake: Variables created within the component but not defined as
output parameters will remain internal to the component and are not accessible
at the test level.
Using Variables in Components
Variables are essential for making components flexible and reusable. Components can access and use variables from different scopes to create dynamic, adaptable workflows.Variable Types in Components
Test Variables:- Variables defined within the current test
- Accessible to all components used in that test
- Perfect for test-specific data and is not shared with other tests
- Include environment variables and shared configuration
- Global variables available across all tests in the project
- Ideal for application URLs, API keys, or common test data
- Variables passed specifically to a component when it’s called
- Provide component-specific customization
- Allow the same component to work with different data sets
- Variables that components can return to the test level after execution
- Defined in the component’s output parameters configuration
- Created using the Define Variable action within component actions
- Only variables explicitly defined as output parameters are returned to the test
See how parameters are configured in the Configuring Component
Parameters section.
Variable Syntax and Usage
Accessing Variables: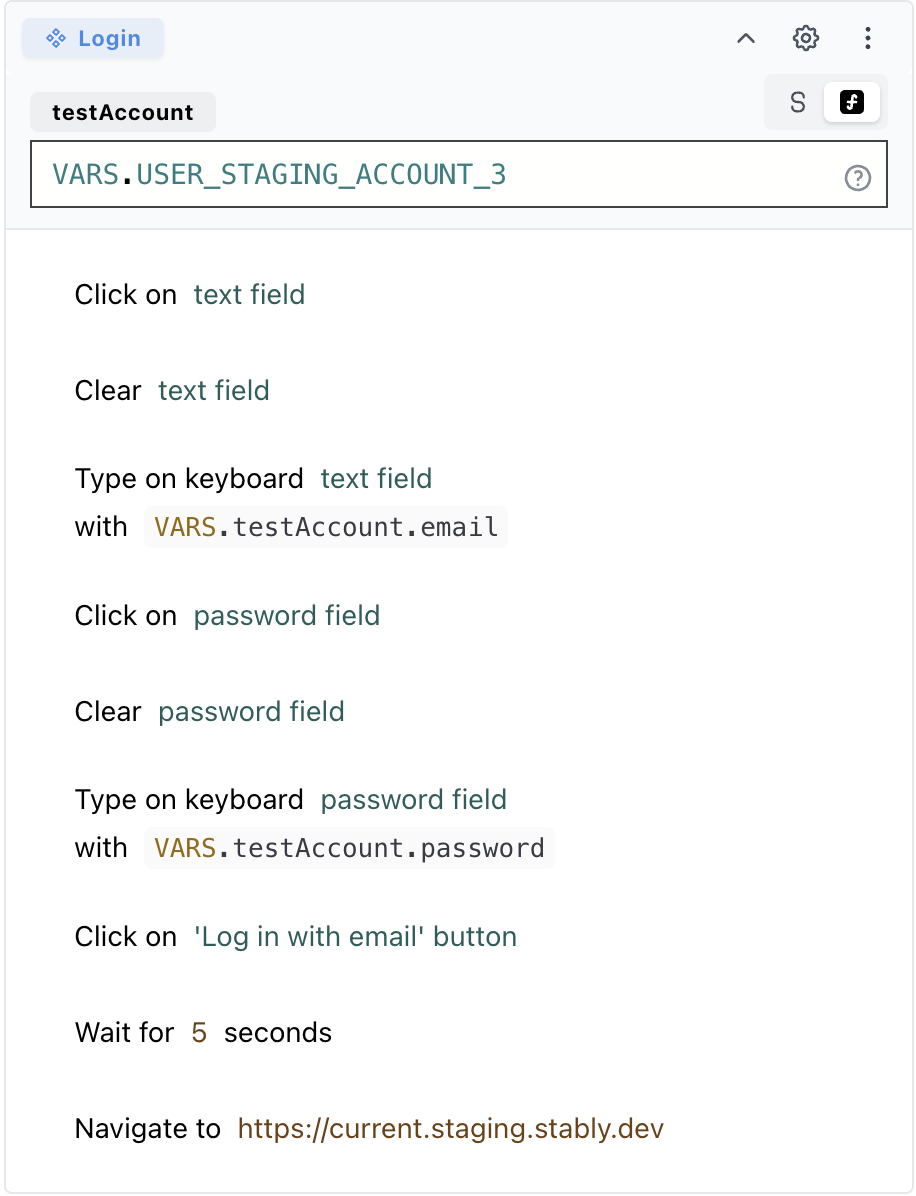
- The component parameter
testAccountis configured withVARS.USER_STAGING_ACCOUNT_3 - Email field uses
VARS.testAccount.emailto dynamically fill the email - Password field uses
VARS.testAccount.passwordto securely provide credentials
Component Variable Scope
Components follow a hierarchical variable scope pattern, similar to how functions work in programming languages. Understanding this scope is crucial for effective component design and variable management.Variable Access Hierarchy
Top-Level Components:- Have access to all test variables from the current test
- Have access to all environment variables
- Cannot access variables defined within lower-level components
- Can access all variables from their parent component
- Can access all test and environment variables
- Cannot access variables from sibling components or components at the same level
Scope Rules
- Downward Access: Components can access variables from their parent scope
- No Upward Access: Components cannot access variables from child components
- No Sibling Access: Components at the same level cannot access each other’s variables
Environment Variables: For more information about environment variables and
environment configuration, see the Environment Variables
documentation.
Managing Components
Modifying Component Actions
To edit the component’s actions, expand the component in a test draft and use the action controls.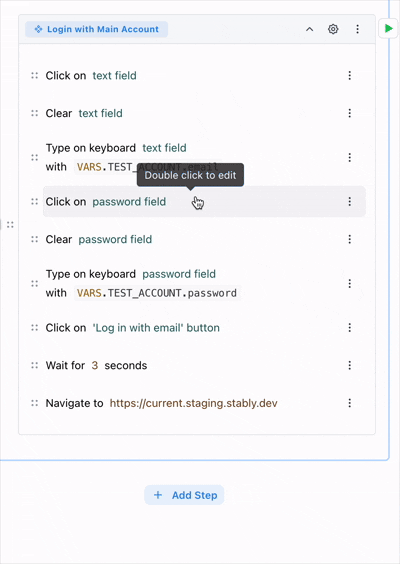
Modifying Component Name and Parameters
Components can be managed from the component library in your workspace:Access Component Library
Navigate to the component management section in your project. Found in the left sidebar under Components.
View Component Details
- View the component name and description
- View the parameter definitions
- View the component usage across tests
Component Versioning and Updates
When you update a component, all tests using that component will inherit the changes:- Automatic Updates: Tests using the component will automatically use the latest modified data.
Archiving Components
Components can be archived when they’re no longer needed. Archiving is the recommended approach for managing components that are no longer actively used: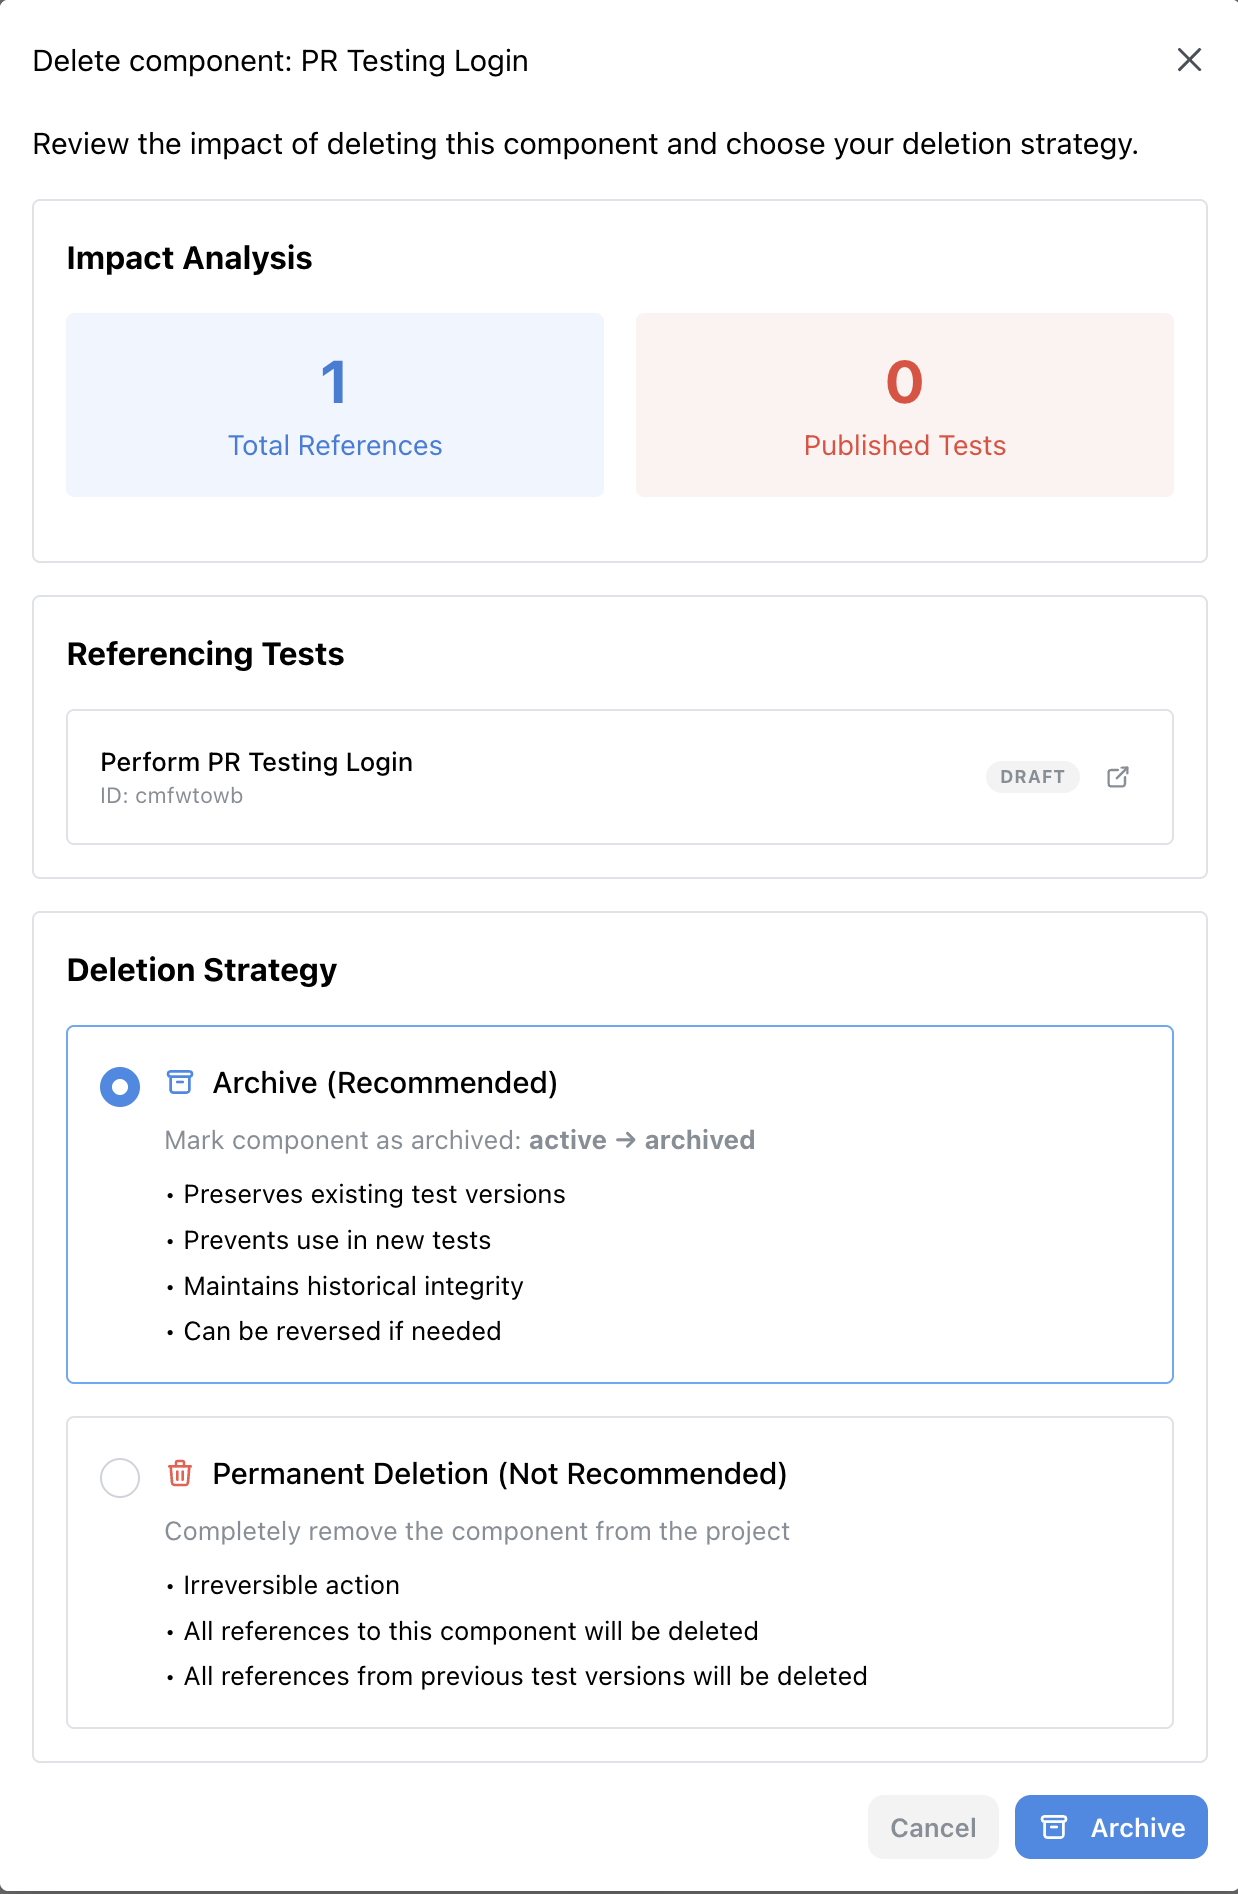
- Archive Status: Archived components remain in existing tests but can’t be edited or added to new tests
- Visual Indicators: Archived components are clearly marked in the UI with a special badge
- Preserves Test Integrity: Existing test versions maintain their functionality
- Reversible Action: Components can be unarchived if needed later
- Historical Integrity: Maintains the complete history of test executions
- Components that are no longer needed for new tests
- Legacy components that are being replaced by newer versions
- Components that are temporarily out of use but may be needed later
Deleting Components (Not Recommended)
For components that need to be permanently removed, Stably provides a comprehensive deletion process with impact analysis: Deletion Process:- Impact Analysis: Before deletion, Stably analyzes the component’s usage across your project
- Reference Review: Shows all tests that currently reference the component
- Deletion Strategy Selection: Choose between archiving (recommended) or permanent deletion