Overview
Autofix automatically diagnoses test failures and generates code fixes after cloud runs complete. Whenautofix: true is enabled, Stably’s AI kicks in automatically after failures — analyzing why your tests are failing, categorizing each issue, and applying targeted repairs to your test code. You can also trigger it manually from the dashboard on any failed run.
This is ideal for teams that want their scheduled test suites to stay healthy overnight without waking anyone up.
How It Works
1
Tests run on schedule
Your scheduled tests execute normally on Stably Cloud Runner.
2
Failures detected
If any tests fail, autofix kicks in automatically.
3
AI diagnoses each failure
Stably analyzes the failure context — screenshots, traces, DOM snapshots, and logs — to determine why each test failed.
4
Fixes are applied
The AI generates targeted code changes and applies them to your test files.
5
Review the results
View the diagnosis report and fixes in your dashboard.
- If your repo is connected to GitHub/GitLab: A PR/MR is created automatically. Review and merge when ready.
- If your repo is not connected: View the diagnosis report and code diffs in the dashboard. Apply changes to your codebase manually, or connect your repo to enable automatic PRs.
By default, autofix changes are submitted as a PR/MR for your team to review before merging. If your repo connection is configured with a different publish behavior (e.g., push directly), that setting applies to autofix as well.
Enabling Autofix
From the Dashboard
When creating or editing a scheduled test run, toggle “Auto-fix failing tests” to enable autofix for that schedule.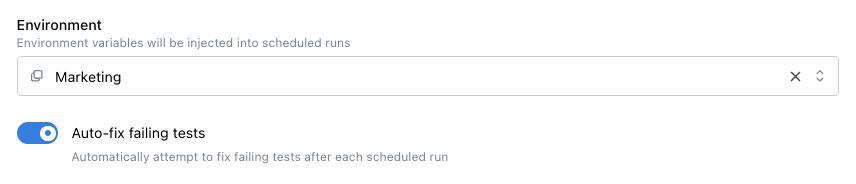
Toggle "Auto-fix failing tests" in your schedule settings
In stably.yaml
You can enable autofix as a project-level default that applies to all runs (scheduled, API-triggered, and UI-triggered):
stably.yaml
stably.yaml
autofix sets the default, and per-schedule values override it:
stably.yaml
Via the API
When triggering a run via the API, you can passautofix: true in the request body. If omitted, the project-level default from stably.yaml is used.
Triggering Autofix from the Dashboard (Post-Run)
You don’t have to enableautofix: true upfront. After any test run completes with failures, the Autofix tab on the run details page presents two options:
- Autofix on Cloud — Click “Fix with Agent” to start a cloud agent session. The agent diagnoses failures and generates fixes; when complete, you can create a PR (if your repo is connected).
- Auto-heal on your device with CLI — Copy the ready-to-run
npx stably fix <runId>command and run it in your local repo. Fixes are applied to your working tree.
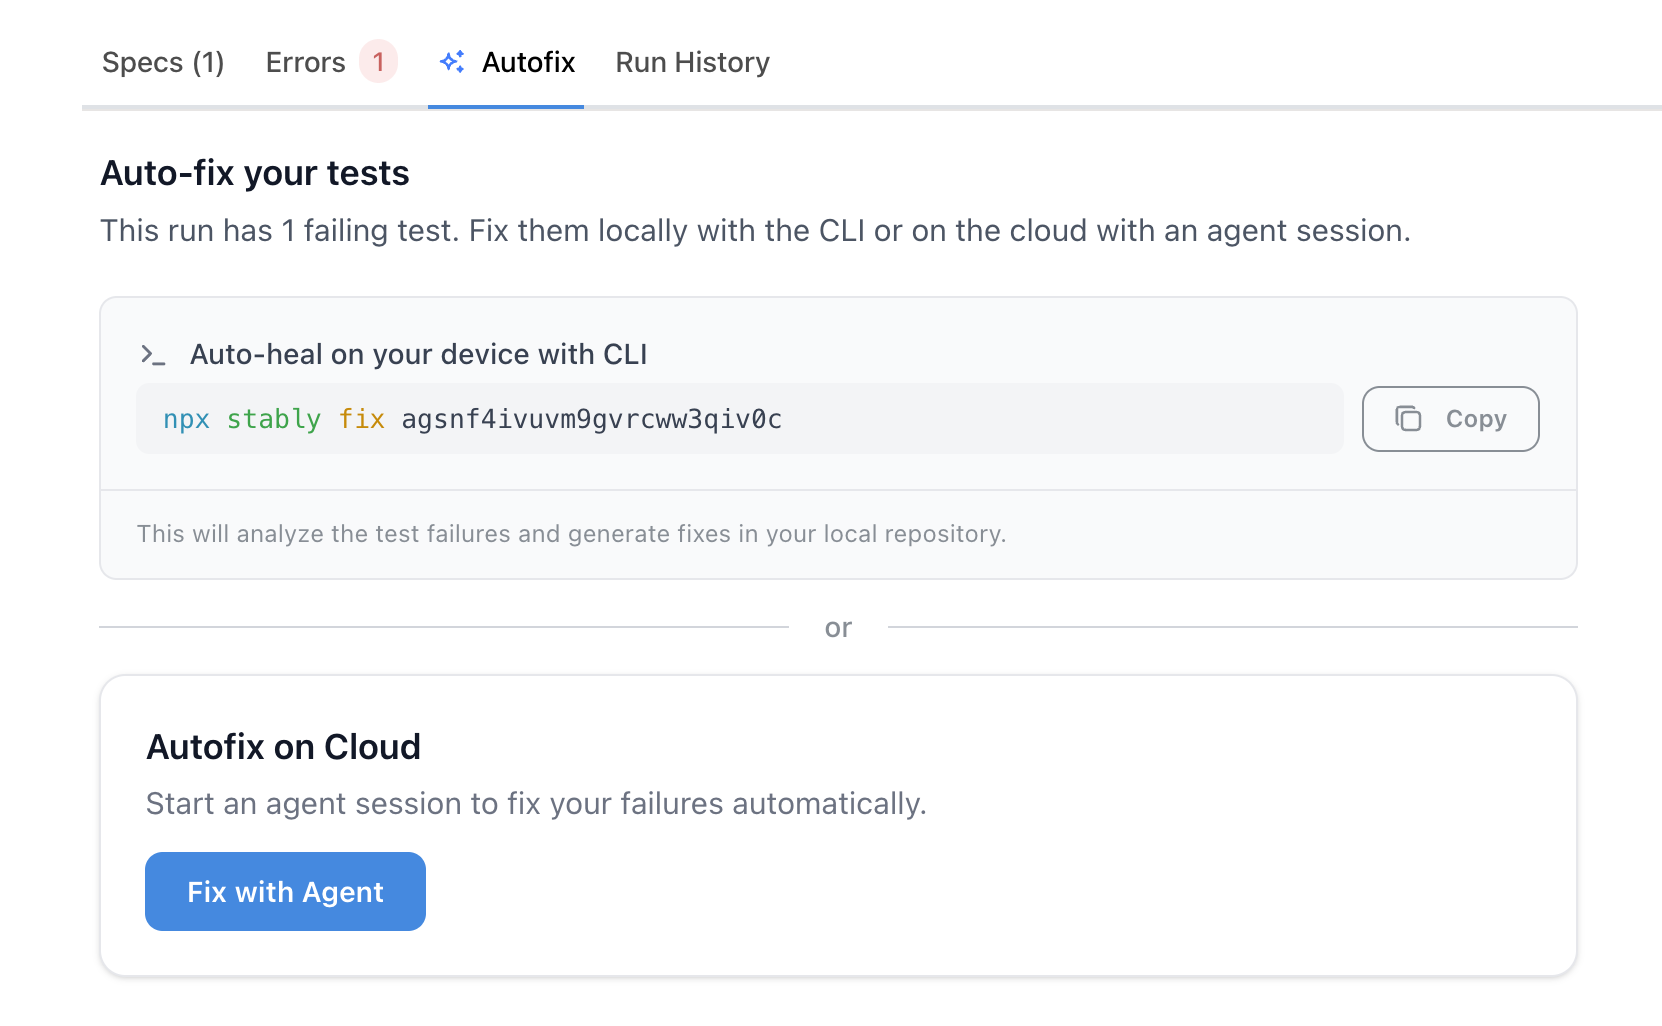
The Autofix tab offers both cloud and CLI options for any failed run
autofix was enabled at trigger time.
Diagnosis Categories
When autofix runs, it categorizes each failure into one of the following:
This categorization helps you understand at a glance whether failures need attention or have already been addressed.
Viewing Results
After autofix completes, results appear in your test runs table under the “Diagnosis & Fix” column: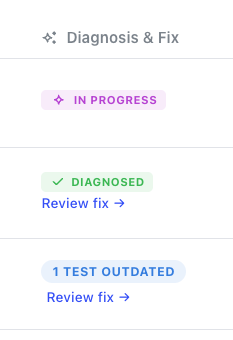
Diagnosis & Fix column showing autofix status for each run
- In Progress — autofix is still running
- Diagnosed — analysis is complete, with issue counts by category
- Review fix — click to see the full report and code changes
- No fix available — the issue was identified but couldn’t be automatically repaired
- Each failing test with its diagnosis
- The code changes that were applied
- A link to the generated pull request (if your repo is connected to GitHub)
Configuration
You can fine-tune how the fix agent behaves — including budget caps, turn limits, and smart skip rules — using theagent.fix section in stably.yaml:
stably.yaml
Running Autofix from the CLI
In addition to the cloud-based approaches above, you can run autofix from the command line — on your local machine or in CI:Next Steps
Scheduled Test Runs
Configure when your tests run automatically
Fix Tests (stably fix)
Full guide on
stably fix — run ID detection, CI integration, and configurationMonitor Fix Sessions
Watch fix progress live on the dashboard and send messages to the agent
Alerting
Get notified about test failures and fixes